I haven’t been this excited about a tripod in a very long time and now that I finally have it in my hands, I can finally do a full Peak Design Travel Tripod review of the carbon fiber version. As a traveller, I’m always on the lookout for gear that’ll either help me travel lighter or consolidate tools so I don’t have to bring as much. When the Travel Tripod Kickstarter was announced, I was optimistic about it with features that would make the ball head easier to use, and the streamlined body when collapsed to make it smaller to pack. There of course were many concerns at all and until I could test it in-person I wasn’t able to give an accurate and thoughtful review.
I’ve spent the past few weeks testing the tripod as I wanted to be as thorough as possible. I know that there are concerns and questions about the product so I wanted to make sure I got to all of them. Ultimately, I want to be able to answer the question of “is it worth it to buy the Peak Design Travel Tripod in carbon fiber?”. Keep reading to find out my opinions and thoughts as I lay it all on the table.
Travel photography reads
- Hiking Inca Trail in photos
- Best locations for photography in Prague
- Itinerary for Zion National Park and Horseshoe Bend
- What to pack for New Zealand including camera gear
How to find the best travel deals?
- Hottest deals – Bookmark the frequently updated travel deals page.
- Car rentals – Save the most money through car rental coupon codes.
- Hotels – Use corporate codes or get Genius 2 tier with Booking.
- Flights – Have you ever heard of the “Everywhere” feature?
- Insurance – Make sure you’re covered for all of your adventure activities with the best travel insurance.
Table of Contents
Are you looking for something specific about the Peak Design Travel Tripod? Just click on one of the topics down below.
In This Article
Who I am as a photographer and videographer

I fall under the digital content creator bucket with a focus on travel. I create content for the blog here, on the Going Awesome Places YouTube channel, and social media primarily. As someone that is typically on the go, I need gear that’s quick to pack, unpack, light for day use, and has a small footprint when tucked away. It applies to my camera, lenses, drone, accessories, and of course, the tripod.
As a photographer, my tripod needs are pretty simple. I usually use them for sunrises, sunsets, and long exposures. More recently, I’ve been playing with Olympus’ features like focus stacking, and high-res mode. When I’m travelling with my wife, the tripod also comes in handy when we need a selfie or posed shot of us where I’ll set the timer to go if 20 seconds later so I can get into position after framing the shot, and doing a sequence of 5-10 shutter bursts, 1 second apart.
For video, I don’t normally use a tripod unless I’m in the studio at home and need fixed shots of me talking to the camera.
Peak Design Travel Tripod Review – Carbon Fiber Version

This is a practical review of the Peak Design Travel Tripod.
To keep this review focused and organized, I’ve broken things down into a number of key sections that really define how I think most people will be using this tripod. Of course, this will be somewhat biased because of my style of shooting so forgive me if it misses topics that you care about when you use a tripod.
For each of these sections and subsections, I not only wanted to talk about the Peak Design Travel Tripod with its merits and faults but I also wanted to frame it against what I think is a top performer in the travel tripod category, my own personal Sirui T-024X. Unfortunately this has been discontinued but bear with me because its specs are very close to its replacement which is the Sirui T–024SK.
By comparing the Peak Design Travel Tripod vs. Sirui T-024X, I’m hoping to provide additional data points and context around which one I think is “better”.
Ultimately I want to be able to answer the question “Is the Peak Design Travel Tripod in carbon fiber worth it?”
Specs (Dimensions)

My personal opinion is that specifications are a great starting point but it doesn’t mean a damn unless you put it in the context of what you’re using it for and how it performs in the field. Let’s start off with this comparison table to see how the Peak Design Travel Tripod compares to my trusty Sirui T-024X.
I have ordered the below table according to what I think is important when it comes to travel.
| Peak Design Travel Tripod | Sirui T-024X | Who Wins? | |
|---|---|---|---|
| Weight | 2.81 lbs | 2 lbs | Sirui |
| Folded Length | 15.5" | 15.7" | Peak Design |
| Maximum Height | 60" | 58" | Peak Design |
| Load Capacity | 20 lbs | 13.2 lbs | Peak Design |
| Minimum Height | 5.5" | 8.2" | Peak Design |
| Diameter | 3.125" | 3.46" | Peak Design |
In travel, I personally think that weight and packed/folded height is the most important mainly because the tripod is in transportation mode majority of the time. It’s a wild statement to make for some but that’s just the truth. I’m on-the-go more than I am camped out using my tripod for photos or videos.
In my hands, the Peak Design Travel Tripod feels amazing. Closed up, it fits in my hand really nicely, has a nice grip to it, and doesn’t have anything awkward protruding outwards. For a tripod, it’s sleek and that’s a word I never thought I would associate to a camera-holder-upper.
Maximum Height

When fully deployed, the extra height I get with the Peak Design is definitely nice because I always felt that the Sirui, while nice at eye-level for someone that’s 5’11”, could’ve benefited from a higher vantage point in certain shooting situations.
Minimum Height
On the other end, Peak Design wins at being able to get low to the ground. For one, I have no idea where I put my Sirui short center column. Still, I appreciated the fact that I could convert the Travel Tripod’s center column to a shorter one and get the lowest I’ve been able to go. Usefulness aside, it gives me flexibility in shooting and I like that.
Folded Length
Length is important because it means being able to pack it into a small carry-on suitcase and not having it stick out too much in a backpack.
When everything’s packed and tucked in, it’s clear that the Peak Design is cleverly engineered to minimize its footprint and ultimately it’s just a tad shorter than the Sirui.
Weight
Where the Peak Design Travel Tripod hits a bit of a wall is in weight which I know you’ll be surprised to hear about. After all, most people are going to be paying a significant premium for the carbon fiber version but that’s precisely why it sucks that the more expensive tripod isn’t as light as the Sirui.
This put me in investigation mode. Is it because of the ball head? Is it because of the legs? Is it the center column? For one, yes the center column is confirmed to be aluminum as opposed to carbon fiber (as it is on the Sirui) but when I weighed the legs of the Peak Design versus the legs with centre column of the Sirui, the Travel Tripod was still heavier. I then compared the ball head attached to the top third of the center column with the C-10X ball head and again Peak Design was heavier.
So yup, it’s heavy when compared to the clearly anorexic Sirui T-024X but maybe there’s more to it because there’s always a tradeoff between weight/size with everything else a tripod does.
Pros
- When closed, fits hand nicely and easy to hold
- Narrow diameter and smooth surfaces means it can slide into any side pocket really easily
- Comfortable and tall maximum height for a travel tripod
- Gets extremely low to the ground without requiring the packing of a shortened centre column
Cons:
- No matter how you slice it, 2.81 lbs is still heavier than 2 lbs
Who wins at the specs?
Sirui if weight is important
Peak Design for everything else
As painful as it is for me to say, the Sirui wins here because of weight. Holding both in my hands, the 0.81 lbs weight difference is noticeable.
Deployment

Ultimately the usefulness of a tripod comes in actually using it so let’s start off with how easy the setup is.
Full height
The Sirui is as regular as a tripod can get. It’s got 4 leg sections, uses twist-lock, and it’s stored with legs inverted.
From a speed perspective, the Peak Design Travel Tripod blows the competition out of the water. The opening of the legs is similar as you can in one motion, open the cam locks, extend out the single leg, and lock. The big difference comes from the fact that you don’t need to flip each leg around.
However, the one added step that is required for the Travel Tripod is that the center column starts in its lowest setting. To have it extended, you have to use the wheel to loosen, pull up, and tighten.
Ultimately it’s the flipping of the legs for the Sirui that makes it deployment and packing slow so top marks to Peak Design for improving how theirs works.
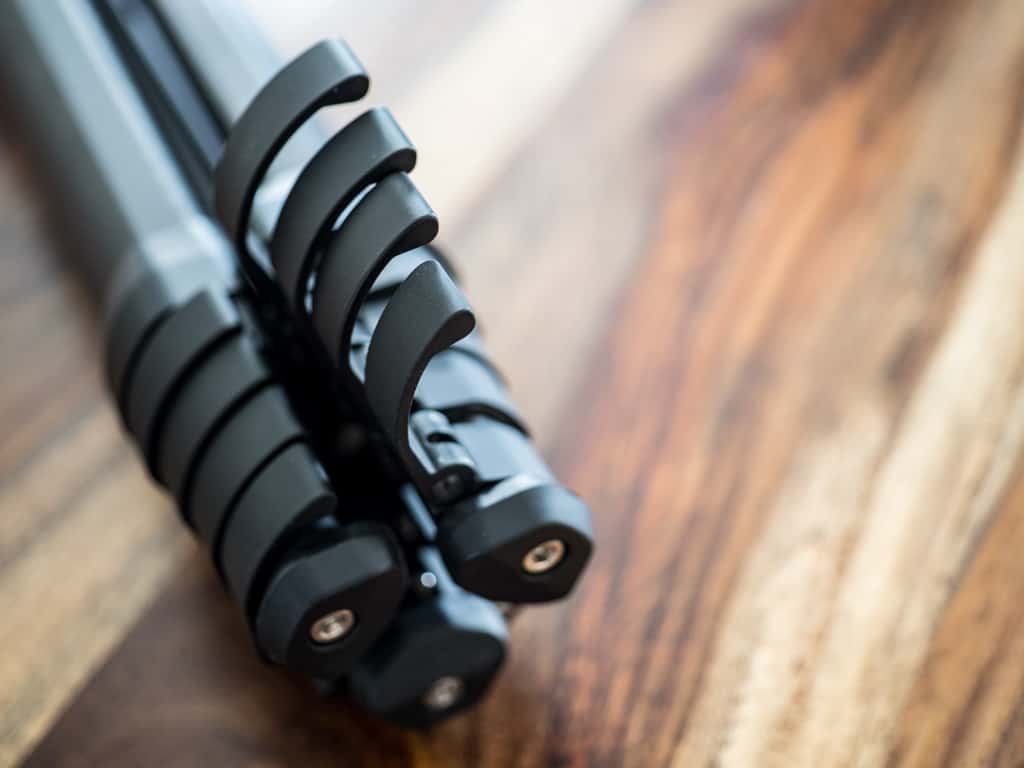
Cam lock love: I didn’t think I’d say this but I’m starting to warm up to the the cam lock legs after using twist locks for decades. A huge benefit of cam locks are the fact that you can tell visually when a section of the leg is open or not. With twist locks, I often times found myself setting things up quickly only to realize that I missed tightening one or two sections. With cam locks you can tell right away which one you forgot to do.
When collapsing the tripod, the Sirui is annoying because of the aforementioned flipping of the legs but another thing is the readjustment of the ball-head so the knobs don’t hit the legs and everything closes up flush.

The Peak Design Travel Tripod eliminates this issue but not all of it. The ball head has 3 fins that point downward and in order for the center column to collapse, those fins need to be rotated so they fit in the correct slots. This means that when you drop the column back down, you might have to loosen the ball head, rotate it slightly, collapse the column further, and then tighten the ball head again (or not).
Down to the bottom

I’ve never really had to use the tripod low to the ground but I can see benefits of setting up the camera to do a video shot if you’re on your own or trying to do something creative where you want more of the foreground in your shot (i.e. flowing water).
The Sirui comes with a short center column that you’re supposed to be able to replace it with but I’ll cut myself off right there and say that it’s dumb because I never pack it with me which is probably why I can’t even find the darned thing.
Peak Design has a pretty smart way of having things all contained together. That said, the transformation to the tripod’s minimum height does take a bit of work. First you need to take out the trusty hex key tool, bend the ball head in a way that exposes the hex screw at the very top, and then unscrew it to disconnect the ball head from the length of the center column. Once you have this done, you’ve effectively chopped off the centre column to a remaining third. Connect that back to tripod and snap each of the legs into the second, wide-stance angle.

While getting the tripod to its “low-mode” is a bit laborious, I do appreciate the fact that I don’t need to lug a smaller center column and also understand that this design is what allows the tripod to be a mere 5.5″ off the ground. The Sirui at its best can only get down to 8.2″ off the ground.
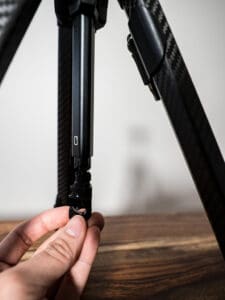
One thing I’ll say is that the Travel Tripod makes the center column quite easy to remove once you master the pull and twist motion of the hook that holds the phone holder.
Oh and that hex key thing? I’ll get to that a little bit later on.
Pros
- Quick to deploy
- Incredibly low to the ground
- All tools required to convert tripod to low-mode is part of the tripod
- Quick to collapse and takedown (with the caveat that the ball head may need to be adjusted so it slots in the right way)
Cons
- Will need to get used to raising the center column when deploying
- Several steps required to convert to low-mode including the use of the hex key
Upside down

Who wins at deployment?
Peak Design Travel Tripod
The Peak Design team sure thought this one through. It might not be revolutionary but the design allows the tripod to inherently be deployed much faster than in the traditional design.
Ball head

We finally get to the most controversial part about the Peak Design Travel Tripod. Everyone was up in arms when the Kickstarter was announced and it seemed Peak Design might’ve forgotten a use case – panning. Let’s start with this.
Panning

The Travel Tripod custom ball head is designed with one adjustment ring. Loosen the ring and the ball head rotates in all directions. Tighten it and the camera is locked in place.
Contrast that to the ball head that comes with the Sirui and most other tripods. There’s the larger knob that in effect does what I just described above which allows the ball head to move in all directions. There’s then an additional small knob that acts as an independent pan lock. This is what allows the head to pan left and right.
What the Peak Design ball head solves is the simplification of the side knobs. In traditional designs, you’ll find that the two knobs are always never where you expect them. Sometimes you need to use your right hand and sometimes you need to use your left hand. Peak Design’s can be accessed the same way. It’s always counter-clockwise to loosen and clockwise to tighten (lefty loosey righty tighty anyone?).
The also common problem I have with standard tripod heads is that I always manage to loosen the head right off of the tripod frame. This happens when you try to pan the tripod but forgot to loosen the panning knob. As a result you end up doing extra adjustments just to make sure you have it all right.
That said, one challenge you’ll have to overcome that’s inherent in the Peak Design ball head design is that if you’re not careful, the twisting of the adjustment ring can change the desired position of your camera. This happens when your hand touches the tab that protrudes from locking ring. This can also happens of your hand or fingers rest on the lower fins of the ball head as you try to lock. This is one of those things that you’ll just have to get in the habit of not doing when operating the tripod.
TIP: Don’t aggressively twist the locking ring as it’ll knock the camera out of position. With time you’ll remember the right direction to lock the ball head and you’ll learn that it doesn’t take much force.
Pros:
- One “knob” versus two
- Access to adjustment ring from all sides
Cons:
- You lose independent panning control
- Confusing to learn at first – remembering which direction does what
- Accidental knocking of camera position
Mounting the camera

Another fundamental design change with the Peak Design ball head is in how ARCA-type plate (included) is attached.
DO 3RD PARTY ARCA-TYPE PLATES WORK? Yes, all of them should work and there are removable pins if your plate is the longer rectangular type.
Standard ball heads have a third knob that opens and closes a jaw that clamps into the plate. There’s nothing wrong with this design but I guess an argument can be made for the complexity of having a third knob.
If there’s one flaw in this design is that there is a chance for the plate to not sit perfectly flush with clamp and if unstable, the camera can slide off.
I unfortunately experienced this with the Joby Gorillapod 3K. I’ve now learned that you have to double and triple check the knob to make sure it’s fully locked in.
The Peak Design Travel Tripod has its own quick release mechanism. There’s a tab that you pull down which exposes enough space for the plate to drop in. To lock it in, you simply release the tab and it’s in. Since there are two pins on each side, there’s no way it can slide off accidentally.
When the camera is loaded, there’s a ring on top of the adjustment ring that locks the tab so you can’t accidentally knock it to release the plate. What I’ve learned though is that the camera is pretty secure even without the lock so think of the locking ring as extra security.
GOOD TO KNOW: The camera is very secure even without the lock.
Functionally, I think the protruding tab can be confusing especially if it isn’t facing you. The ring has icons that let you know whether it’s in lock mode or unlock mode. What I’ve learned is that the same conventions of clockwise to tighten and counter-clockwise to loosen applies. This will make your life easier instead of rotating the ball head around so you can see the icons.
TIP: Don’t rely on seeing the lock and unlock icons on the ball head. Instead, just like the adjustment ring below, think in your mind clockwise to lock and counter-clockwise to unlock. Once you have that down, it’ll make things a lot easier.
I will admit, the technique of getting your camera locked onto the ball head can take some time to get used to. The trick is that you have to put the plate fully flush into the jaw opposite to the tab first before you can lift the tab to lock it in.
Pros:
- Simplified tripod plate locking mechanism that doesn’t require tightening of a knob
- Camera is secure even without the use of the locking ring
Cons:
- Takes time to get used to the new mounting mechanism
- Locking ring will feel unintuitive at first
Vertical mode

Sadly, panning just isn’t something that the Peak Design tripod does but what it excels at is in going vertical for portrait mode.
Standard ball heads suck at this
I always just found regular tripod ball heads to be a big pain to shoot in portrait mode because they only had one notch that allowed them to go vertical. It’s an annoying and disruptive change in your shooting flow because if you don’t have the notch facing the right way, you have to unlock the panning knob and then make sure the notch is either to the left or the right.
The direction matters because the plate locking knob can get in the way of the camera going fully vertical. I prefer shooting with the shutter button on top which means I like the camera on the left when vertical but if I mounted the camera with the knob pointing left, it just won’t work. Many times in the field, I’ve encountered this problem so many times. The only quick solution in the moment is to flip the camera vertical on the right and just deal with having the shutter button on the bottom which is awkward.
Now you might be thinking. “Will, why don’t you use an L-plate then?”
Well sure this could be a solution and I actually owned one for my Canon full-frame camera but it’s just too bulky of a set up. Another accessory to travel with and another hex key. You could keep it on permanently but the constant weight is simply not practical. If you’re wondering, L-plates do work with the Peak Design Travel Tripod ball head but you will need to remove 2 pins to make it work.
Peak Design works in all directions…sort of
With the elimination of the plate knob means you can turn over your camera vertically with much more flexibility.
The Peak Design ball head has 3 fins at the bottom so you still run into problems depending on how you have your camera mounted. This might be a bit too detailed but here’s what I mean:
- Plate locking tab facing towards you: You can tilt left but not right
- Plate locking tab facing away from you: You can tilt right not left
- Plate locking tab facing right: You can tilt in both directions but neither side can be perfectly level (x and y axis)
- Plate locking tab facing left: You can tilt in both directions but neither side can be perfectly level (x and y axis)
TIP: If you like shooting vertically with the camera on the left, make sure the plate locking tab faces you. If you like shooting vertically with the camera on the right, make sure the plate
So practically speaking, you do need to mount the camera in a specific way depending on your shooting preferences.
Pros:
- Elimination of plate knob means you won’t run into a situation where the knob prevents you from shooting in portrait mode
- You don’t need to fiddle with the panning knob and rotate the ball head around in order to go vertical
Cons:
- The camera needs to be mounted in a specific way in order to go vertical on the side you prefer
Who wins the ball head design?
Sirui if panning is important
Peak Design as long as you give it a shot
The ball head is a divisive part of the tripod where it’ll work for some and not for others which we’ll get into more detail in then next section. With all of the topics we’ve covered about the ball head, what it comes down to is getting used to the new design. Once you’ve got it down, you’ll realize that it’s really simple to use.
Use cases

We’ve talked in detail about the ball head but if we think practically about how people might use this tripod, it might become more clear who the Peak Design Travel Tripod is and isn’t for.
Photography use case
I envision myself using the Peak Design Tripod primarily for this purpose. For me it falls under:
- Long exposure
- Sunrise/sunset
- Astrophotography
- Focus-stacking
- Low-light environments
- High-res mode (on Olympus OMD EM-1 Mark 3)
- Studio shoots
To me, these are many of the classic use cases of a tripod. You need your camera planted still so you can shoot at low ISO, eliminate vibration and shake, and/or take advantage of in-body camera features or post-processing technique.
For these, Peak Design does an awesome job.
What it doesn’t do well is in panoramas or anything that fixed panning intervals in any direction where post-processing stitching is required.
The solution? Replace the ball head with something that’s designed for that. There are plenty of specialized ball heads out there that can do what the Peak Design ball head can’t do. All you need to do is get their Universal Head Adapter.
Pro’s:
- Fixed position photography
Con’s:
- Lack of panning
- No measurements or notches
Videography use case
I’m not an advanced videographer so bear with me here. I rarely use a tripod for video as I do most things handheld since Olympus has arguable the best in-body stabilization in the market. That said, there are a few cases I can think of where I’ve had to pull out my Sirui tripod and I think the Peak Design Travel Tripod would also handle these cases quite well.
- Fixed position tripod shots
- When I’m travelling solo and need a third-person view of me doing something
- Studio filming at home
I know, those are pretty basic uses for a tripod.
In the same vain of the flaws it has for stills, they apply in the same way for video. If you’re looking for a tripod where you can smoothly pan or need fine control in movement, the ball head just isn’t going to work for you. Replace it with the Universal Head Adapter if that’s the case.
Pro’s:
- Fixed position videography
Con’s:
- Lack of panning
- Lacks handle for finite control
Smartphone use case

Over-engineered? Probably. Handy? Absolutely!
What seems to be a nice-to-have feature on the Peak Design tripod is that it has a hidden phone holder built into the centre column.
It’s neatly tucked inside the triangular tube and is held in by a magnet and is spring loaded as well. This means that even though it’s upside down, it won’t fall to the ground due to gravity and you won’t have any problems accessing it because it’s stuck inside.
The phone holder cleverly springs out so you can grab it quickly after removing the hook and doesn’t fall down because of the magnet inside.
TIP: I will admit, the hook is not easy to remove. It’s a pull and twist motion but with the triangle shape that it has to fit in first and the awkward technique that’s like pushing a syringe, it’ll take some practice. My only tip is that you need to first make sure the triangle lines up first and then pull and twist. Also to put the hook back on, the key is to push the hook in first and then twist instead of doing an awkward upside down pull while twisting at the same time.
There’s no other tripod that has this feature and it’s something super useful for travellers. Gone are the days of stacking random objects to prop your phone for a group selfie.
The holder itself is intuitive to use except for two things. When folded open, you need to know which side is the one that mounts to the ball head. It’s the longer side. You’d think it’s agnostic to the direction that it mounts but with mine, it’s much easier to mount with the vertical piece facing the release tab instead of the other way around. Also remember that you have to put the edge towards the bubble leveller first before closing the tab, like the camera plate.
You’ll also notice that that phones in the holder will be tilted downwards. Just remember that’s what the ball head is for so adjust accordingly.
So yes, you’ll have to play with it a few times but after a few tries it’ll all make sense.
TIP: I tried the phone mount on the Sirui and it works! If you’re looking for a solidly constructed clip, you can buy it on its own.
Pros:
- Hidden inside the tripod
Cons:
- Requires some practice to use it
Selfie stick?

I’ve seen some Peak Design literature that mentions that you could use the tripod as a selfie stick.
I suppose you could in theory but you could say that about any tripod on the market. It’s awkward AF and it’s not light enough to make it practical. That’s why products like the Gorillapod exist and sadly I can’t say that the Peak Design Travel Tripod is a comparable product if you want to use it for selfie vlogging.
Who wins in different use cases?
It depends…
It really comes down to whether you need panning or not. For many, the ball head will be the big deal breaker but if you don’t care for panning, the Peak Design Travel Tripod is solid with the added bonus of the built-in phone holder.
Stability

I know this is an important feature of a tripod but I’ve always had trouble quantifying this between tripods.
One of the easiest ways is to look at the tripod’s load capacity. For the Peak Design Travel Tripod, its 20 lbs while the Sirui T-024X is 13.2 lbs. This is a simple means to know how much camera weight the tripod can handle safely. This has to do with the construction of the tripod and ballhead. For Peak Design, I can tell already that it has a wider stance and so
The common rule of thumb is to use tripod and head that have at least two to three times the load capacity of your heaviest camera/lens combination. For my case, if I combine my Olympus OM-D EM-1 Mark 3 with the 40-150mm f/2.8 PRO lens, the total weight is 2.95 lbs. This means that any tripod that has a load capacity of 8.85 lbs will be able to handle my set up. Not exactly a needy set up but that’s why I made the switch to M43.
Still, I feel like this is the kind of thing that goes beyond the numbers so I decided to do my own investigation.
Leg flex
I took both tripods and had each fully extended. I then basically just pushed the legs near the middle and I am really surprised by what I observed.
The Peak Design Travel Tripod exhibited the most amount of flex. Due to the combination of the tripod legs being 5 sections instead of 4 and how the joints are constructed, I saw quite a bit of movement when wiggling the leg back and forth.
Contrast that to the Sirui and it just wasn’t that bad.
This is something that I’ve seen many other users mention and it is concerning but I guess the question is how big of an impact does that make in the field?
Sure, I can push and prod the legs all I want but in real life is wind or vibration going to cause problems?
Vibrations

In an unscientific manner, I decided to see just how much vibration would affect the tripods.
Vibrations are a common issue that you’ll see in the field because you’ll be on a surface like a bridge that has vibrations in the ground from footsteps or maybe your planted on a ground that’s near equipment that vibrates the ground at a specific frequency. What I’ve learned over the years is that flat ground is not truly fixed which is why you should never really be walking around when taking a long exposure shot.
I tried to isolate the variables as much as possible so here’s what I did.

The test:
- Tripod fully extended
- Smartphone set to the Radiant alarm on iOS and placed underneath one of the legs
- Use the VibrationAnalysis tool to look at the average max vibration by gravitational constant (g)
- Use phone mount to place phone in a fixed position on the tripod to measure vibration
I know this is totally not how you would measure something like this but at least it was something. Ultimately I wanted to see who would show more.
No vibrations:
- Peak Design Travel Tripod – 0.001 g average max
- Sirui T-024X – 0.001 g average max
Results:

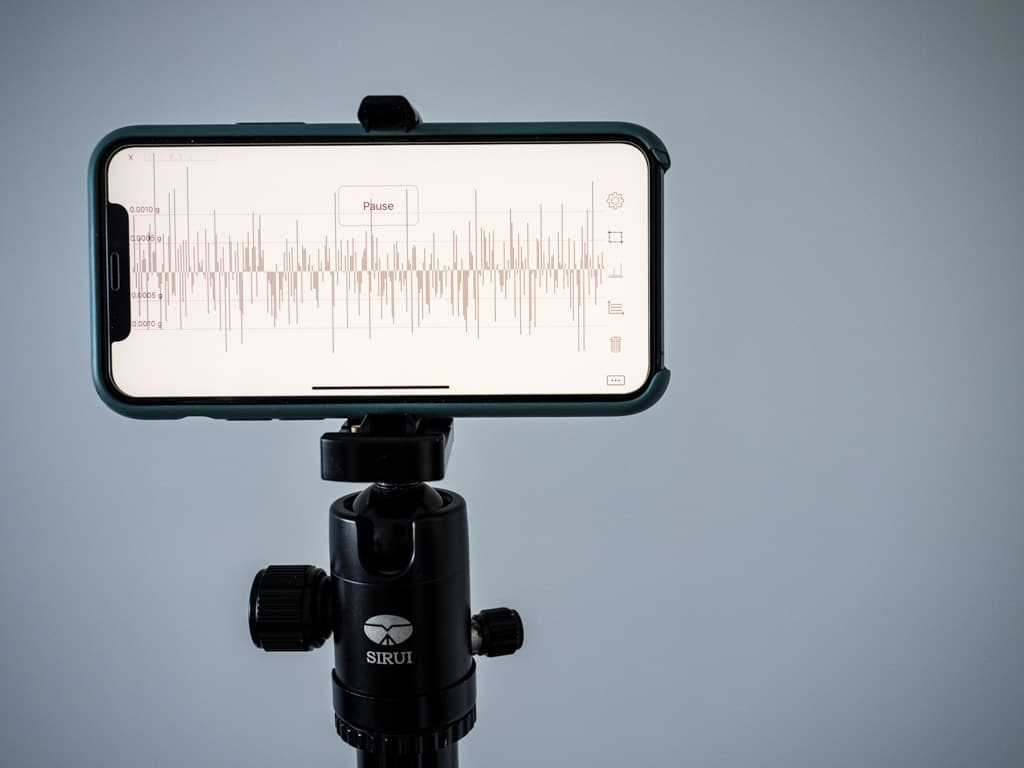
- Peak Design Travel Tripod – 0.002 g average max
- Sirui T-024X – 0.001 g average max
Conclusion: The Sirui seemed to not propagate the vibrations up the leg and column as much as the Peak Design did. Perhaps the “shock-absorbing feet” aren’t as shock-absorbing as they claim to be?
Wind

Not satisfied, I wanted to see the effect of another natural phenomenon. We encounter windy situations all the time and while it’s not something that feels like should affect stability, powerful gusts could propagate movement through the tripod.
Without a wind tunnel built into my house, the only thing I could use was our weak tower fan.
The test:
- Tripod fully extended
- Tower fan set to the highest mode
- Standing still, hold the fan off the ground with no cables touching the ground (to make sure vibration isn’t the prevailing factor)
- Use phone mount to place phone in a fixed position on the tripod to measure vibration
Results:
- Peak Design Travel Tripod – 0.002 g average max
- Sirui T-024X – 0.001 g average max
Conclusion: Again, shocked to find out that the Peak Design Travel Tripod showed more effect in vibration to the ball head than the Sirui with the effect of wind.
Physical tapping

This is the least scientific of methods but I wanted to see what if I just tapped one of the legs at its middle to see .
The problem with this test is that it’s impossible to tap with the exact same force but I wanted to try anyways.
The test:
- Tripod fully extended
- Standing next to the tripod, tap close to the middle of the leg.
- Use phone mount to place phone in a fixed position on the tripod to measure vibration
Results:
- Peak Design Travel Tripod – 0.02 g average max
- Sirui T-024X – 0.01 g average max
Conclusion: With strong physical forces on the legs, vibrations carry up to the ball head slightly more than the Sirui based on its construction.
Center column stability

I don’t really have an experiment for this one but from physical inspection and touch, the Peak Design center column is very solid and does not wiggle when touched. Contrast that to the Sirui and something I’ve known all along is that the centre column is crap. Slight touches to the Sirui centre column and you can see it tilt away from the middle.
The difference in construction is that the Peak Design center is made out of aluminum vs Sirui which decided to keep it carbon fiber. Now the material itself shouldn’t make much of a difference here but it’s the implementation of the locking rings that cause the wiggle if you will. Even with the Sirui centre column ring tightened all the way, I can still feel the wiggle.
For the center column, the Peak Design Travel Tripod is much more stable.
Load hanging hook

Tripod hooks are great in theory but in the field not as easy to use as you think.
The Peak Design Travel Tripod hook design is different from most tripods which have a spring-loaded flat metal hook. What I like with a more accentuated curve here is that something with a smaller strap can sit in there and be much more secure. The drawback of course is that if you have a fat strap, it doesn’t work so well.
Another flaw with tripod hooks in general is that if you have the center column raised, this means that the hook is right at the very top of the legs which doesn’t exactly give whatever you’re trying to hook on much space. This is an issue that plagues both the Peak Design Travel Tripod and Sirui T-024X.

Curious how the Peak Design hook would do with its existing line of products, here’s what I found:
- Travel Backpack – The top handle is quite chunky and as I talk about in my video review, I don’t like that the strap’s position makes the backpack awkwardly front-heavy. The handle can go in but parts of it sticks out. That said, it does seem quite secure. If the center column is raised, there’s no way the backpack can sit on the hook. An alternative hook point are the backpack’s loops for external carry.
- Everyday 5L Sling – The top handle is narrower than others so more of it sits in the hook. Due to the small profile of the bag, the center column can be raised to about 3/4 of fully extended height.
- Everyday 6L Sling – Similar to the 5L Sling.
- Everyday 30L Backpack – Compared to the Travel Backpack, the handle fits in more easily as it’s less chunky but half the handle sticks outside of the hook. You can raise the centre column about 2/3 and you’ll still be able to hook it on. External carry loops don’t work well with the hook.
- Everyday 20L Backpack – Same as 30L except you can raise the center column maybe an inch higher when hooked on.
- Everyday Zip Backpack – The handle chunkiness is closer to the Travel Backpack so it feels less secure as half of the handle sits outside of the hook. The center column can be raised to about the height of the 30L Everyday Backpack
Another thing to be aware of with Peak Design’s hook is that its position can only go in 3 directions. The open part of the hook points towards one of the corners of the center column triangle. It’s adjustable but only in one of 3 directions since the hook is removable to access the phone holder. This can be a problem if you have a wide object as the weight and need it to go in a specific direction for it to fit underneath the legs.
Meanwhile, Sirui’s tripod hook is the tried and true design that works. It’s a spring-loaded L-shaped hook that spins in all directions.
While it has the same problems of not being able to hook any backpacks while the center column is fully extended, the hook is more conducive to bags with chunky straps.
Final look at stability
As unscientific as this was, I think it’s clear (as mud) from my tests that the Peak Design Travel Tripod is simply more susceptible to vibrations.
I’m no material design physicist (is that a thing?) but my theory is that because the tripod is 5 sections instead of 4 and each section has more than slight amounts of room for wiggle, vibrations can carry through slightly more.
In practical terms, it’s hard to say how much of a problem this will be in the field. On one hand, I think the Peak Design centre column is incredibly sturdy compared to Sirui but the wiggle in the legs can be cause for concern if the weather conditions and/or ground conditions are extreme.
Anecdotally for the type of shooting I do, I’ve really never encountered conditions extreme enough for vibrations to really come into play. As long as the tripod can handle my camera’s weight and I set a 2 second countdown timer for each shot to eliminate camera shake, I’m good. Even with my Sirui’s center column wiggle, I never experienced anything catastrophic. The question is how much does leg wiggle actually degrade the tripod performance and for my measurements, how much is 0.002 g vs 0.001 g?
Maybe this is one of those things where you chalk it up to ¯\_(ツ)_/¯.
Pros:
- Rigid and extremely stable centre column
- 20 lbs load capacity vs. 13.2 lbs
Cons:
- Noticeable wiggle between joints of the leg sections
- Measurable increase in vibration travel from legs to ball head
- Loss in weight savings from not having a carbon fiber center column
Who wins at stability?
Peak Design
After all of that and still Peak Design? Despite all of my analysis on vibrations and flex in the legs, I was really looking for major improvement in the center column because of my hope of using this tripod with a slider as well. I may not be a picky tripod user but to me, as long as my tripod doesn’t topple over, I’m good. Vibrations aren’t something you face frequently and when I shoot with a tripod, I know I need to be a careful like a ninja in the dark as to not knock the camera or tripod. If I am truly worried about tipping or stability, I just need to add some weight onto the hook.
Warranty

When it comes to customer service and warranty, Peak Design is a winner hands down.
Let’s talk Sirui first. According to Sirui USA, they warranty their tripods for 6 years in which case they’ll replace the defective parts free of charge but the cost of shipping to a distributor or service center will be yours.
Peak Design’s warranty is lifetime no questions asked. I have personal experience with their process and can speak to how it works. It was really simple actually, all I did was head to their Submit a Request page and described the issue I was having and attached a few photos. To my surprise, the first thing I heard back was that a replacement was already on its way to me. The next step was to ship the defective product back to their warehouse in Buffalo Grove, Illinois. I had to do this on this own (they don’t generate a shipping label for you) and the deal is that they would reimburse the shipping costs to me. All I needed to provide was the receipt. I received my replacement a week later and that was it.

Beyond warranty, another feature of the Peak Design Travel Tripod is that it’s fully serviceable from top to bottom and can be dissembled. Peak Design has a video on how to service the Travel Tripod by disassembling each section of the legs that demonstrates that you can maintain the tripod on your own easily and that any part is replaceable if needed. This is why the tripod comes with a bushing removal tool hidden inside the soft case. The Peak Design store sells some of the tripod replacement parts but I am sure their service center has others if something does go wrong.
Pros:
- Lifetime warranty that Peak Design says is “no-hassle, no-rhetoric lifetime guarantee”
Cons:
- None
Who wins with warranty?
Peak Design
Can’t beat lifetime right? I’ve leveraged their warranty for some broken stitching on my Travel Backpack and bad zipper on the 5L Sling and I received replacements for both with ease.
Price
Where Peak Design will always win is in the engineering, overall packaging, and presentation of the product but that will often come at a price and for many, this will be the biggest variable holding you back from buying the Travel Tripod.
- Peak Design Travel Tripod – $599.95 USD
- Sirui T-024X – $200 USD (newer version is $229.90)
Who wins with price?
Sirui
Whether it’s my old generation T-024X or the newer Sirui T-024SK, you’re looking at close to a third of the cost of the Travel Tripod.
Additional functionality
During the course of my testing, I came across a number of other things that I thought I’d just bucket into this miscellaneous section that you can say acts as a bit of an FAQ for everything else.
Can I replace the battery while mounted?
No, I tried mounting my Olympus OM-D EM-1 Mark 3 in different directions and for each the camera’s battery cover was blocked by some part of the ball head. This could be different for your camera though.
Is the bubble leveller useful?

In most cases no. Since the bubble is on the top surface of the ball head, depending on how large your camera is and how you mount the standard plate on, you will most likely be covering it. Even if you’re not covering it, I’ve just never found bubble levellers useful since cameras like the Olympus OM-D EM-1 Mark 3 have digital horizontal and vertical levels built in.
How about those hex keys?

This is another gripe of the hardcore user. Peak Design relies quite heavily on the use of two hex sizes (4mm and 2.5mm). Officially, this tool is called the Folding Hex Wrench.
The 4mm hex key is the more typical size used in tripods and something that’s included. This is the hex size you’ll use for the plate, disassembly of the ball head from the center column.
The 2.5mm hex key is for the tightening of the leg sections, the ball head’s pins, and removal of the feet.

Of course, it’s frustrating that the plate can’t be tightened by using a flat-edged tool (i.e. a coin) but this has been in the design since Capture was designed a long time ago so this isn’t exactly new.
The advantage here is that you can eliminate the old L-shaped hex keys that comes with Capture and use this tool exclusively which is much more compact. The design of the tool is user-friendly as it folds down to something quite compact and opens 90 degrees for good leverage. The top of the tool also has a loop if you want to attach it to your keychain or anchor links.
There are two places where you can store this dual hex key tool.
- Wrench leg clip – In theory a great idea to have it with the tripod at all times but in practice the key is too easily knocked out
- Inside the soft case – A bit of a hidden feature but there’s a small loop in the case that allows you to store it inside
How is the soft case?
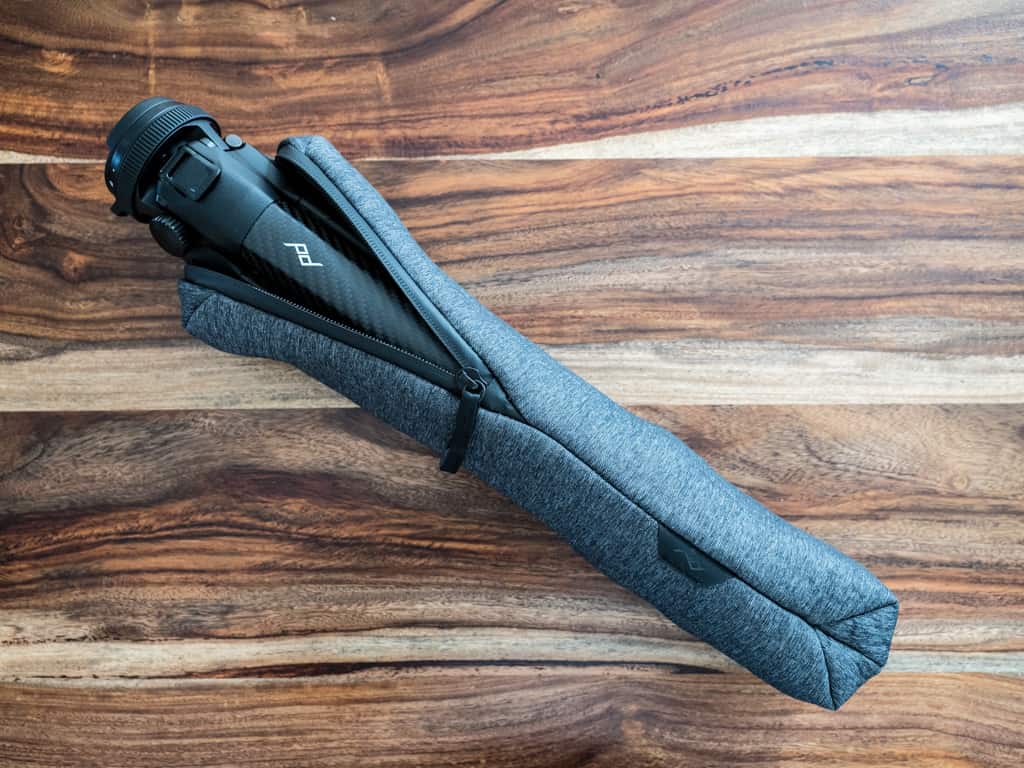
For the premium you’re paying for the tripod, I’m glad that they spent the time to design a suitable bag and case for the tripod.
The case’s material has a premium fabric feel to it but different from other Peak Design products especially with its dimples. The material is thick and plush, yet firm at the same time. The detailing is something you’ll be familiar with and ultimately feels quite durable.
It’s weatherproof but definitely not waterproof.
You’ll appreciate the handle that’s built in and it has loops to integrate optional Peak Design anchor links and the Leash to turn it into a shoulder strap.
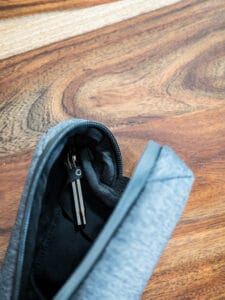
Peek inside, and look there’s a little loop for the hex key tool if you don’t want to use the holder.
My only gripe with the bag is that it’s insanely tight. This might be a case of needing to “work it in” but so far I’ve really had to make sure I push the tripod all the way in before I can zip it closed. This soft case is a snug fit but I wish some breathing room was built in and perhaps zippers built-in.
Does the tripod work with other cameras or devices like sliders?
By default, the Peak Design Travel Tripod simply doesn’t. Unlike traditional tripods, you can’t screw off the ball head to reveal either a 3/8 inch or 1/4 inch reversible screw.
Other cameras

For those that don’t know, the 1/4 inch screw is the one that the base of your camera uses. It’s also the standard screw that fits into say an Instax Mini 90, or a GoPro Tripod Mount Adapter.
With the Travel Tripod, the only way you can mount them on is if you attach a plate to it which is a major inconvenience.
Sliders

The 3/8 inch is a larger screw size and is the standard for ball heads and other add-ons like sliders.

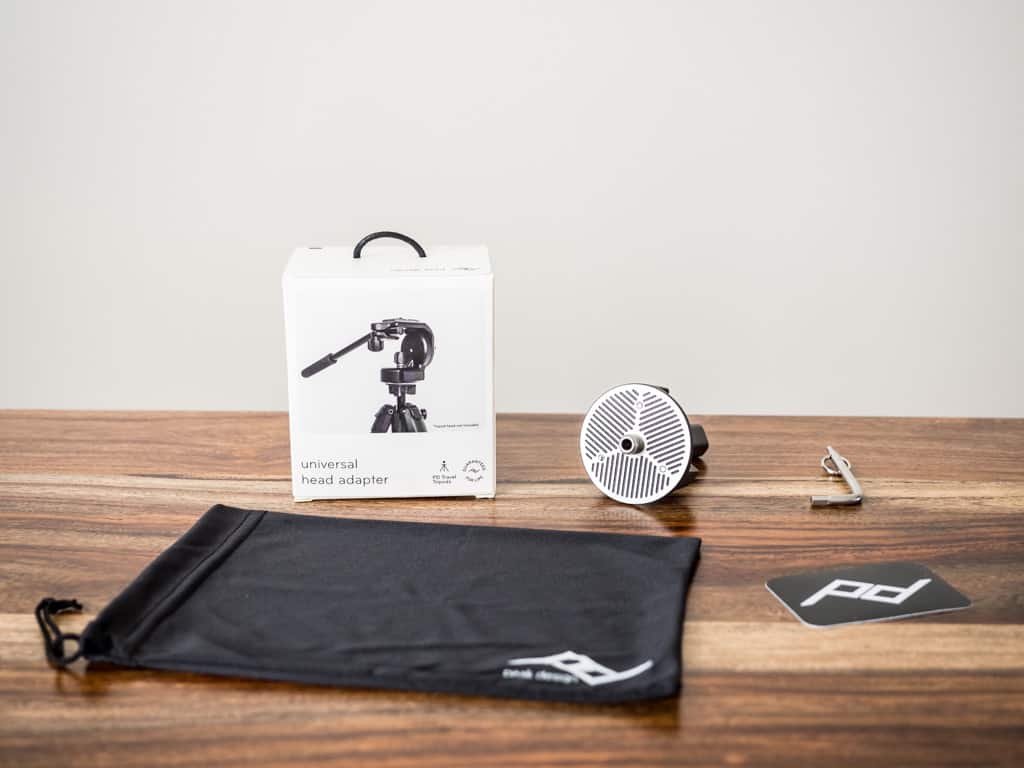
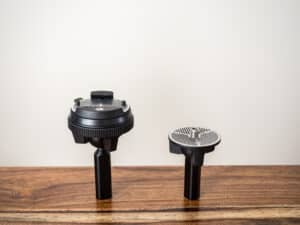
As an example, I have an Edelkrone SliderONE slider. With most tripods, I can simply screw off the ball head and screw it in since they both use the 3/8 inch screw. With the Peak Design Travel Tripod, you can’t do this unless you have the Universal Head Adapter. Again, this is a major inconvenience but the option is there. Simply, disassemble the Peak Design ball head and screw in the adapter which has a 3/8 inch screw head.
To give you an idea of how it looks, I have my Edelkrone slider attached to the universal head adapter. Performance wise, I found the tripod to be very stable with my mini slider.
Unfortunately, what you won’t be able to do though is use the Peak Design ball head as your ball head for your slider. You’ll still need to use a traditional ball head.
Again, this is another ugly truth to the custom design that ultimately makes it less compatible with other devices. While technically you could do this in the field, you probably won’t want to. In a studio, it’s manageable but you probably already have a more suitable tripod. Ultimately, I would not recommend the Peak Design Travel Tripod for sliders.
TIP: Before installing your slider, make sure the 3 stabilizing screws are lowered since these are meant to prevent third-party ball heads from twisting.
Practically speaking, I probably wouldn’t travel with the Universal Head Adapter but if you plan on using this tripod with accessories like a slider or want to replace the ball head with your own.
Compatibility with Peak Design ecosystem
So far we’ve talked about using various Peak Design bags as weights for the tripod’s hook but how does it pair with other products that you might already own?
Capture
Since the tripod uses the exact same plate as the latest version of Capture, you don’t even need to do anything to your camera since the plate is already on.
Everyday and Travel Backpacks
I’ve tested the Travel Tripod in the side pockets of the 20L, 30L, and Travel Backpacks and the tripod fits in like a glove. It’s of course much easier to store it in the side pocket with the feet facing downwards but I actually recommend that you place it in ball head down to protect it from catching anything and to protect it overall from any damage in transit.
The tripod fits is so streamlined and easy to slot in that I find that it has too much wiggle room so you’ll need to use the external carry straps to hold it in place.
The one bag it doesn’t fit is the Everyday Zip Backpack which is just a little too small as a 15L.
Everyday Slings
You could use external carry to hold it on the outside on the bottom of the bag but I can’t see that being too comfortable. It’s do-able but only if you don’t have any other options.
Anchor Links and Straps
True to Peak Design, they’ve made sure there are loops in the right places on the tripod so that you can attach their standard anchor links so you can attach any one of their straps. It’s down to the point where even the folding hex wrench has a loop so you can link it to an existing Peak Design bag or anything you want.
What I haven’t been able to test yet
Off the top of my head, I’m curious how the Travel Tripod handles sandy environments. Sand is my nemesis as I’ve seen it get stuck to the lubrication in locking rings and in between the smallest crevices to get stuck in between the rubber feet and the legs or inside the legs themselves. My guess that Peak Design will perform about the same.
However, since the Peak Design Travel Tripod can be fully disassembled, I do appreciate the fact that I can service it on my own if performance degrades over time because of elements like sand.
Final Conclusion

The Peak Design tripod is either going to work for you or not based on your needs. If you can work with the ball head without panning functionality and don’t need to a tripod that also works with sliders, this is a tripod that is well designed, constructed, and easy to use (once you break the habits of the traditional tripod).
Price-wise, there’s no way around it but it’s expensive and weight-wise, there are lighter carbon fiber tripods so you have to take that into consideration.
If you’re invested into Peak Design, love their products, and are looking for a solid long-term investment into a tripod, this is one that you’ll buy now and probably never have to look at another tripod for a very long time.
Is it the best travel tripod out there? Fan boys (yes, I am certainly one) will say yes but the practical side of me will point out that it’s not great for those wanting video features and that traditional ballhead. I also wish it was a tad lighter for the price point.
Without putting any more words into your mouth, I’ve summarized everything as best as I can into a table below.
| Peak Design Travel Tripod | Sirui T-024X | Who wins? | |
|---|---|---|---|
| Specs | Small diameter Higher load capacity Taller max height Smaller packed dimensions Can get very low to the ground | Lighter Packed dimensions close to Peak Design | Sirui if you care about weight but Peak Design for everything else |
| Deployment | Cam-lock Two less steps to deploy instead of 3 since the center column is not extended by default | Twist-lock Traditional set up which requires the inverting of the legs | Peak Design |
| Ball head | No panning functionality Takes some time to get used to Seems like more vertical (portrait) options but its got its quirks | Panning capable Arguably more manipulation required to go vertical | Sirui if panning is important Peak Design as long as you give it a shot |
| Use cases | Photo - Great unless you need panning for panoramas Video - Good for fixed position but lacks panning and calculated articulation of movement Smartphone - Advantage with built-in phone clip | Photo - Expected standard Video - Expected standard Smartphone - Requires additional accessories | It depends... |
| Stability | Affected more by taps, wind and vibrations Strong and stable center column Higher load capacity | Less affected by taps, wind and vibrations Wiggle in center column | Peak Design because it has a higher load capacity rating but expect the legs to wiggle |
| Warranty | Lifetime | 6 years | Peak Design |
| Price | $588.95 USD | $200 USD ($229.90 for updated model) | Sirui |
Your Choice
Peak Design

It’s the ultimate carbon fiber tripod if it meets your needs.
Sirui

The updated version of the Sirui T-024X that I currently own.
Man, and I thought this would be an easy write-up but there ended up being so many more aspects and angles to it than I would’ve thought for a tripod and one that’ll spark debate of “is it worth it?” in forums, social media, and private chats for awhile. I’m curious what your thoughts are? Did I miss something? If you have it, what’s your experience been? Drop a comment down below!
What you should read next
