Alright so I thought it’d be helpful for any backpackers or semi-backpacker like me to see what the heck did I actually bring on my epic trip that started it all? When you know you’re going to be out there for 3 months, some thought has to go into what to pack. I’m such a gear junkie and I ended up spending more money than I should’ve on new gear and clothes and whatnot.
Post-trip I can say that I did a pretty good job at packing. I don’t think I ever really thought I needed more than I had in my pack. It sure pays to be prepared.
I’m going to keep this post pretty simple. 1) What it is, 2) Where I bought it, 3) Why I brought it, 4) Was it useful or not.
Read more about Asia
- Japan 12 Day Itinerary
- 7 Day Seoul, South Korea Itinerary
- 5 Day Bali Itinerary
- Best things to do in Ubud in Bali
- Our best Asia content
How to find the best travel deals?
- Hottest deals – Bookmark the frequently updated travel deals page.
- Car rentals – Save the most money through car rental coupon codes.
- Hotels – Use corporate codes or get Genius 2 tier with Booking.
- Flights – Have you ever heard of the “Everywhere” feature?
- Insurance – Make sure you’re covered for all of your adventure activities with the best travel insurance.
In This Article
What to pack for a 3 month trip to Asia
What’s in the backpack?
The Backpack
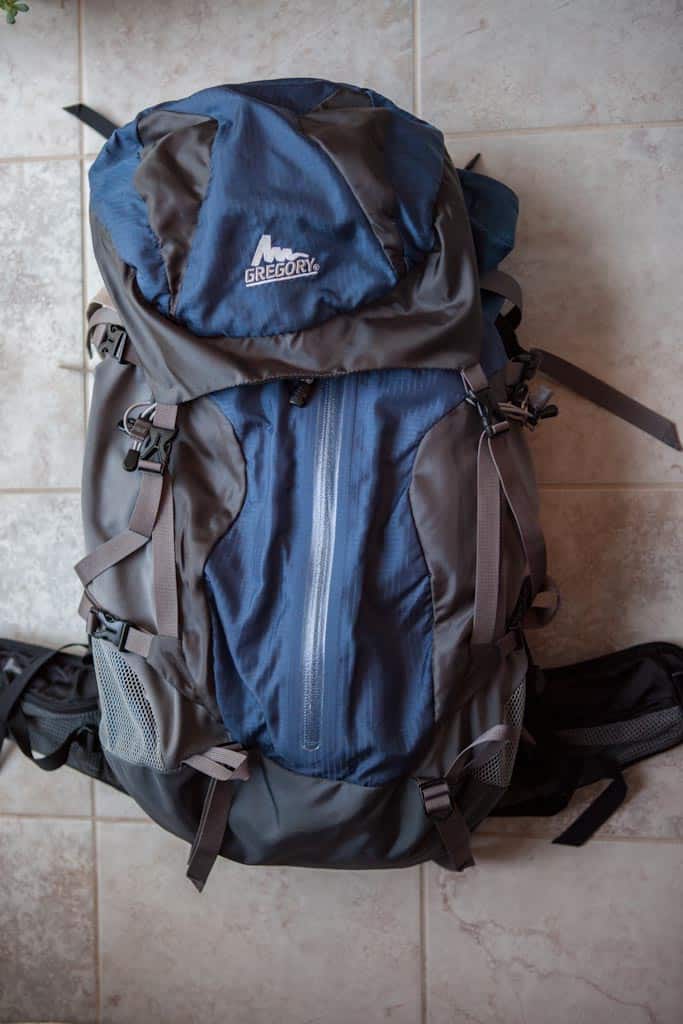
Model: Gregory Z55 M-size
Purchased: MEC
I had an old MEC branded backpack (the cheapest one that everyone buys as a beginner backpack) and I knew I wanted to upgrade to something that had better build and features. I picked this up for my Australia/NZ/Cook Islands trip back in 2010 and I’ve been using it ever since. Very solid bag with 55L capacity and has this really awesome jetstream feature where your back actually sits against a mesh and not directly against the bag so air is allowed to flow between the mesh and bag.
Gregory makes awesome bags. Definitely useful and top notch quality.
The Backpack Bag
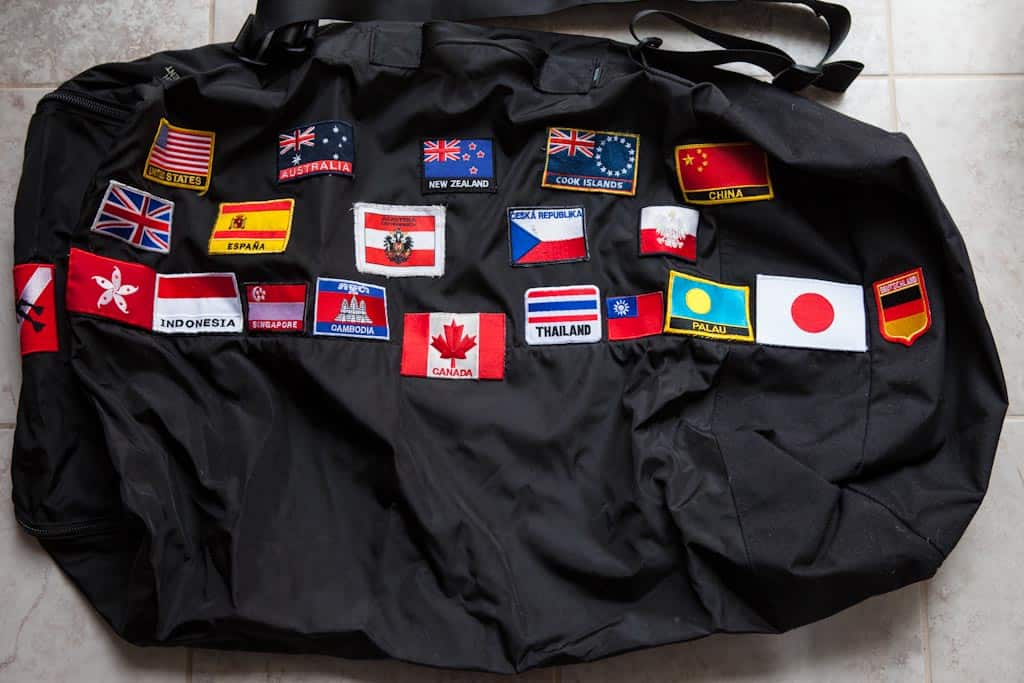
Model: Generic black bag with top loading zippers that fit my Gregory
Purchased: MEC
I know this isn’t absolutely necessary as you can check-in your backpack for most flights (as long as you buckle everything in) but I decided to get this to protect the bag and provide an additional backup bag in case I needed to carry around more stuff than my bag could carry. For example, I would throw my backpack in there but on top of that I can throw in my tripod and maybe I picked up some extra souvenirs I couldn’t fit in my bag. Worst case scenario, I can use this bag as an entirely separate check-in bag.
They add a bit of bulk to the backpack but I love my flags and they give me some extra insurance in case I need travel with more stuff than I anticipate. Quality wise they do end up ripping up in certain areas though that may just be a testament to how rough bags are handled at the airport.
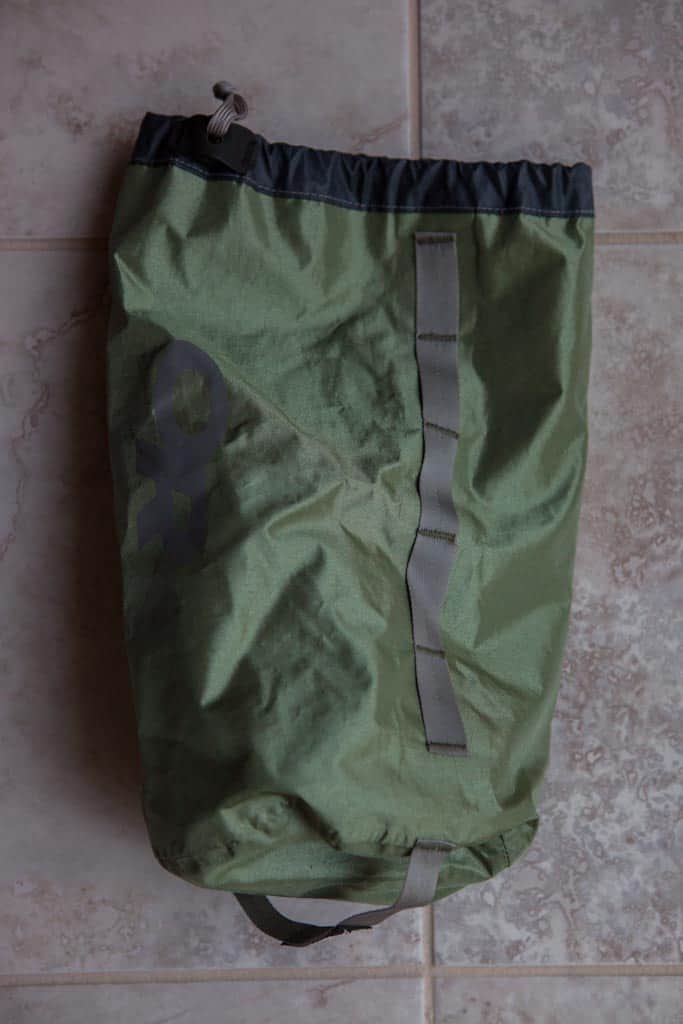
The Mesh Stuff Sacks

Model: Mesh stuff sacks (M & L) by Cactus Creek
Purchased: MEC
These mesh stuff sacks are perfect for putting in your rolled up clothes. They’re great because it keeps your backpack very organized. Prior to this I would just kind of throw my clothes in my backpack. With these, I can now organize types of clothes for each stuff sack. For example I would use the orange one for underwear and socks. The black one I’d use my bigger clothing items like shorts and my button up shirts. For the blue one I used it for my swim trunks. Since my backpack is a top loader, I just drop these stuff sacks into the bag and when I need to pull stuff out, by color I can determine exactly which one I need to pull out. Trust me it makes life that much easier. On top of organization these are great for clothes because they are breathable so less funk can develop.
Used these for two mega trips so far and I’ve loved them so far.
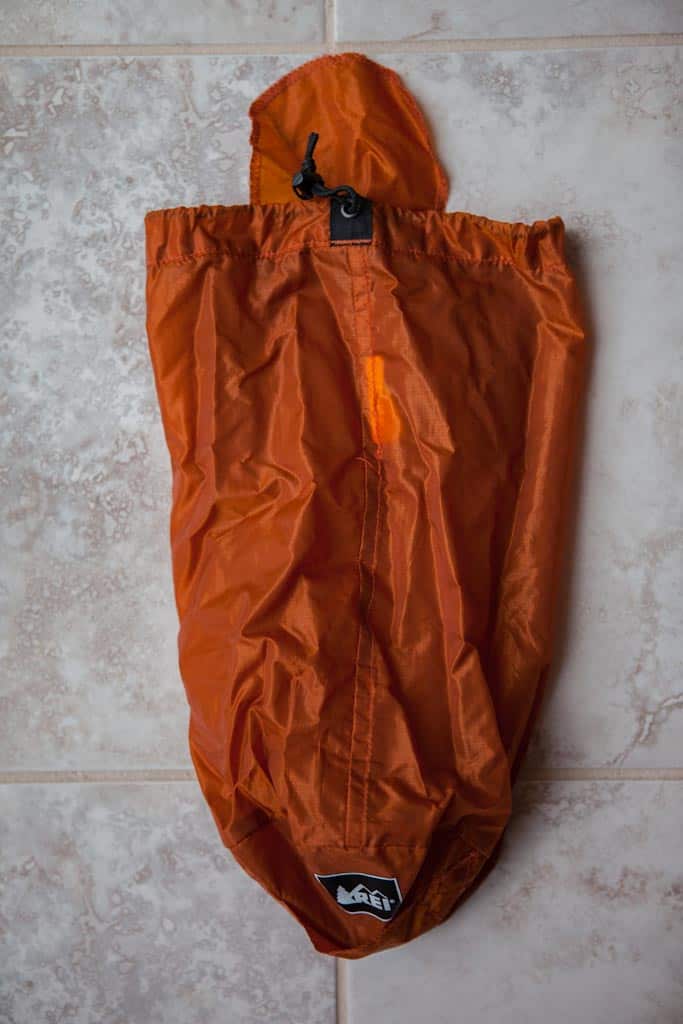
20L Stuff Sack

Model: MEC 20L Stuff Sack
Purchased: MEC
I had no idea how I was going to use this when I bought it but somehow this ended up being my de-facto dirty laundry bag. It’s pretty large at 20L and I just threw in my dirty socks and underwear in there which worked because I didn’t want to use a mesh for the beautiful smells to spread to everything else.
I don’t know if you need 20L for that. I would say something like 10-15L would suffice for next time but now that I have it I guess i’ll be using it for awhile.
The Rest of the Stuff Sacks


Model: S to M sized stuff sacks from a variety of companies (REI-branded, Outdoor Research and Sea to Summit)
Purchased: From a variety of stores including REI, East Mountain Sports (in NY) and MEC
I kind of went a little overboard with the stuff sacks as I was planning the trip but I figure I’d have some use for it down the road. Feels like i’m looking at mugshots when I have these stuff sacked lined up like this. I had an assorted way of using these. One of them I ended up using to carry all my electronic-ey type of stuff (HD backup, plugs, chargers, my P&S camera accessories nail clippers, swiss army etc.). Another I used to put my flip flops in so that I wouldn’t get my other stuff dirty. The others I had as backup stuff sacks and they eventually filled up with souvenirs (lots of magnets and other random stuff).
I don’t know if I’d bring as many stuff sacks for my next trip. 2 was probably enough. I bought the blue one (Sea to Summit) thinking that I might need some water-proofing. They only time I actually used that feature was when I went diving and wanted to keep some of my camera accessories/clothes dry. Water proof bags are expensive and I only wanted to pay for a small one. For future diving trips, I’m definitely going to invest in something like a 15L or 20L waterproof stuff sack.
Rolled Up T-shirt Cube

Model: Eagle Creek PackIt Specter Cube
Purchased: Europe Bound (in Toronto)
As you know I already did a video review of this so I won’t go into too many details but this was absolutely an awesome addition to my backpack for my summer 2012 trip. I was able to roll a good 8-9 t-shirts in there which was everything I travelled with. It kept everything organized and also made it extremely small in profile. This bag I typically kept at the top of the sack and shoved it along the back-side of the backpack. When I needed it all I needed to do was pull back up on the handle strap of the cube and I’d have access to it right away.
Hell yes get one of these!
Medical Kit

Model: Ultralight/Watertight Medical Kit .7 by Adventure Medical Kits
Purchased: MEC
This was one of those things that I really struggled with as I really didn’t want to be allocating space for this and have to carry it around for 3 months but ultimately I decided to get one of these that came with a decent amount of supplies. The main reason for this was because I knew we were going to be doing some trekking in Thailand wanted to be prepared. I’m happy to say that I never had to use this thing at all. Bad thing is that it kind of reaffirmed my thoughts that I didn’t need it.
For the paranoid ones and if you are doing some series backcountry stuff it would be a good idea but for the trip that I ran which ended up being in more civilized places than anything, I dont’ think it’s worth it. You can buy most of this stuff along the way if you need it. The only thing I always make sure I bring are bandaids and some essential meds. That should be enough.
Quick Dry Towel

Model: PackTowl Personal Towel by MSR (Large)
Purchased: MEC
These towels work wonders. They’re super compact, light and somehow still are able to absorb all the water off your body after a shower. This item I really felt I didn’t need to bring if it wasn’t for the trekking. I suppose I could’ve stolen a hotel towel along the way for this but I figure this would be good to have “in case”. The downside of course is that I lugged this around everywhere when I barely ever used it.
Product is fantastic and would highly recommend this for any sort of camping/canoe/trek trips. If you’re going to be staying at hotels, leave this at home. I guess I really should’ve weighed the need to have this for trekking for one night’s shower vs 90 days of not requiring it.
Zip Locks, Elastics, Paper Clips and Zip Ties
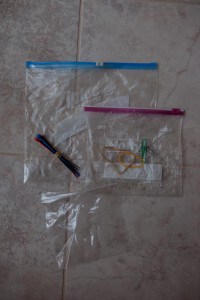
Model: At home
Purchased: Anywhere
I’ve always developed a habit to bring these backup items along. You never know when you need a small bag to carry some small things. Maybe you collect some shells on a beach one day and need a small zip lock to store it in or you need something rolled up with an elastic band or zip tie. It may look like this is pretty extreme but it’s one of those “you never know when you might need it” things.
I still stand by my decision to bring these despite not using these all too much.
Electric Plug Converters
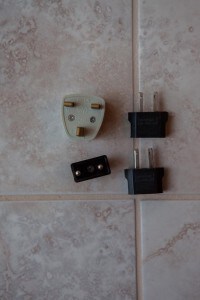
Model: I don’t really know
Purchased: Some of these I purchased off of eBay, some are from the dollar store and some are just really old things from my parents
These are often times forgotten about but pretty obvious at the same time. Do your research and figure out what plug converters you need. Also these days all of your electronic chargers should be suited for both 110V and 220V but I guess double check to make sure.
Definitely bring these. Minimum 1 up to 2 are good for each type of plug you need.
Toiletries Bag
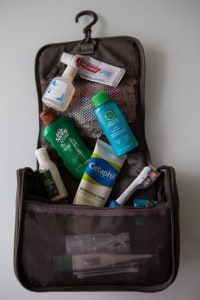
Model: Muji Hanging Wash Bag
Purchased: Muji
I’ve had this for a very long time since my consulting days. It’s a fantastic bag to keep all your toiletries and meds together. The biggest feature that you should look for in any kind of toiletries bag is a hook so that you can hang it onto something when you’re in a tight quarters bathroom or don’t want to put it on some sort of surface for some reason. This one has been pretty clutch for me and can carry quite a bit of stuff here. No need to go into too much detail on what I put in there but here are the essentials:
- Face wash
- Shampoo
- Conditioner
- Body Wash
- Tooth paste
- Cheap electric tooth brush
- Face cream
- Body cream
- Thermometer
- Bandaids
- Tylenol Cold
- Gravol
- Imodium
- Eye drops
- Benadryl
- Vitamins
Shaver

Model: Braun 350cc shaver
Purchased: Walmart
So this is one of those luxury items that I just have to have with me. I’m not a fan of razors (I never really learned how to do it properly sadly) so I bring this around.
Yep I’d still bring it for my next trip despite the extra bulk it has and the need for an extra charger. Oh and don’t forget the charger. I thought the charge would last on my trip to Australia/NZ/Cook Islands but somehow during flight the on button was pressed and it was pretty much out of juice at my first destination. Had to use razors the rest of the way. Lesson learned.
What Clothes Do You Bring to Handle the Blistering Heat of Asia in the Summer?
Capris
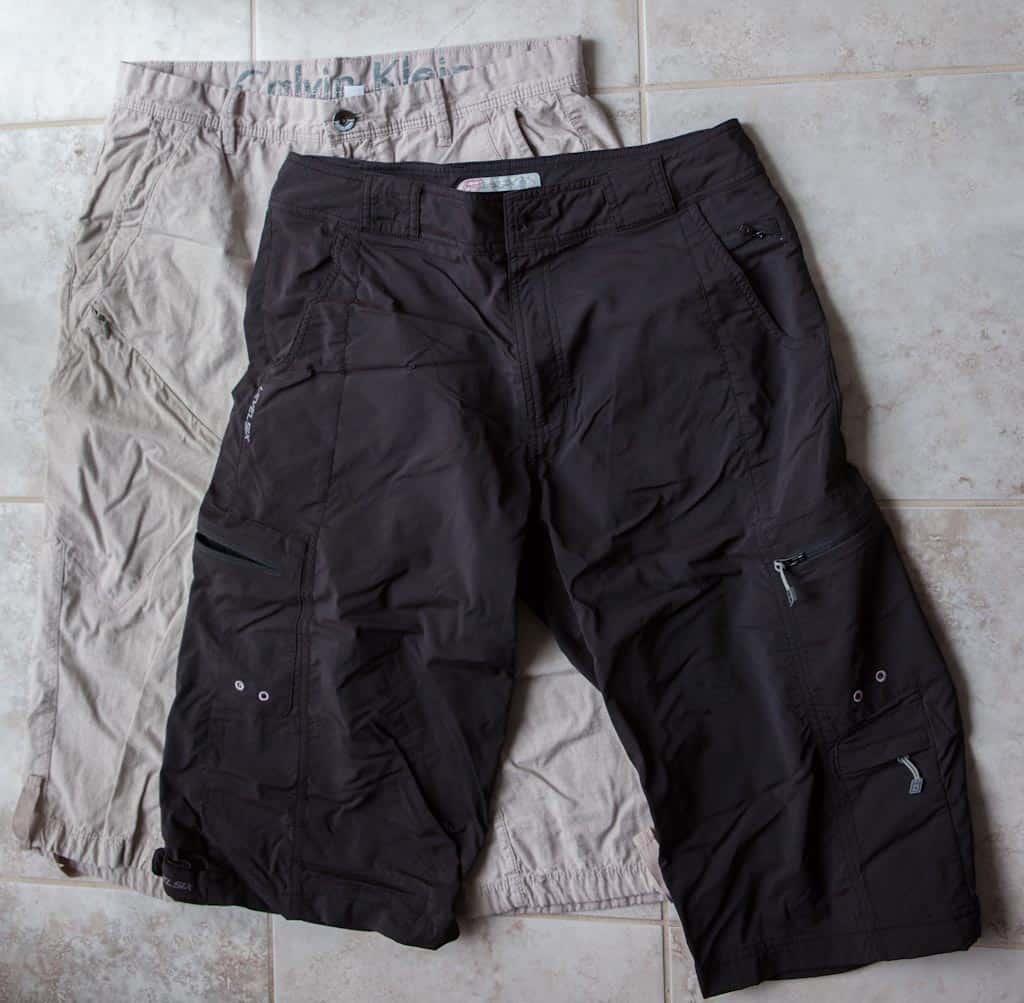
Model: Khaki one is from CK and the black one is small brand from MEC
Purchased: CK and MEC
I bought these because I wanted something a bit different from normal shorts and at the same time were ones that were thin, light and also had some waterproof-ness about them. Both of these capris (is that what you really call these for guys?) served me well over the entire trip. The black one I bought specifically for it’s selling feature as basically being multi-use swim trunks. The added benefit to these type of pants is that I didn’t have a problem when we visited temples in Thailand. What most people don’t think about is that there is actually a loose dress code when you visit these temples. For guys it means no excessive amount of skin showing (sleeveless is out of the question) and pants that don’t show the knees (normal shorts out of the question). These ended up being perfect for this. On the other hand Jia had no choice but to wear his long khakis (a.k.a. horse pants we called them later as an inside joke) which i’m sure was miserable in that heat.
I love versatile clothing and this was perfect for the job. Would definitely bring these next time. I did have a problem with size along the way. I found that I was a lot skinnier than when I tried them on. I’m going to need a smaller size next time.
Khakis

Model: Khakis from GAP
Purchased: GAP from a long time ago
Despite what I said above, I still needed one pair of comfortable and light khakis. These are awesome because they have the drawstring which allows you to tighten the waist to however you need it. Super versatile for when the weather gets a bit chillier or when you need long pants to be a little bit more formal. I usually wore this in combination with my summer dress shirts for nights when we went out for a fancy dinner or for partying. When you’re in the tropics you can totally pass with a nice shirt, khakis and flip flops.
This is a no brainer.
Shorts

Model: Dark grey khaki shorts
Purchased: American Eagle
This one I knew was a bad choice but I loved them so much that I just had to bring them along. This was probably the most illogical choice I made for this trip – they’re heavy, difficult to roll and take up a lot of space. Still, I loved wearing these and I typically just rotated my shorts between this and the capris.
If I were to do it all over again, I might’ve shopped around for something similar but much more packable and lighter. This guy definitely took up a lot of space in the backpack when I wasn’t wearing it.
Dressy Summery Shirts
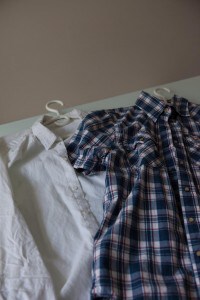
Model: Yeah…it’s what you see
Purchased: Hollister and CK
I don’t know what these are called but let’s just stick to “dressy summery shirts”. These are also two items that probably weren’t the most logical but I knew I needed something a bit nicer for those nights going out. These were great at night when I didn’t need to be lugging around my day pack anymore and just wanted to be super laid back. As an experiment for this trip, instead of rolling these shirts I actually used a medium compression bag (not depicted in this blog) to hold them.
I would probably just bring one next time. I think what influenced me to bring two was due to the fact that we were staying at some fancier hotels (especially the big resorts I was doing – Conrad Bali and Conrad Koh Samui). For more normal trips I’d probably just bring one. The compression bag was cool and all but rolling it and storing it in a mesh stuff sack would’ve been good enough.
Technical T-Shirt
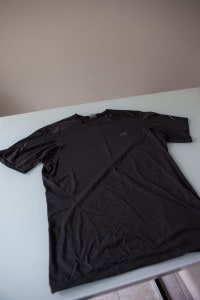
Model: Arcteryx Motus Crew Graphite M
Purchased: REI (they had a sale…otherwise Arcteryx is too baller for me)
This is my first piece of hardware from Arcteryx and I have to say that I’m incredibly impressed. This has got to be the lightest t-shirt I have ever owned. On top of that it has amazing moisture wicking. This was definitely one of the stars of my clothing line up especially on those crazy hot days or when I was doing anything super athletic.
I would definitely bring this out with me again. You need to have a few of these dri-fit/moisture wicking shirts for a summer trip like I did. You cool off so much easily, the clothes don’t stay wet on your body as long while you’re wearing it and they’re ridiculously easy to wash and dry. Check out my hand washing video for tips and tricks on how to do that.
Sleeveless Shirts
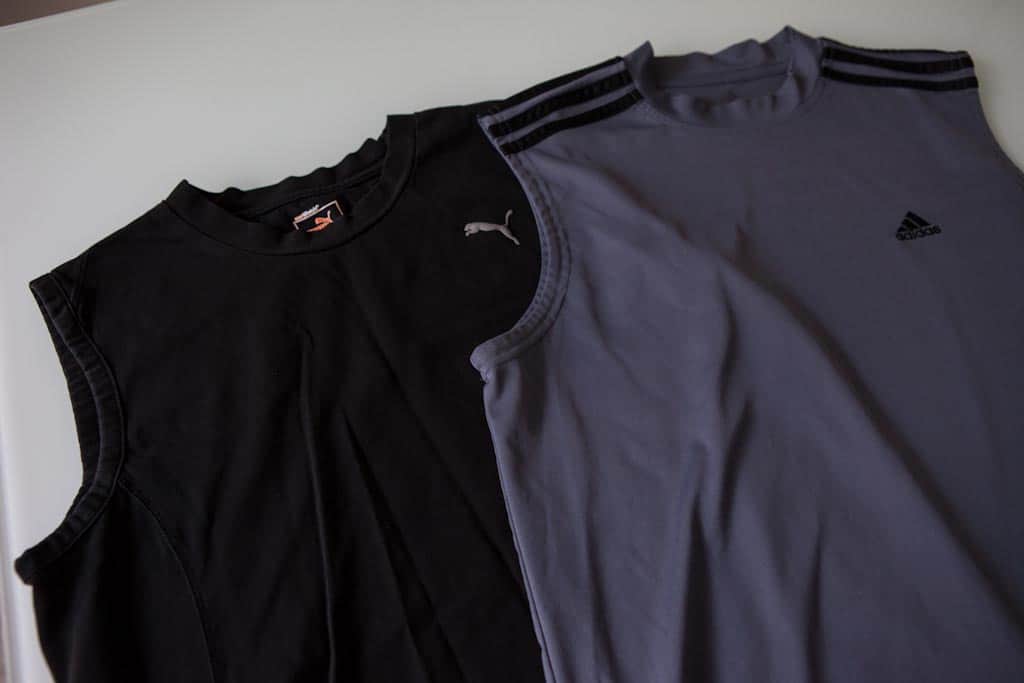
Model: Puma and Adidas sleeveless shirts
Purchased: Probably some outlet
I plucked these right out of my gym clothes section of my closet. With crazy heat I knew I wanted a few of these with me. These were great for just having less clothes on you but also for developing less of a farmer’s tan on your arm ;). Because they’re naturally gym clothes, they already have a lot of the built in dri-fit stuff so they did a good job with moisture wicking.
For summer travel, sleeveless shirts are a must. I thought 2 was a good number and would do the same next time.
UV Water Shirts
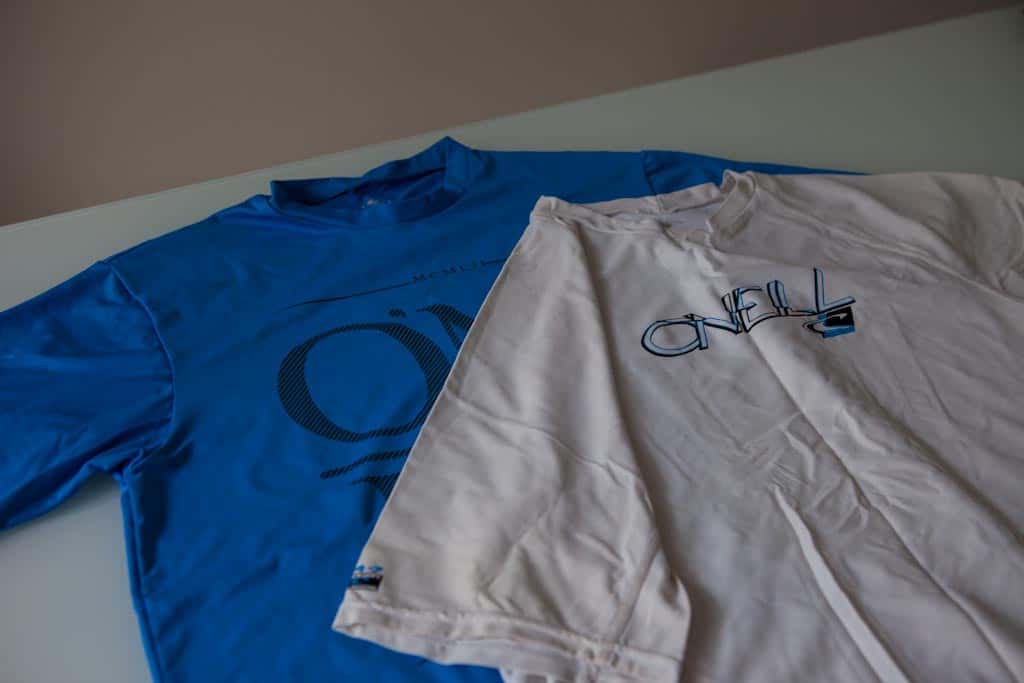
Model: O’Neil UV protection shirts
Purchased: MEC
These aren’t quite the rash guard shirts I originally had in mind but they still fulfilled the purpose of having some t-shirts that had built-in UV protection and would be useful in the water. These are typically used for surfers that don’t go topless and the thought I had was that I could potentially use this when snorkelling if I didn’t want to get crazy sunburns on my back. For my trip to the Cook Islands I encountered this problem where either you had to be topless in the strong sun or at the time grab a regular t-shirt to do some spear fishing. Wearing a regular t-shirt in the water is just uncomfortable as it really drags you around with the added weight and when you’re out of the water they take forever to dry. With these, if you don’t feel like taking off your shirt then you can go right ahead and jump into the water. If you’re nowhere near water, these are still fantastic regular t-shirts to wear that pretty much act like any other dri-fit kind of shirt with the added bonus of having some SPF protection. Win-win.
Versatile is good. Awesome shirts. Would bring them along again.
Swim Trunks
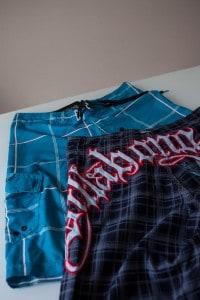
Model: O’Neill recycled poly swim trunks + Knock off Billabong board shorts
Purchased: Century 21 in NYC for the O’Neill and Shanghai Science and Tech for the fake Billabongs
Board shorts are board shorts right? Once I started doing a bit more shopping on these I realized that there was some new materials companies started to used to make these lighter than ever before. The O’Neill’s were awesome. They barely weighed anything and weren’t bulky at all when you wore them. The Billabongs I picked up on one of my last few weeks in Shanghai. They’re nothing too much to write home about. I also had another one I originally brought with me and it was a white O’Neill one. I will never buy white swim trunks again. The problem is with the sunscreen. I don’t know if it’s because I use high SPF sunscreen but when it comes in contact with white (especially in swim trunks) they start staining them as the sunscreen drips down after you go into the water. Eventually you just get these nasty splatter/smear marks on your swim trunks that can’t be washed away.
The 1 or 2 or more swim trunks was something I debated about for awhile. 2 is the magic number I think. If you’re doing two days of consecutive water sports, one can dry up in your room while you wear the other or vice versa.
Fleece Zip Up
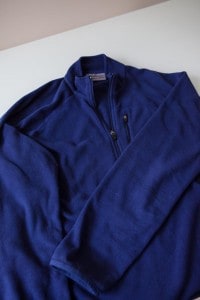
Model: Kathmandu blue half-zip fleece
Purchased: Kathmandu Store in Queenstown, NZ
This is the only warm clothing I brought on the trip and it was enough. The only time I needed to bust this out was for the morning hike to see the sunrise at Mount Bromo and when we slept overnight with the hill tribes in Chiang Mai. Otherwise that was it. It was just nice to know that if it ever did get cold for some reason that I could layer this on.
Rarely used but still important to bring along. It was the right choice to bring only this one piece of warm clothing.
Jacket
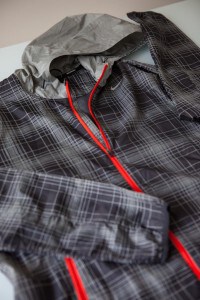
Model: Nike running jacket
Purchased: MEC (clearance)
I debated long and hard about what jacket to bring and originally I was going to bring a bulkier water proof jacket I had but then I stumbled upon this at MEC. This jacket is really meant for runners but I thought this would be perfect. It’s incredibly light. It may not be fully waterproof but at least the material is water resistant. It has a hood in case. It zips up. Done!
I pulled this out for that morning sunrise at Mount Bromo and while trekking when it started to rain. This was the perfect jacket to have for the climate I was in for the summer.
T-Shirt
I wasn’t going to show you all the t-shirts I brought nor could I remember exactly which ones I chose but I had around 5 or so normal t-shirts that I wore the bulk of the days while travelling. I also bought a few extras along the way as souvenirs.
I don’t think you can travel with pure technical dri-fit clothing. It’s still fun to wear graphic tees that make a statement or just make you feel cool wearing.
Underwear
I figured you wouldn’t want to see DSLR photos of my underwear so I didn’t end up shooting them. I’m also not going to mention too much about the underwear except that the ExOfficios were the best. The cotton underwear I had were the majority of them but every time I had the opportunity to wear my ExOfficios, I felt so much more free and cool down (haha don’t laugh).
I love the ExOfficios so much that I bought another pair. Underwear wise, just estimate how many days you can go without doing laundry. That being said, hand-washing my own clothes has completely changed the game for me. I must’ve brought 8 or 9 pairs of underwear. If I knew I’d be doing the amount of hand-washing I ended up doing on the trip, I probably could’ve cut that down half the amount (4 or 5). In a perfect world, I’d have 4 pairs of ExOfficios.
Socks
Nothing special here. I think I only brought 3 or 4. I barely ever wore them because I either had flip flops or sandals on. Neither required socks.
I probably could’ve cut these down to 2 pairs.
What’s In The Day Pack Then?
The Giant Behemoth Camera Backpack
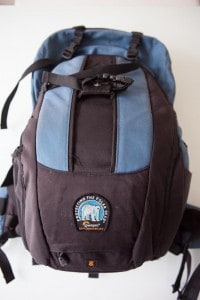
Model: Lowepro CompuPrimus All Weather Backpack
Purchased: Henry’s
This backpack has been truly a stalwart for me. I’ve had it for several years now and for every big trip I will eventually bring this backpack as my day pack. A part of it is made necessary by the DSLR that I bring with me. This conveniently has side access to a camera so you don’t need to take off your backpack to pull your SLR out. It can hold a body with lens + additional lens which is perfect for me. The top zipper compartment can carry all your other stuff. Another bonus to this bag is that the front section can perfectly carry my Macbook Air. Lastly it also has a GlideLock mechanism that can carry a tripod as well. Somehow this just has every single feature I need.
You really have to decide what kind of day pack you want. Considerations you have to make are, what kind of stuff am I going to need to be carrying on a day-to-day basis? Am I bringing a laptop? Since this bag is going to be used as a carry-on for flights, will it have sufficient space to hold everything I need? (i.e. laptop, camera, etc.)
Headlamps

Model: Petzl Tikka Plus 2 and Mammut Lucido TX1 headlamps
Purchased: Petzl from MEC and Mammut from REI
Seriously who still uses flashlights…put your hands up. If you’re still using flashlights, you’re really missing out. Headlamps has been one of my best purchases for travel. It’s quite simple actually. Flashlights require a hand hold, headlamps do not. These were really useful while trekking and when we had to do that morning hike at Mount Bromo. If you’re not doing any of those type of activities, I feel like headlamps are still useful just as an emergency tool (i.e. power outages, when you’re staying at a hostel and need to find something in the dark without waking everyone else up by turning on the lights)
Why did I bring along 2? Well I know Chantelle and Jia didn’t have one so I thought it’d be good for them to have one to use.
Highly recommended. I just stuff this into the waist pocket of my Gregory backpack.
The Valuables

Model: Victorinox Travel Organizer
Purchased: Amazon
I kept pretty much all of my main valuables here (passport, reservations and cash). In the past I used to carry some of this stuff in my money belt but sometimes it was just a lot easier to use one of these travel organizers to hold it all. This held everything from membership cards, passport, student card, extra passport photos (good idea to have some), international drivers license (was initially going to rent a car in Koh Samui which would’ve made this necessary. Good to have still), cash, pen and reservations.
In hotels I would lock this up in the safe for the day which is why I didn’t rely on the money belt as much on this trip.
This was great for keeping everything organized and together. When flying I pretty much had this in my hand the whole time as it also has a pocket on the outside which allows you to slot in your passport and boarding pass so you can easily retrieve it. This also eliminated the need to carry an additional folder or paper protector for all my print outs. Overall I loved this and would recommend having something like this.
Kindle
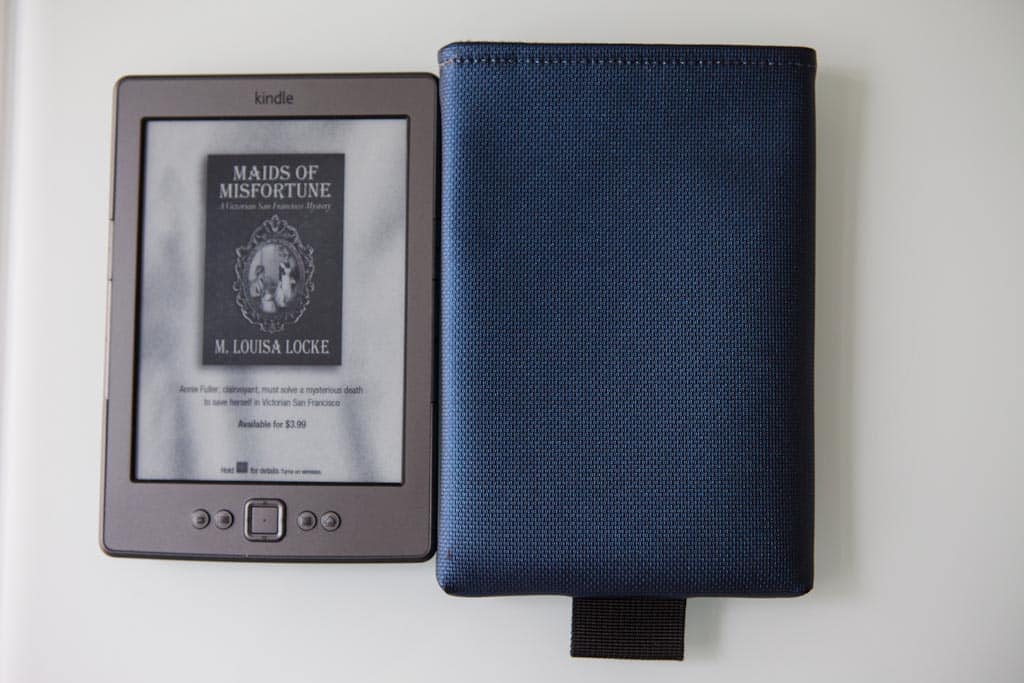
Model: Kindle + slip case from WaterField
Purchased: Amazon + WaterField
I didn’t read a heck of a lot while I was on the go but I definitely put this to use during the long haul flights and some of the shorter ones too. If you’re a reader this is definitely something you want to bring along. I made my first crack at Storm of Swords on this trip.
For me this may have been something I could’ve left at home because I was either too tired to read or was busy blogging over anything else while travelling.
Earphones

Model: Ultimate Ears Triple Fi Pro
Purchased: Amazon
Those with keen eyes will notice that these aren’t the triple fi’s. Long story short but there were serious cable issues with them and after 3 or 4 warranty swaps, I finally told them to just get me a different one. This is the UE900 from Logitech’s new line. Anyways you really don’t want to be stuck with crappy Air Canada earphones so make sure you bring your own. Good for the plane and good for your iPhone or whatever music player you bring.
The Buff
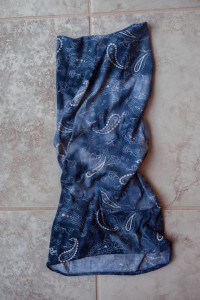
Purchased: Gift
*Cue Survivor theme music*. I write an extensive review on the Buff here so check it out.
Great piece of travel gear to have. The theme is versatility as you can tell. It’s versatile and therefore gets my thumbs up.
Survival Gear
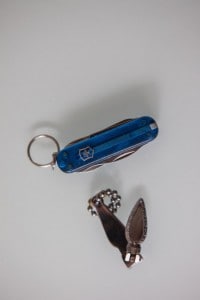
Model: basic Swiss Army knife + old nail clippers from my parents
Purchased: Gifts I suppose?
These are essentials for me for obvious reasons so I won’t say much. Only thing to be careful of is to remember to not bring the Swiss Army knife on as carry on. I was paranoid when packing so I always made sure this was in my other stuff sack for my checked-in backpack. You don’t want to be going through security and find out it has to be confiscated.
A must-bring!
Carabiners
I always bring 2-3 carabiners with me that clip into various straps on my backpack. The reason I do this is just in case I get lazy and want to strap bags or what not onto my bag so I don’t need to hold it. Aside from that they’re just handy to have. You never know when you might need them. They don’t take up much space and are super light.
Oh and this is an obvious one that I should’ve paid attention to. White hats tend to get dirty easily and especially with how much I was sweating, the hat got stained yellow pretty quickly.
Hat
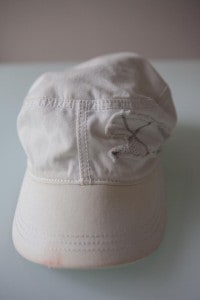
Model: Unknown
Purchased: Puma outlet
I usually love wearing hats and usually do when I travel but I realized throughout the trip that I was wearing my hat less and less. It wasn’t because I liked my hat any less but it was just because of the sweltering heat. I was always re-positioning my hat and scratching my hair because it felt like there was hot air trapped in there or something. Towards the end I wore my hat once in awhile but not all too often.
Sunglasses

Model: Oakley Five Squared Ducati edition
Purchased: eBay
I got these sunglasses earlier in the year, replacing my flak jackets that I had in favor of a new design and something polarized.
These sunglasses were great. No complaints! The only annoyance I would say about sunglasses in general is when it comes to photography. You just can’t be wearing sunglasses when you’re trying to use the viewfinder. I tried it and it doesn’t work. I typically will end up wearing the sunglasses around the back of my head or taking it off completely.
Macbook Air

Model: Late 2011 Macbook Air 11″ + iPearl mCover Hard Case Shell
Purchased: Apple Store + Amazon
Sorry I didn’t get a chance to snap a shot of my MBA but you all know what it looks like. This was something that I would’ve debated about if I wasn’t going to be staying in Shanghai for a full month for school. Otherwise, this would’ve been a harder decision. That being said, this was great to bring a long since I was also staying at a lot of hotels. It was great for doing some last minute research, to blog and surf around. I usually have a leather sleeve case for this but for the purpose of this trip, I knew I needed something a bit more rugged and functional. I found a highly rated case on Amazon called the iPearl mCover and picked it up because it would protect the entire Macbook and as a bonus it also had rubber feet and 2 leg stands for the back to give the laptop an elevated ergonomic stance when standing on a table.
If I wasn’t doing an extended stay anywhere, I probably would’ve considered a tablet for the trip. As a matter of fact, I will probably pick up an iPad mini sometime soon so I can test it out for my next trip!
Toilet Paper To Go
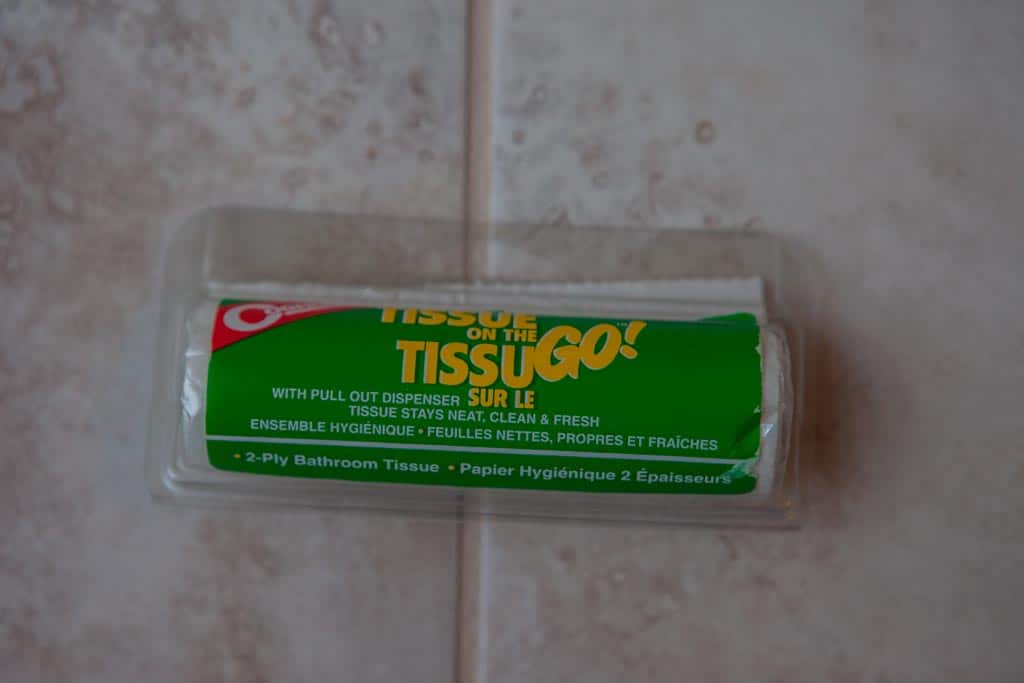
Model: Coghlan’s Tissue on the Go!
Purchased: MEC
Going to Asia I had a feeling that washroom conditions were going to be a problem and lack of toilet paper so I picked this up at MEC just in case. To be honest though I never used it except for the one time while staying with the hill tribes in Chiang Mai and another time to give to Chantelle to use one time. This was useful during trekking because there really wasn’t any toilet paper around. In Indonesia, I might’ve needed to use it when we were taking that sketchy van ride from Bali to Mt. Bromo and then to Yogyakarta and stopping by random pit stops with squatter washrooms (gotta love that manual water flush) but luckily, #2 never hit when I was on the road. I brought this around with me in my back pack everyday just in case.
Particularly useful for girls. Even for me as a guy and considering some of the “less civilized” places we went to, I still think this is a good thing to have. You don’t want to be stuck without it when you really gotta go.
Sunscreen
I brought an assortment of 50-60SPF bottles of sunscreen. Most were half used from old trips. This is definitely critical when you’re out in the sun all day. I learned from my all-inclusive days that you can’t be stingy with your sunscreen. Apply often and concentrate on spots you often miss (behind the ears, the crack between you swim trunks and your waist, the arm pits, and getting someone to do your back since I have terrible arm reach). High SPF is key as well. I wouldn’t use anything below 50. Just be aware that high SPF will cause yellow staining of white shirts when you hit the water.
Bring one bottle for the trip and if you need more, buy it along the way.
Bug Spray
There were some countries where this wasn’t so much a problem and then others were we got eaten alive. I brought one with Deet and it seemed to do a decent job at repelling the mosquitoes though I seemed to be travelling with people that were more attractive to mosquitoes.
You probably could buy it when you land but a lot of times you’ll forget or there’ll be strange brands/labels you can’t read. I would recommend just buying it locally so you know what you’re getting. One bottle should be good enough.
Hand Sanitizer/Wet Naps
I guess I’m a bit of a boyscout when it comes to bringing all the necessary gear but this is helpful when you need a quick clean in a somewhat dirty area without a bathroom close by. Wet Naps are awesome for wiping anything down like utensils you get or the table.
Wet Naps – You don’t need a whole lot of these but a few in case would be a nice to have. Hand Sanitizer – Bring a small bottle. Good to have.
Camera Gear
Body and Lens
Model: 5D Mark II and 24-70 F/2.8L + Black Rapid Curve RS7
Purchased: All used off either Craigslist or Fred Miranda. The Black Rapid I got from Adorama
Well I couldn’t use my SLR to take a picture of itself could I? This beastly combination has been a staple of my travel photography. It’s not the lightest or the most compact but it’s something I’ve had to learn to deal with. The 24-70 is the most versatile lens when travelling. You really don’t have time to change lenses on the fly when you’re going from place to place.
At one point I really thought about not bringing an SLR but I just couldn’t help thinking all the awesome photos I would be able to take and did take. At the same time though, halfway through the trip I really got tired of having to lug this gear around with me all day in my backpack. The weight really gets to you. What I really need a second higher-end point and shoot camera like the Canon G15 where on days I don’t feel like bringing out this big boy I can just put the P&S in my pocket.
As a photographer I’m all about the camera so I really couldn’t leave this at home. This is something you’re going to have to think about – whether you’ll be okay with constantly thinking about good photos to take with it and carrying it around all day.
My Submarine

Model: Canon D10 Underwater Camera + Accessories
Purchased: eBay
I affectionately call this the submarine camera. The metal, bulbous and screw hole features make it look like a submarine no? Anyways this little guy has been awesome to me for my past many trips. It’s great because in those situations where you don’t want to risk bringing out your SLR you can pull the D10 out instead which can handle hot and cold climates and most importantly handle little splashes of water to being totally submerged. A bonus that came with this when I bought it off of eBay was that it came with all the additional accessories. The strap can be swapped out for the rope looking thing which you can hang off your neck when you’re snorkelling or you can strap it around your BCD when diving.
My only gripe with it at this point is probably the quality of the photos. At this point this camera is probably 4-5 years old and is in serious need of a refresh. The D20 is out but i’m not sure how good the reviews are. The other downfall of this camera is that it can only handle 10M of depth which is good only for snorkelling and intro-dive depths.
I would highly recommend anyone to recommend in one of these rugged-type cameras.
Going Wide

Model: 16-35MM F/2.8L
Purchased: Craigslist surprisingly (in the US of course)
Most of you know that I’m more landscape photographer than anything else so I felt that I had to bring this for those sunrises and sunsets I wanted to capture. Great wide angle lens when paired with a CIR-polarizer. I probably used this 20% of the time while the 24-70 was on the 5DMK2 80% of the time.
For my next trip I may consider just being a one lens guy. I feel like the 24-70 truly is versatile enough to handle the wide at 24mm and some long shots at 70mm.
Backup Hard Drive

Model: Hyperdrive Colorspace UDMA
Purchased: Purchased used through the forum, FredMiranda
This is the secret weapon out of all my gear. During the days when I was less experienced with my SLR, I would always come to the problem of how much memory to bring and what to do when you run out. One way to handle it is to just buy a shit load of memory cards but how do you know how much is enough? I did my research for my Australia/NZ/Cook Islands trip and stumbled upon these backup hard drives. These are specifically designed for photographers as they have dedicated slots on them for SD/CF memory cards. The beauty of this is that when you’re done shooting a card, you can back up the entire card onto the hard drive immediately. Once you’re done, that card is free to be formatted and used again.
For any serious photographer that shoots in RAW you have to have one of these. You get the peace of mind that you’re getting backups of your photos and you will never run out of memory for your camera.
The Memory Cards
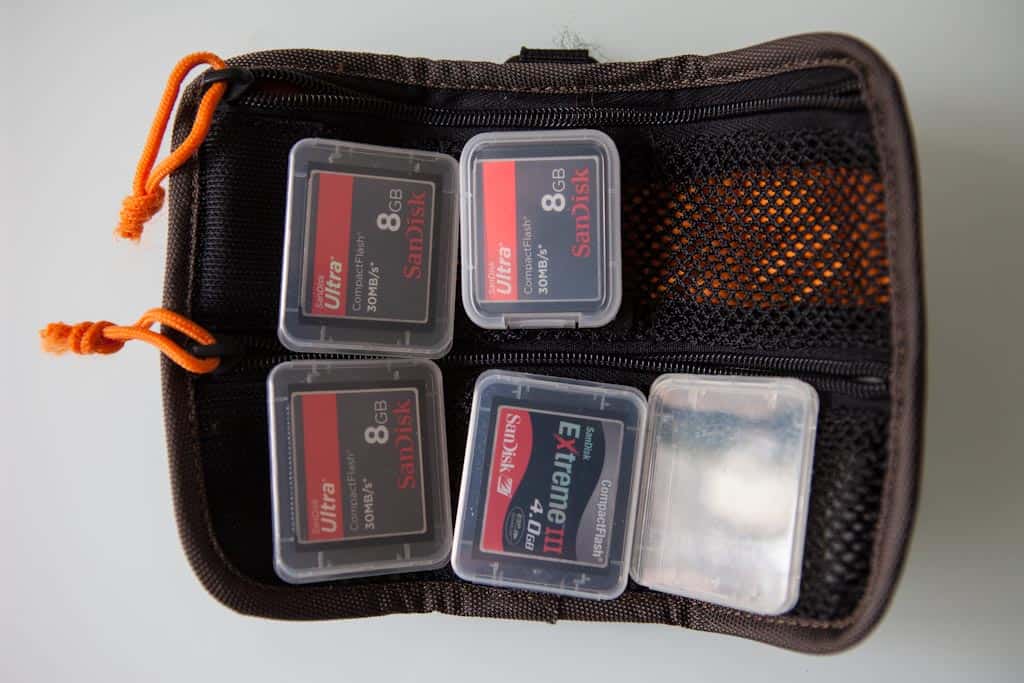
Model: All San Disk ranging from 4GB – 16 GB
Purchased: All over the place – Futureshop, B&H, Adorama
This is what I have: 3x8GB, 1x4GB and 1x16GB (not depicted here since it’s in the camera) = That’s 44GB of memory.
I probably burned through 4 or 5 cycles of these cards which makes for…A LOT of photos right? That is why the Colorspace UDMA was such an awesome device to have. Nothing too special I’ll note about this except for perhaps the system I came up with to make sure that I never lost track of what was empty and what was full and needed to be backed up.
The System:
The top 3 rows were always cards that were fresh and ready to use. The bottom left and middle slot were always for cards that I just finished shooting and needed to be backed up to HD. The bottom right card was for the 4GB card that I seldom used. You just really have to be disciplined in your system because there was a time during my Australia/NZ/Cook Islands trip where I must’ve messed up along the way and forgot to back it up. It was too late when I realized I formatted it and started to shoot over it. When you’ve maxed out a memory card, IMMEDIATELY put it back into the card holder in the right spot, pull out a fresh card from the top row to replace it and advance forward the cards on this row to the right to make sure you’re not always using one card more than the other. Yeah I’m a bit anal like that haha. Hey you need to prevent card failure ok?
Memory Card Reader

Model: Some random brand called Kazee
Purchased: Hong Kong electronics market
I picked this up along the way. I had another card reader with me but it wasn’t that good and was only able to read CF cards while this one read CF and SD. Now you’re probably wondering why I have this when I have the Colorspace UDMA backup HD. Well I did have a laptop with me and so for blogging purposes I needed a way to pull photos off of my CF cards onto the Mac.
If you’re not bringing your laptop this probably isn’t necessary.
Other Camera Gear
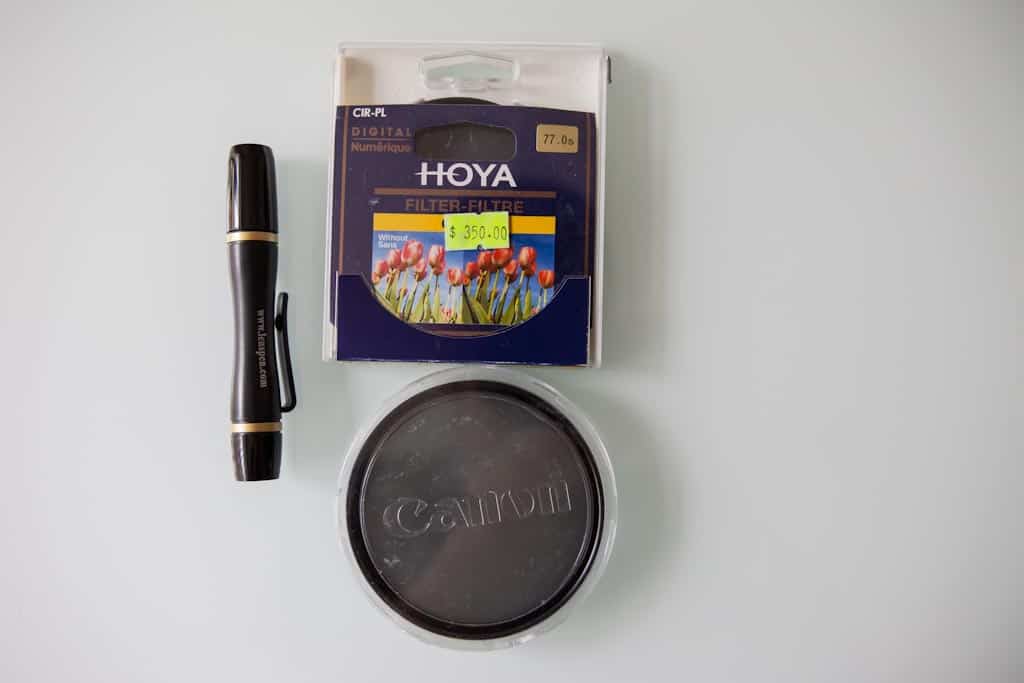
Model: Hoya and Canon filters + Lenspen
Purchased: Hoya from HK, Canon came with my 16-35mm purchase, Lenspen from Blacks
All of these I would consider to be critical for any photographer when on the road. The lenspen is obvious. The Hoya and Canon filters are both circular polarizers which are a staple for landscape photographers. The 77mm is for the 24-70 and the 88mm one is for the 16-35mm.
Yep bring these along.
Tripod

Model: Rollei Carbon Fiber Tripod with Ball Head
Purchased: Camera market in HK (Sim City)
Last but not least is the tripod. This one I struggled with THE MOST out of everything I packed. I knew that this wouldn’t be used very often but was absolutely necessary for sunrise/sunset shots. *sigh the tradeoffs. Ultimately I decided to bring this along because I knew there were going to be a lot of good photo opportunities and didn’t want to miss out. The crazy thing is I originally brought my old Benro travel tripod. When I went back to Hong Kong for the second time on my trip, I did a little bit of shopping and picked up this Rollei Carbon Fiber tripod which is almost half the weight of the Benro. At one point I had two tripods and not one to carry around but luckily I was able to get Chantelle to bring one back to Toronto for me when we met up again in Shanghai.
This one you’re going to have to think long and hard about. For my Australia/NZ/Cook Islands trip, it was an easier decision because we would be renting a car for most of the trip. For this one I had to lug this thing around everywhere and for days when I wanted to use it before dusk and I couldn’t go back to the hotel to pick it up before then, I had to carry this thing from morning to night which was hella annoying. For my next trip I might contemplate buying one of those Gorilla Pods designed for SLRs.
What’s in My Pockets?
Wallet

Model: Sea to Summit Travel Wallet (Small)
Purchased: SAIL (in Toronto)
In the past I used to have a leather type wallet but I found that it just wasn’t functional enough for travelling. I wanted something rugged, lightweight, something with more pockets and more sealed up so stuff doesn’t accidentally fall out. I was shopping around SAIL since it had recently opened up at Hwy 7 and Hwy 400 in Vaughan and saw this travel wallet. What sold me on it was that it was fully zippered on the outside, it has it’s own coin pocket inside that also zips up, has enough slots for cards (4) and a 2 section partition for cash (plus mini pocket along the back). Anyways this really wasn’t meant to be a fashion statement at all. Sometimes when I bust this out I didn’t feel the most “cool” but it was extremely durable and met all my needs.
Never thought I’d actually have a travel wallet but for the type of adventures I was having, I thought this was a well worthwhile investment.
Phone
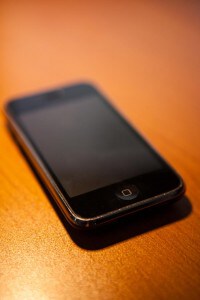
Model: Apple iPhone 3G
Purchased: Borrowed from my friend
Oh god this had to be the slowest phone I could bring on the trip with me but since I had just left my job and didn’t have any personal phone of my own I asked to borrow an iPhone from Hilton. Now I would’ve borrowed a better phone (3GS at least) but it seemed that I could only unlock the 3G. At the time the 3GS was not unlockable after you’ve upgraded to one of the newer baseband versions. Anyways, I knew I wanted to have something to play music and have travel and utility apps for my trip, I decided to stick to this 3G. Phone is obviously critical when you’re travelling in case you need to use it. I don’t think I ever made calls with it other than during my month in Shanghai. In terms of SIM cards, I used one in Hong Kong which I used all the way throughout SE Asia. In Shanghai I got my own SIM and because I was cheap, I just used that same SIM throughout Taiwan, Palau and Japan.
The sad thing with the 3G was that well it was ridiculously slow and I got laughed at more than once when people saw my phone. “IS THAT A….3G??” Okay so bring a phone…hopefully one that doesn’t humiliate you, has some apps and can play music.
Money Belt

Model: Rick Steves’ Silk Money Belt
Purchased: Amazon
I have money belts from previous trips but one thing that annoyed me was how uncomfortable it was. The nylon aways bugged me so I started to do some research and found that a lot of people raved about Rick Steves’ money belt. I had no idea he sold his own gear. The main draw for this one is that it is made of spun silk. The reviews said that it was the most comfortable belt they had owned. On top of that it was supposed to be even more light weight. So I thought I’d give it a shot. On the road, I used this about 40% of the time. I thought it was definitely better than my previous money belts but still annoying to wear. I don’t think anything can really change that. The one lesson learned I will impart on you about the money belt is that you should always keep your cash and other important papers in a zip lock bag within the money belt. Because this is sitting underneath your pants, there isn’t a whole lot of ventilation happening down there so it gets pretty sweaty. In previous trips my bills and random paper would get moist and start deforming. I kept things in a zip lock this time and it worked like a charm.
I ALWAYS recommend to anyone to bring a money belt. You just never know when shit might happen on the road. I always tell people the story of what happened in Paris and how if I was lazy and left my passport in my backpack, I would’ve been extremely screwed when those damn kids stole my backpack at Sacre Coeur but luckily I had all of my essentials in my money belt. Ass saved.
Watch
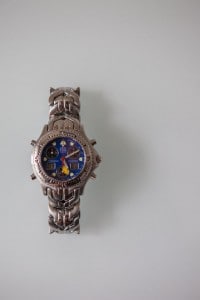
Model: ESQ watch
Purchase: Gift
So this was something I thought was going to be essential going into the trip but once the summer heat started kicking in, I developed this rash around my wrist where I wore my watch. I guess it had to do with the sweat being trapped there and chaffing that would occur. For a good part of the trip I ended up not wearing it and just leaving it in one of my stuff sacks.
This is your preference but I almost feel like with the technology we have today, a cell phone should really be enough.
USB Key
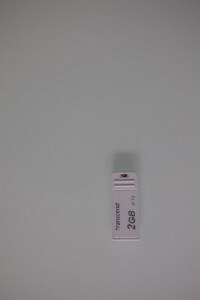
Model: Transcend 2GB super tiny USB key
Purchase: Canada Computers
This is a nice to have if anything but I always bring it with me and put it in my wallet because you never know when you might need to do a file transfer somewhere. The only time I had to use it was during a trip where I went on an excursion and these guys took some photos of me. We later met up and he luckily had a computer and was able to transfer it onto the USB key. At the same time though I’m thinking e-mail these days would work just as well.
Okay now that I think about it, this probably isn’t really all that necessary. Oh well!
Feet Options
Flip Flops
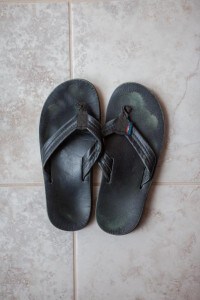
Model: Rainbow Smooth Leather Double Layer Arch
Purchased: Rainbow Store in NYC
Most comfortable pair of flip flops ever. Period. I’ve had these for 2 years now and they’ve battled through every condition I’ve thrown at them. Thank you Jia for show me the light! The awesome thing about Rainbows is that over time the leather sole gets shaped to the shape of your feet so it truly is customized to you. My full review can be found here.
This one’s an obvious one to bring. Just make sure you break them in if they’re new.
Sandals

Model: Keen Newport H2
Purchased: Europe Bound
I already have an in-depth review of these over here. Read the Keen Newport H2 review.
If I were to do it again, I’d definitely bring these along. You really don’t want to have to wear socks on a hot-climate type of trip like I did. These give you the breathability that you want and versatility in the water.
What you should read next
Leave a Reply