Bold claim I know, but in a country where it’s almost impossible not to have the Lord of the Rings soundtrack play as you’re going there and back again, you’ll instantly fall in love with the jaw-dropping landscapes, heart-pumping adrenaline, never-ending ecological playground, and impossibly cute mascot, the Kiwi. It’s a paradise that you have to experience for yourself and that’s where I come in.
Planning for a trip to New Zealand is no easy task and as I was planning my own trip, I was overwhelmed with all the choices and places that we could go. To pass down all the knowledge that I’ve learned from my experiences, this travel guide is meant to get down to the details of what you need to know to plan your own Middle-Earth-sized 3 week New Zealand itinerary.
3 Week New Zealand Itinerary Highlights
New Zealand is a vast, dynamic, yet compact country which makes it easy to explore and see a ton. That said, you still need time to see it properly which is why this itinerary is perfect. You get to see almost everything you want to without having to do any real double backs.
Here were my top 5 highlights of New Zealand:
- Skydiving
- Hobbiton
- Black Water Rafting
- Milford Sound
- Flying Kiwi
Curious where our favourite place we stayed was? More on that below but I highly recommend Arthur Street B&B in Whitianga of the Coromandel Peninsula
Read more about New Zealand
How to get the best deals in travel
- Hottest deals – Bookmark the travel deals page.
- Car rentals – stop getting ripped off and learn about car rental coupon codes.
- Hotels – Use corporate codes or get Genius 2 tier with Booking.
- Flights – Have you ever heard of the “Everywhere” feature?
- Insurance – Make sure you’re covered and learn more about where to buy the best travel insurance.
In This Article
Feel free to jump around!
In This Article
- 3 Week New Zealand Itinerary Highlights
- In This Article
- Your 3 Week New Zealand Itinerary
- Trip Planning Map
- Day 1 – Goodbye Sydney, Hello Queenstown
- Day 2 – Horseback Riding in Glenorchy
- Day 3 – Milford Sound
- Day 4 – Thrills in Queenstown
- Day 5 – The Start of the Reverse Traverse
- Day 6 to 17 – Flying Kiwi
- Day 18 – Hot Water Beach
- Day 19 – Cathedral Cove
- Day 20 – Tongariro Crossing
- Day 21 – Hobbiton
- The trip costs
- What we missed
- The whole experience
- Travel Resources For Your Next Trip
Your 3 Week New Zealand Itinerary
If you want to see the country properly, you need at least 3 weeks, if not more. This New Zealand itinerary was crafted from a trip that came up quite last minute between the months of October and November which landed in the middle of the Spring season. Having been to the country before, I knew that I wanted to put something together that was more thorough than the first time around which meant trying to slow things down a little to see more.
Before we begin, make sure to read all of the basics in the Comprehensive New Zealand Travel Guide. Inside you’ll find the kind of things you need to know when you start planning your very own trip including tips, coupon codes, and travel hacks.
Trip Planning Map
This is a detailed driving route and key highlights custom map that I created for this itinerary. One thing you’ll notice that the Flying Kiwi portion of the trip is left basic as you can check out their tour itinerary for the full details for the sake of simplicity.
Tip: View the New Zealand planning map in full screen and create a copy for yourself. Make tweaks for your own trip and in Google Maps, you’ll be able to view it by going into the menu, selecting “My Places” and the “Maps” tab.
Day 1 – Goodbye Sydney, Hello Queenstown
There’s a lot of ways to start your journey through New Zealand but with efficiency in mind and to make the most of the 3 weeks, I knew that this itinerary had to be a one-way route from the South to the North Island or vice versa. Ultimately, logistically, things made more sense to start in Queenstown because of flights and spots open on Flying Kiwi’s Reverse Traverse.
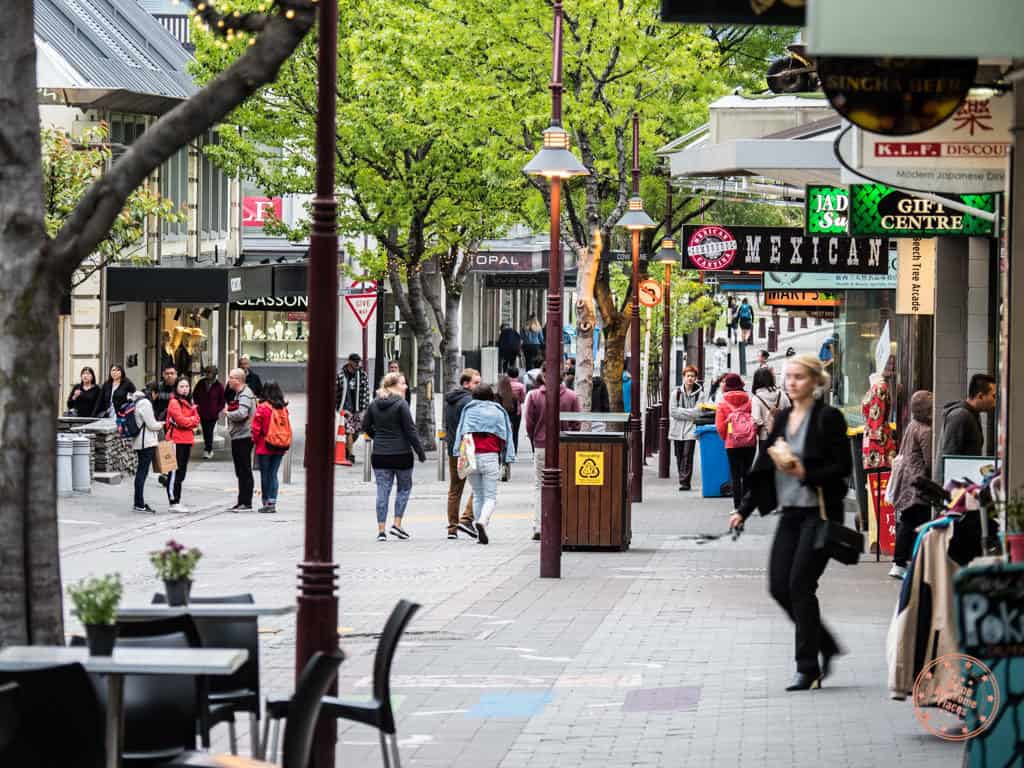
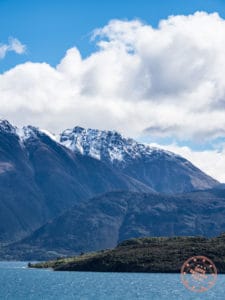
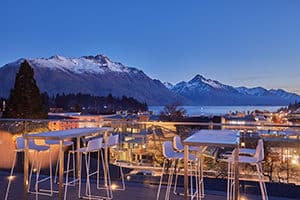
What you’ll love about this is that Queenstown in the South Island is a really awesome spot to start off in and get acclimated. It’s a place where you’re going to want to base yourself at least for a couple of days and that means it won’t be go-go-go right from the beginning. Out of all cities in New Zealand, it’s also my favourite so you’re in good hands.
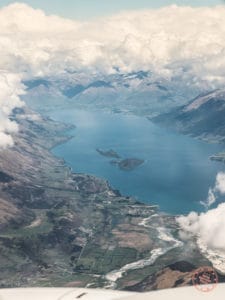
Since direct flights into Queenstown aren’t likely, you’ll be likely coming in from somewhere like Sydney such as I did or transit via Auckland. Wherever you come from, get ready for one of the most scenic landings you’ll ever have. On approach you’ll see the fjords, giant snow-capped mountains, glistening lakes, and fields dotted with the white wool of sheep.
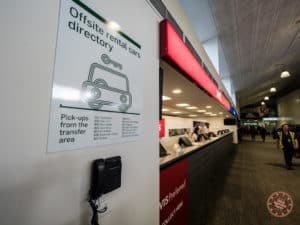
The Queenstown airport is small but really easy to navigate and your first step once you get your bags is to grab your car rental. If you followed my recommendation by booking with Snap (formerly Hitch), head over to the courtesy phone beside the Avis counter and let them know you’re here. A van will come around the shuttle pick up loop and you’ll be set up with your eco-box car in a jiffy at their off-site office. First thing though is to remember that you’ll be driving on the left side of the road so take some time to get used to that and think twice at intersections.
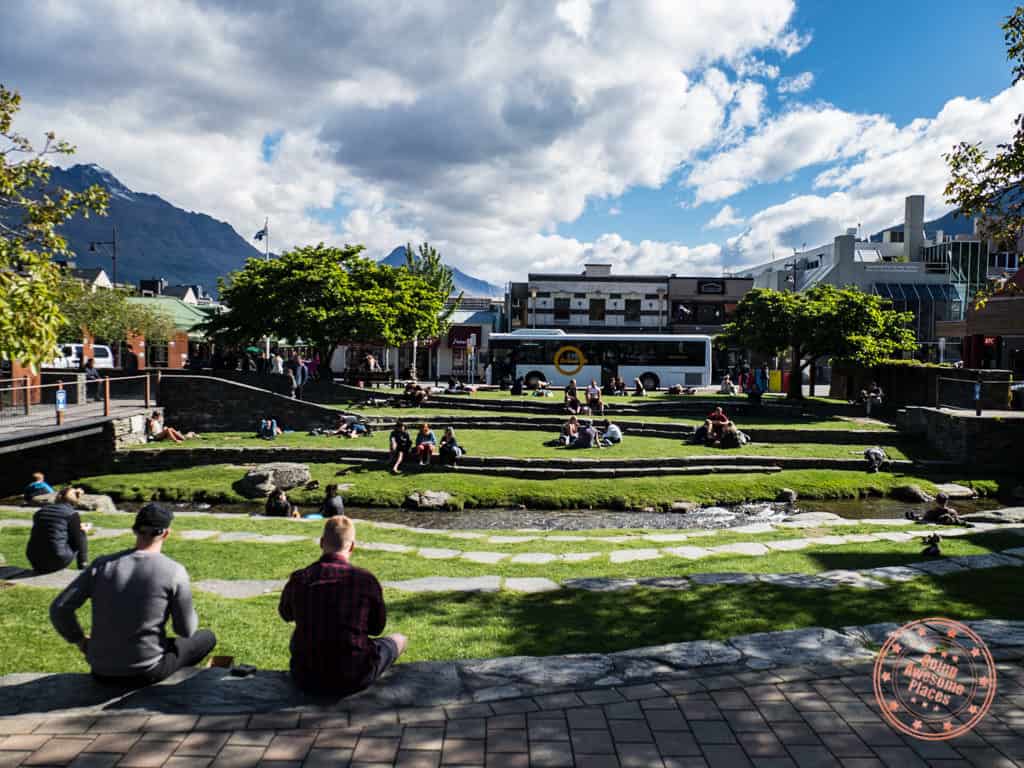
Your first day mainly consists of getting settled in and then exploring the downtown streets of Queenstown so take it as time to get to know the city and walk everywhere. The stores may close early but a bunch of souvenir shops stay open a little later.
Finish off the night by grabbing dinner at the quirky and cozy Italian restaurant tucked in the corner of an alleyway named Cow Restaurant. From its namesake, you learn that this used to be an old cow milking shed. Inside you’ll find a ton of memorabilia from Queen Victoria period. The pizzas are the best item on the menu hands down and might I add very large. The best bang-for-buck is the large 14-inch size.
What you’ll see:
- Downtown Queenstown
Where you’ll eat:
Where to stay:
We never would’ve thought we’d be able to find something like this on Booking.com but it really goes to show you how they’ve stepped up their guesthouse game.
WE STAYED HERE
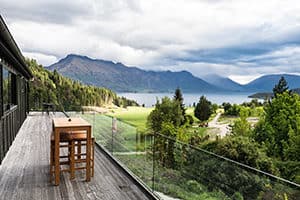
While not in downtown Queenstown, this converted upscale cottage home is set with the perfect view of Lake Wakatipu and The Remarkables. There’s an on-site maid which is why everything is so ridiculously clean. Bonus that it includes laundry facilities.
GREAT ALTERNATIVE
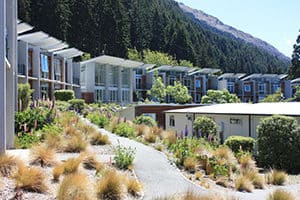
QUEENSTOWN LAKEVIEW HOLIDAY PARK
While you’d think a holiday park is mainly for campervans and RV’s, they actually have private lodges available that are fully equipped. They’re located in a great spot, walkable to the downtown, and quite luxurious.
TIP: Parking in Queenstown can be tricky but the best free street parking we found was on Brecon Street. This spot is good for 240 minutes (4 hours) of free parking (8AM – 6PM, 7 days a week). In the middle of the day, spots get filled up really quickly but the evenings seemed to be easy.
Day 2 – Horseback Riding in Glenorchy
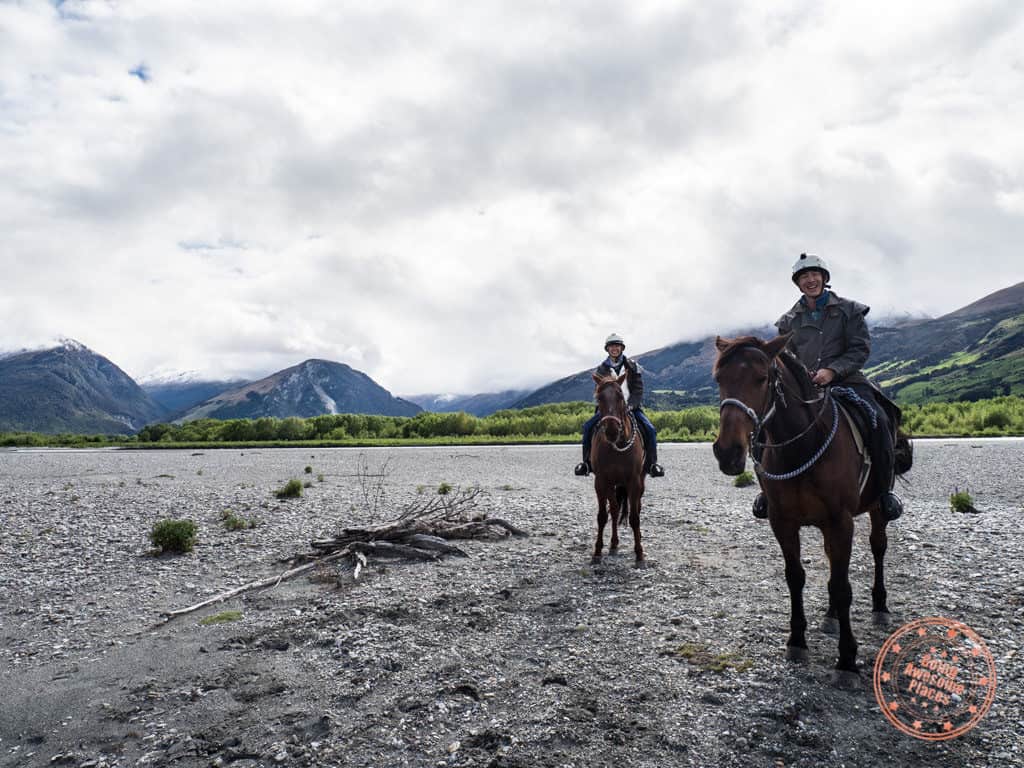
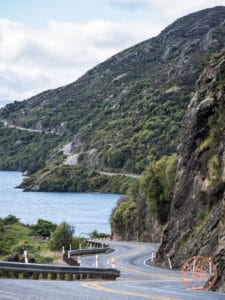
Your first full day starts with an early morning drive through the stunning drive to the town of Glenorchy. The drive alone is an attraction on its own so make sure you account for a lot of stops along the way. The moody morning fog and rising sun with the mountains as the backdrop make for a dramatic scene as the road skirts the pristine shores of the lake.
The best way to take in the landscape around Glenorchy is neither on foot or by car. It’s by horse and that’s why the early morning start is needed. The check-in time at the Dart Stables office in Glenorchy is at 7:50AM. Once you’re all geared up, a shuttle will take you to the location of the stables near the foothills of Mount Alfred. What makes the 2-hour River Wild experience such a treat is that you’re able to comfortably ride around the backcountry of the Dart Valley in a small group. Their guide are extremely knowledgeable and will tell you all about the different locations used by films such as Lord of the Rings.
When you’re done, you’ll be famished so head into the small and charming town of Glenorchy which has a fantastic little cafe called The Trading Post which is also next to the beach and wharf which are all worth a walk to.
TIP: If you have a drone, this is THE place to fly it so make sure you’re all charged up when you get here.
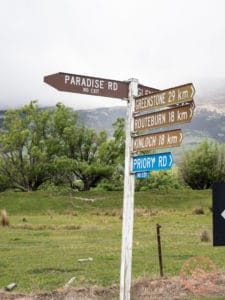
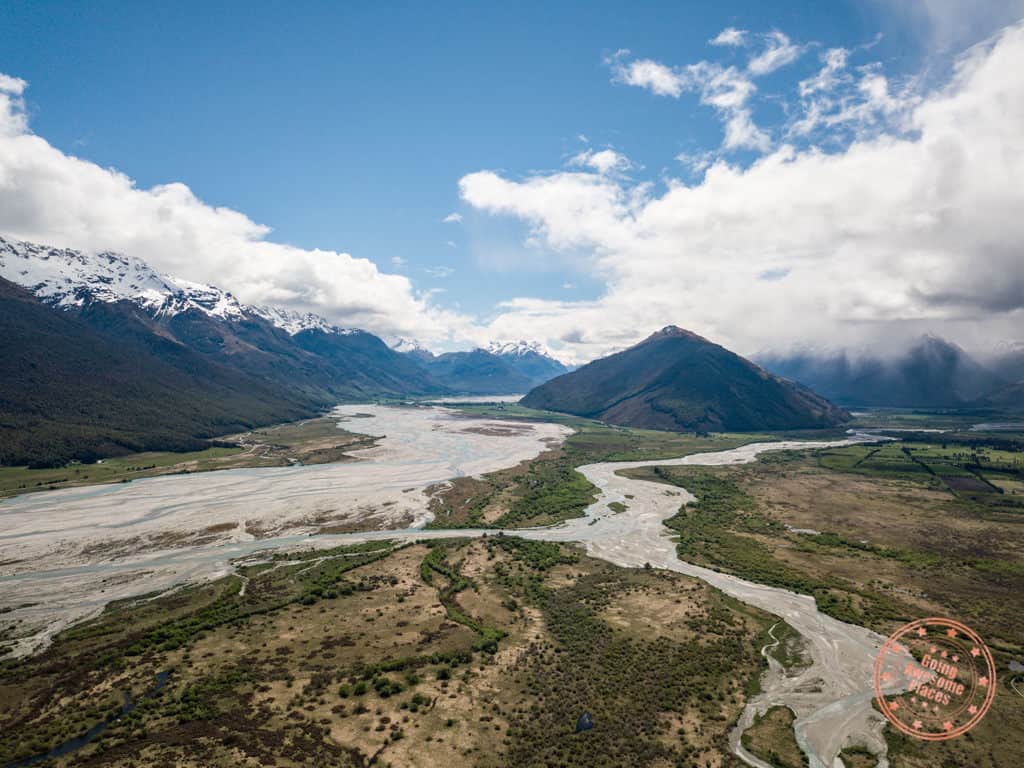
Hit the road again but before you leave Glenorchy, take the drive into Paradise. Now there is an awesome 4WD Lord of the Rings Tour which heads in there and is probably more comprehensive but if you have your own car, you can easily drive the gravel road yourself. You’ll see road signs pointing towards Paradise (pun intended) and all you have to do is follow that one way road in. If you take a look at the map, you’ll see roughly the spot that we drove to and turned back. This is the area where X-Men: Origins and Lord of the Rings/Hobbit scenes (Beorn’s house, final fight in the forest in Fellowship of the Ring, Isengard) were filmed.
Gauge your time as you’ll need to make a 3 hour drive to Te Anau. This is another drive that will be filled with many scenic stops. Ideally you’ll want to make this drive with the sun still up as well.
When it comes to Te Anau, there isn’t too much to do here but if you are looking to do something to close out the night, there’s a fun little zip-line that they’ve built into Lions Park and sunset over Lake Te Anau from the beach is also quite pretty.
Before calling it a night, make sure to pick up food and snack supplies for Milford Sound. There’s a Four Square in the town centre where you can grab everything from breakfast food, sandwiches, drinks, granola bars, chocolate, and even hot dinner if you’d prefer to do your own thing
MUST-DO: Fill up your tank. Do not make the same mistake we did where we ran out of fuel when we got to Milford Sound and that whole debacle.
What you’ll see:
- Glenorchy town & wharf
- Paradise
- Te Anau – Lions Park and Lake Anau
What you’ll do:
Where you’ll eat:
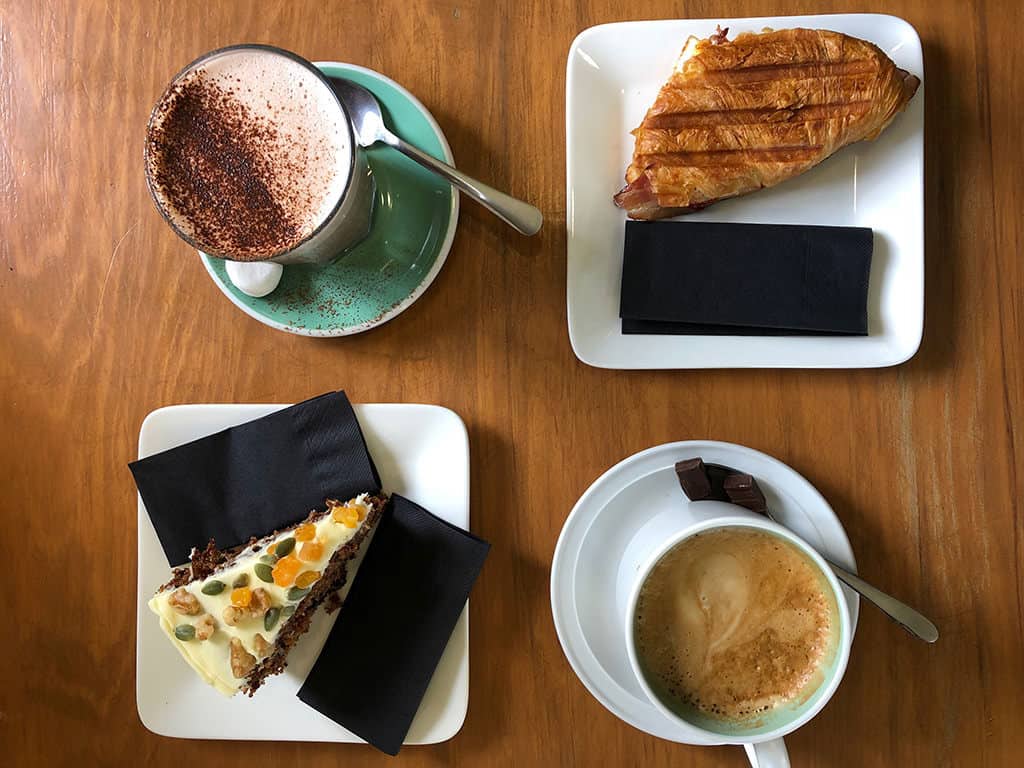
- Lunch – The Trading Post – Awesome little cafe with delicious croissant sandwiches and carrot cake to die for.
- Dinner – Bailiez Cafe – Run-of-the-mill restaurant with an affordable special menu. Choices are limited in Te Anau and prices quite high for what you get.
Where to stay:
WE STAYED HERE

I’ve stayed here twice and each time I’ve been very happy with its balance of location, price, comfort, and availability of private en-suite rooms. It’s a hostel but it’s a good option for anyone travelling through Te Anau.
GREAT ALTERNATIVE
If you’re looking for a property that’s not a hostel but at a similar price to the YHA, this one is a great alternative that also offers a barbecue area, free parking and free Wi-Fi access.
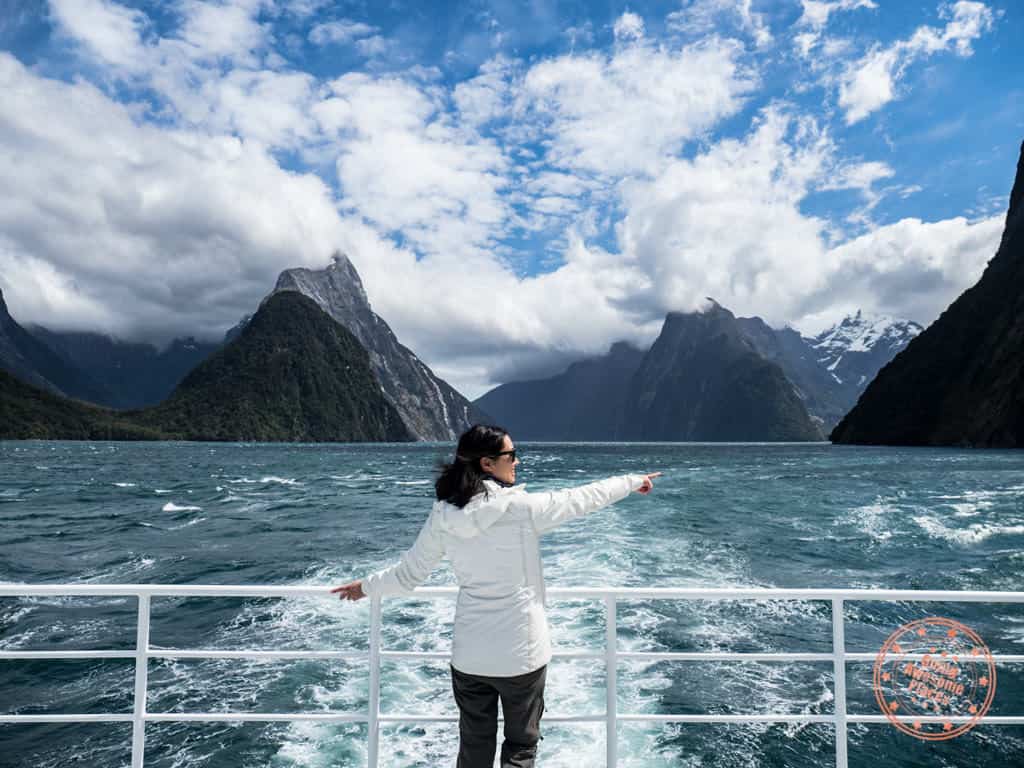
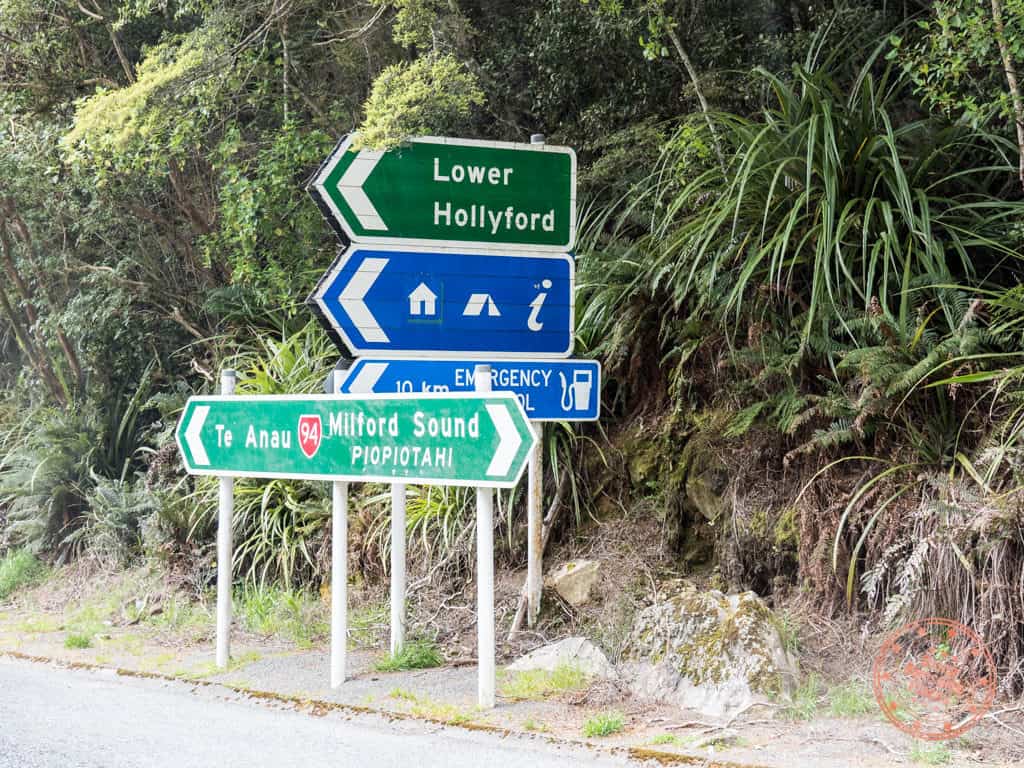
Day 3 – Milford Sound
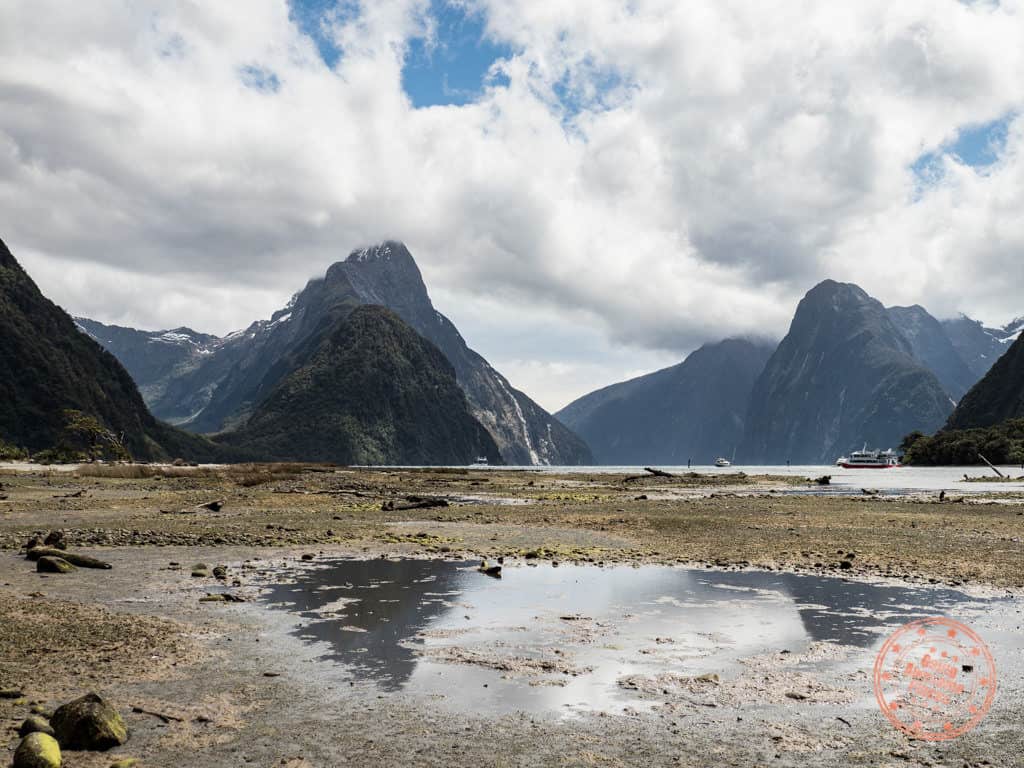
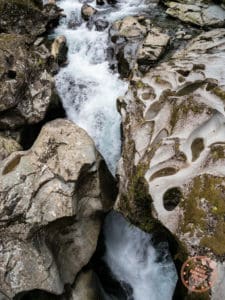
As I mention in the Top 5 things to do from Queenstown, one of the jewels of the New Zealand is its largest park, Fjordland National Park. Deep in the park is the indigo blue waters, flanking mountains, and thunderous waterfalls of Milford Sound. Carved by glaciers millions of years ago, this is a sight you have to see in person and one of those places that if you missed, you’d have serious FOMO (fear or missing out).
The main reason to split up your time in Queenstown with a stay in Te Anau is to maximize the time you can explore the park. The issue I have with day trips is that you end up wasting too much time on the road in a single day.
My recommendation is to book the first cruise of the day with Southern Discoveries. There’s a couple of good reasons for this:
- Minimal traffic on the drive to Te Anau including Homer Tunnel
- The first cruise is typically discounted and it comes with a hearty breakfast buffet
- The morning light at Milford Sound is stunning and much better than the harsh light that you get mid-day.
The drive from Te Anau is only 1 hour 45 minutes but account for 2.5 hours as you’ll be tempted to stop A LOT especially once you enter Fjordland National Park. Just remember that you’ll be taking the road back out.
TIP: You won’t have any data the whole day so make sure you’ve made everything available offline on your phone including navigation. This is where something like maps.me (iOS/Android) comes in handy. If there’s a photo stop you have to skip because of time, just star it and come back on your way out. I talk about how I use maps.me as an offline map tool.
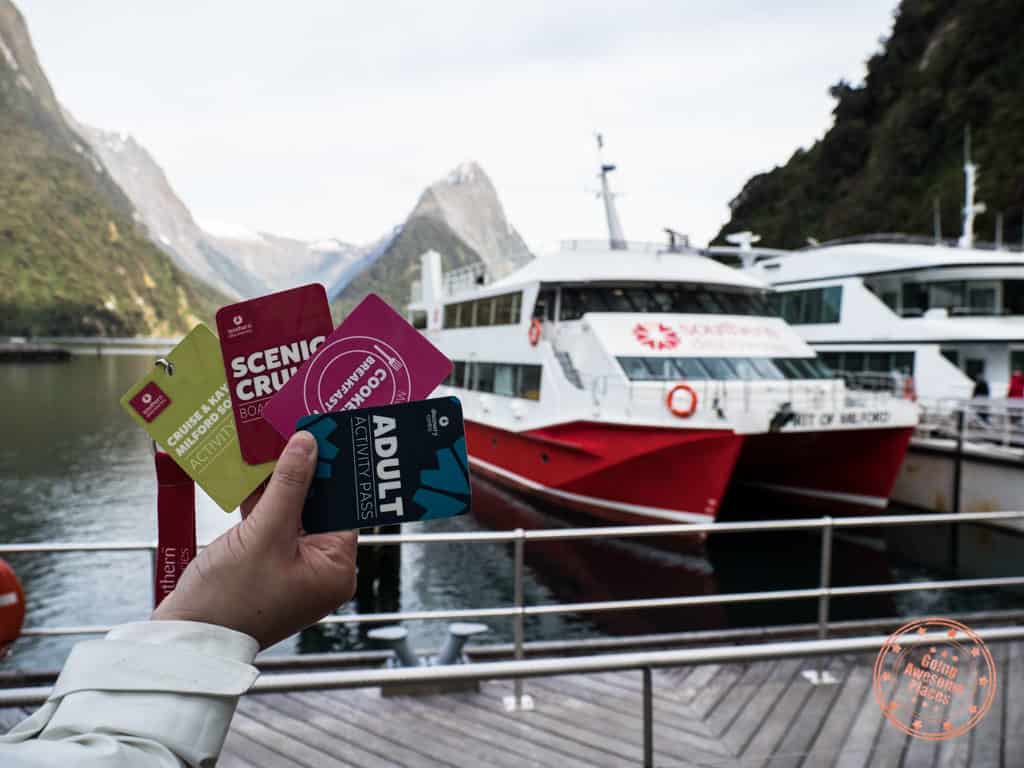
Everyone parks in the same giant lot once you get to Milford Sound and from there you walk over to the cruise terminal where all ships embarks from. Simply show your voucher and you’ll be given the passes you need to board.
The cruise is the best way to see the entirety of Milford Sound starting from the terminal, out into the open waters of the Tasman Sea and then back in. If you booked the cruise and kayak option, you’ll be able to get off at the Discovery Centre which will give you the opportunity to go down to the underwater observatory to see the very rare black coral, followed by a 1 hour kayaking session in Harrison Cove. Personally, this is a great combination because you get to take your time to see the grand scale of Milford Sound from the boat and then experience it in a completely different way on the water and up close to the walls of the fjord.
TIP: We found that things are a little rushed when your kayaking session starts. When you’re done at the underwater observatory, ask the staff if you can get geared up earlier so there’s a bit more buffer time.
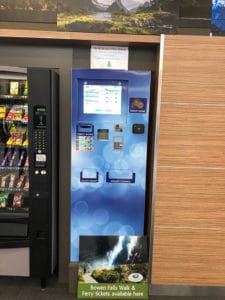
Back at the terminal, decide whether you’re interested in the Bowen Falls Track (NZ$10 – adult, NZ$5 – child) which you can pay for at a kiosk beside the coffee and vending machines. Alternatively, you can buy it from your cruise operator. Tickets are required because a short boat ride is required. When we were there, we decided to skip it because we didn’t know whether it was worth it or not but this is a short track to Lady Bowen Falls that only re-opened in 2018 after being closed for 15 years. It’s a shame that it isn’t well promoted but if you’re interested definitely inquire about it.
TIP: Depending on the tide, I encourage you to head out from the parking lot and towards that iconic view of Mitre Peak. At low-tide you can walk pretty far out and has pretty awesome reflections.
Once you leave Milford Sound, it’s up to you how much more you want to see. There are a ton of photo spots but the main ones to look at for are The Chasm and Humboldt Falls. The Chasm is right off the road so it’s easy to get to. Humboldt Falls requires you to turn off onto the Hollyford Track at the Marion Corner. From there, it’s a very long 4 hour drive back to Queenstown.
TIP: Gunn’s Camp on Hollyford Road carries emergency fuel if you need it. The mistake we made was realizing we didn’t have enough so we turned back to Milford Sound only to realize that their machine was broken which left us stranded.
Depending on what time you get back into town, you can either have a sit-down dinner or pick up something on the way back. Because of our gas issues in Milford Sound, we had to abandon our original plan to have some budget Thai food and just munched on the remainder of our snack food.
What you’ll see:
- Milford Sound
- Bowen Falls Track
- The Chasm
- Hollyford Track’s Humboldt Falls
What you’ll do:
Where you’ll eat:
- Lunch – Packed with supplies from Te Anau
- Dinner – Bronze Elephant Thai
Where to stay:
Looking or something affordable in the city, we ended up with a budget hostel.
WE STAYED HERE
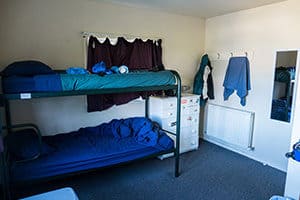
I’ll be honest, not exactly our favourite property especially since we were booked here for 2 nights but you get what you pay for. We found that most people staying here were international employees and so really felt more like a university dorm than anything else. Luckily they have free parking.
GREAT ALTERNATIVE
Centrally located hotel that isn’t going to run you through roof. As a new hotel, everything is modern and extremely comfortable. On top of that, they have an incredible rooftop patio that offers spectacular views since it’s on a hill and facing the lake.
Day 4 – Thrills in Queenstown
After a couple of days on the road, it’s finally time to enjoy everything that Queenstown has to offer. Yes, over the years it’s become even more touristy with the influx of Chinese tour buses, and stores like Louis Vuitton taking over (I know…why???) but there’s still a lot of charm to this town. I liken Queenstown to a really laid back ski village like Park City in Utah.

There’s an overall buzz and excitement to the city whether it’s from people getting psyched for an upcoming adventure activity, going on a fancy night out, or shopping till something drops.
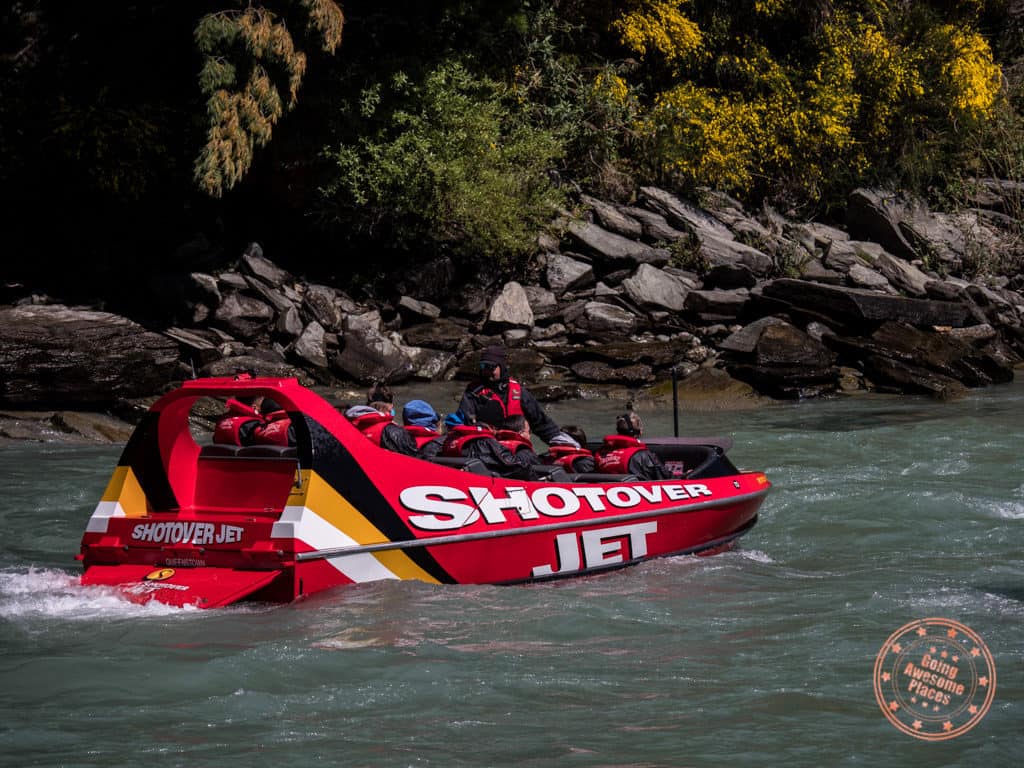
Instead of a flat white to start your day, head straight to Shotover Canyon for what has to be the most ridiculous boat ride known to man. It’s called Shotover Jet and it’s an action packed experience that has you barreling through the canyon and boulders at unreal speeds, and pulling 360 degree spins that’s something out of a James Bond stunt team. The only thing you can do is hold on to the metal bar in front of you dearly and screen at the top of your lungs.
TIP: Read about the whole experience as part of the best things to do in Queenstown.
Head back into town and spend the rest of the day on foot. There are plenty of stores to browse around. This is also a good chance to buy any last minute supplies you might need before you hit the road again. For example, if you forgot waterproof pants or need an extra layer, a store like Mountain Warehouse has reasonably priced gear.

When you’re hungry, it’s time to finally go to my favourite burger place in the world – Fergburger. New Zealand is probably the last place you’d think would have legendary burgers but this is it. There’s a reason why the line up goes out the door and why they’re open 21 hours a day. My recommendation is to either try to Chief Piggum or the Ferg Deluxe. Also, the hand-cut pepper & squid is a new revelation from this recent trip. Wasabi mayo will change your life!
TIP: To avoid the lines, call in to make your order (full menu). That way, all you have to do is pick up your food at the window when it’s ready.
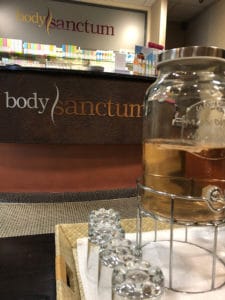
To round this out, make a reservation at the Body Sanctum Spa for a little bit of relaxation therapy. Another popular spot that is impossible to book is Onsen Hot Pools. From their private pools, you get pretty incredible open views of the Queenstown landscape. If you’re keen on doing this, make sure to book at least 4 months ahead of time.
For dinner, if you’re up for a lighter and healthier, grab some food at Rehab which has a great selection of salads and cleansing juices.
With Flying Kiwi starting the next day, the last thing you’ll have to do is return your car to avoid having to deal with it tomorrow. This part gets a little bit complicated because you’ll drive your car back to the airport for the return but will then need a way back into the city. If you’ve read our Queenstown guide, you’ll know that taking the bus is not cost effective at all so call an Uber and get him/her to pick you up closer to the airport since they’re not allowed inside.
This is also probably a good night to do laundry.
What you’ll see:
- Downtown Queenstown
What you’ll do:
Where you’ll eat:
- Lunch – Fergburger
- Dinner – Rehab (sadly permanently closed now)
Where to stay:
- Same location as the previous day
Day 5 – The Start of the Reverse Traverse

With the Queenstown leg coming to a close, there isn’t much time to do anything substantial for this day since the Flying Kiwi pick up is at 2:30PM. As a result, take your time, gather your bags, check-out, and head into the downtown.
The only challenge you’ll have is you’re going to be travelling around with your bags. If you’d like to walk around town without them, you’ll need to go to the Baggage Storage by Smarte Carte inside the O’Connells Shopping Centre (NZ$13 per day for small items and $16 per day for large items).
If you’re hungry, there’s an excellent cafe named Vudu Cafe & Larder. While you’re there, make sure to grab a flat white, avocado toast, and ginger crunch bar. They’re also known for their vegan food if you have any dietary restrictions.
What you’ll see:
- Downtown Queenstown
Where you’ll eat:
- Lunch – Vudu Cafe & Larder
Where to stay:
Day 6 to 17 – Flying Kiwi
Heads up about Flying Kiwi
If you gone over to the Flying Kiwi Reverse Traverse Review, you’ll see that they’ve been acquired by Stray. They’re now back and running but they no longer offer the Reverse Traverse.
The good news is that much of the 14 day Reverse Traverse can be replicated on your own if you have a rental car.
Since the Reverse Traverse tour isn’t published anymore, we’ll do a quick breakdown of what days 5 – 18 should look like:
- Day 5 – Queenstown to Boundary Creek – Leaving Queenstown, you’ll largely be driving on this day to get your first campsite. Stop at one of the local farmer’s markets in Cromwell along the way. Stay at the Makarora Rest Station.
- Day 6 – Boundary Creek to Fox Glacier – Visit Blue Pools, Thunder Creek Falls, Ship Creek, try whitebait in Haast. Stay at Fox Josef Top 10 Holiday Park cabin.
- Day 7 – Fox Glacier to Okarito – Fox Glacier climb/heli-hike (weather dependent), Lake Matheson hike, spring bridge over Lake Matheson, Franz Josef Glacier Hot Pools, camp at Okarito Beach.
- Day 8 – Okarito – Punakaiki – Sunrise on Okarito Trig Walk, explore Hokitika (greenstone stores, pie, and National Kiwi Centre & Aquarium), enjoy the west coast drive towards Punakaiki, sunset at Punakaiki Pancake Rocks.
- Day 9 – Punakaiki to Marahau – Drive through Buller Gorge, pitstop at Berlins Cafe & Bar, Skydive Abel Tasman.
- Day 10, 11 – Abel Tasman – 2 day Ocean and Earth kayaking + hiking tour with Marahau Sea Kayaks including camping at Anchorage campsite. Final day camping at Old Macdonalds Farm.
- Day 12 – Marahau to Wellington – Stop in Nelson to grab a bite at Deville and walk around town before a wine tour in Marlborough (Saint Clair Family Estate) before arriving in Picton to take the Interislander ferry over to Wellington. Stay at a hgotel in Wellington.
- Day 13 – Wellington to New Plymouth – Start the day going to Weta Workshop’s “The Weta Cave” before hitting the road again with stops in Otaki, views of Mount Taranaki along the way, and setting up camp at Fitzroy Beach Holiday Park and then head out to the Te Rewa Rewa Bridge for sunset.
- Day 14 – New Plymouth to Auckland – Waitomo to do the Legendary Black Water Rafting and drive into Auckland. Stay at the Jucy Snooze Auckland. Have dinner at The Lula Inn.
- Day 15 – Auckland to Paihia – Start with breakfast at Shaky Isles in Auckland. Beach time in Urititi, stop in Kawakawa, Haruru Falls (including mangrove hike on Waitangi Trail). Camp in Paihia.
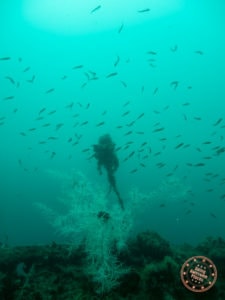
- Day 16 – Paihia Diving – Scuba diving with Paihia Dive to see the Rainbow Warrior wreck and Seal Bay.
- Day 17 – Paihia to Orewa – Sandboarding in Hokianga, Tane Mahuta Walk (see giant kauri tree), lunch in Dargaville. Camp at Orewa Beach Holiday Park.
- Day 18 – Orewa to Auckland – Final stretch back to Auckland which the next section picks up.
We put together a pretty cool montage of behind the scenes stories we shared from our entire trip so make sure you watch that!
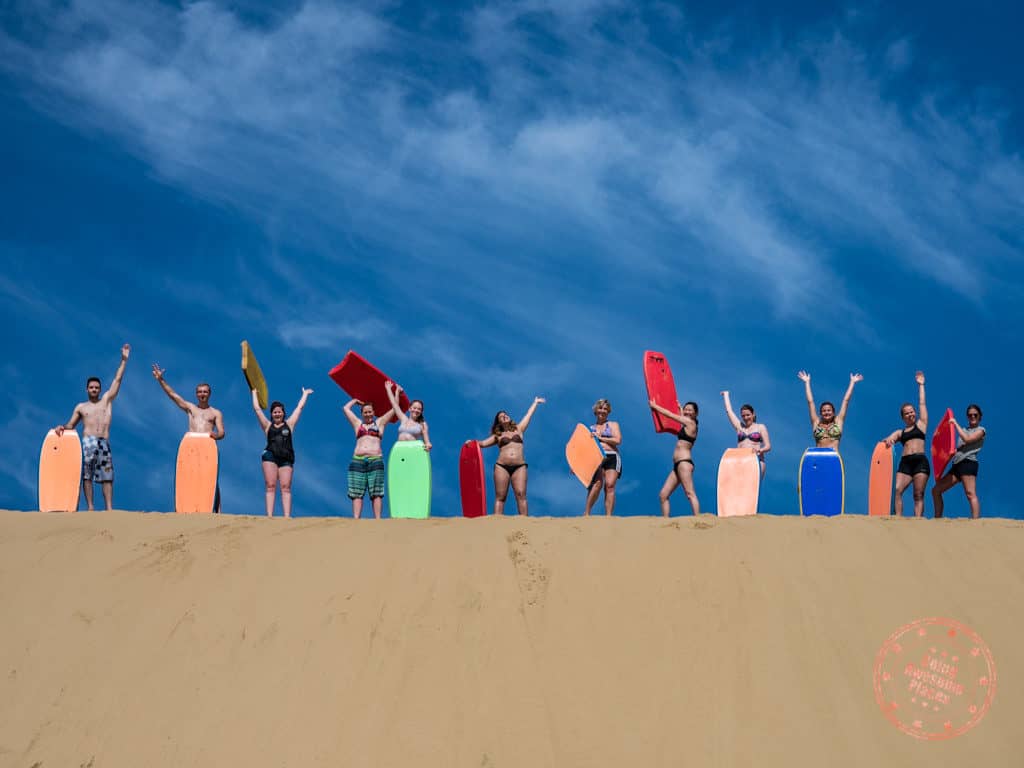
In retrospect, this was a really cool hybrid road trip itinerary because we got to spend 2/3 of the trip guided by experts and travelling with new friends that we met on Flying Kiwi. Their route is really well curated and gave us a chance to do much of what we wanted to see including highlights such as The Legendary Black Water Rafting, skydiving in the Abel Tasman, diving in the Bay of Islands, and our kayak and hiking combo in the Abel Tasman.
Day 18 – Hot Water Beach
On the last day of your Flying Kiwi adventure tour, you’ll be returning back to Auckland. After saying a fond farewell to your new travelling mates, you will be on your own again. While it’ll be tempted to stay in the city for the day, the truth is that your time is better spent elsewhere (sorry Auckland!)
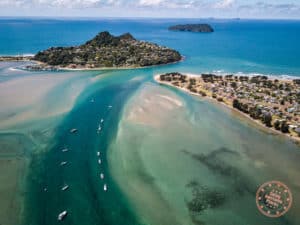
Considered to be off-the-path and often missed in most New Zealand itineraries is somewhere called the Coromandel peninsula which sits almost parallel to Auckland but on the East coast. The landscape changes dramatically here and is a mix of gentle beaches, rugged coves, forest-filled mountains, and a haven for local vacation-goers.
Start off by grabbing your rental car and again I recommend Hitch as they have hands-down the cheapest rate. Just keep in mind, their cars are quite outdated. Like in Queenstown, their offices are off-site so wait for their shuttle in the designated area of the terminal.
TIP: Need a cheap way to get from the city to the airport? Ride the SkyBus Auckland City Express which has several pick up points downtown, runs 24 hours a day everyday, and should take less than 45 minutes to get to the airport. Book your tickets online to get a cheaper rate (NZ$17.50 one-way for an adult). It’s cheaper than a taxi/Uber for sure.
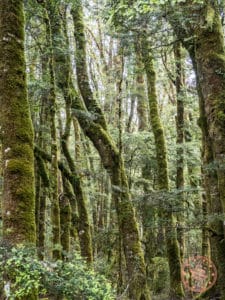
Hit the road and set your GPS to Whitianga. If you’re a car enthusiast, you’re going to love the roads especially once you get into the mountains and you get to drive around the switchback windy and scenic roads that take you through Coromandel Forest Park.
Along the way, I recommend stopping at Tairua which is a great pitstop to grab fresh fruit frozen ice cream and perhaps even fly the drone if you have one.
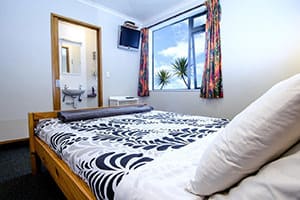
Whitianga is the closest large city which is why you’re headed that way as there are a number of good accommodation and dining options there. When you get there, drop off your bags, settle in, and get ready to head out. If you’re staying at a B&B like ours, they’ll have buckets and shovels available so make sure to load them into the car.
TIP: How you plan out the rest of your afternoon or evening will solely depend on the tides at Hot Water Beach. When we were there, it happened to be at 5PM. The best time to be at the beach is anytime in the +/- 2 hours range (3PM to 7PM in our case). Factoring in the 30 minute drive from Whitianga and sunset time, you will either only have time to do Hot Water Beach or both Cathedral Cove and the beach.
If you don’t want to rush things, I’d recommend just doing Hot Water Beach since it’s not the kind of thing you can jump in and out and you want to make sure you have enough time to do grab dinner.
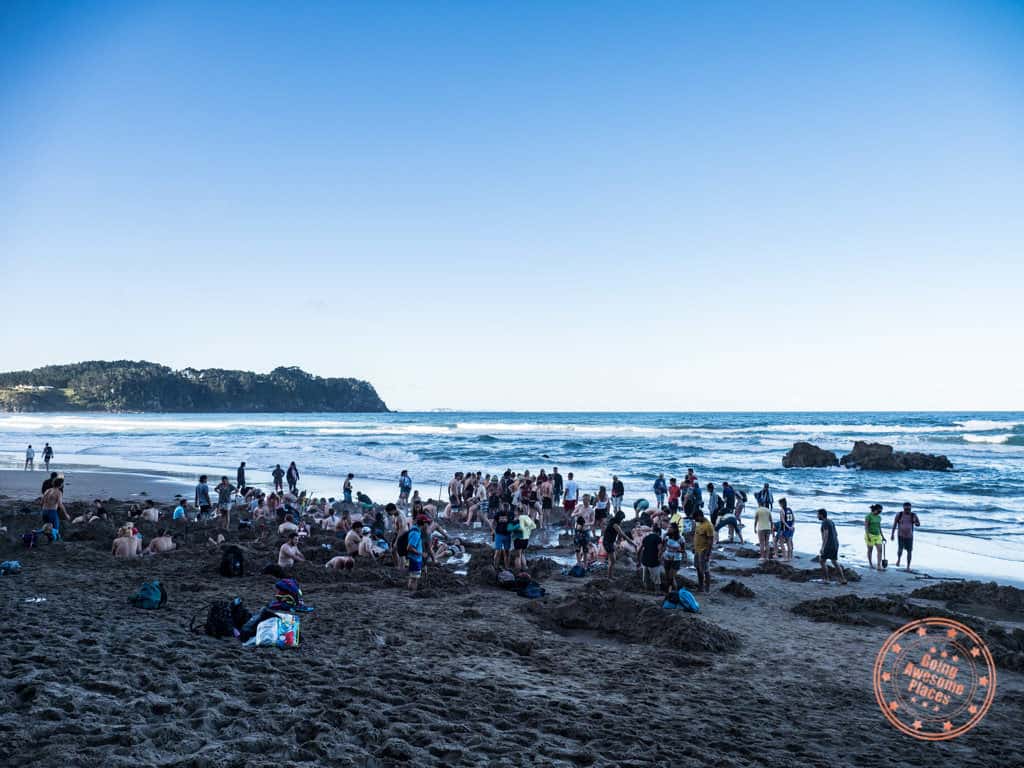
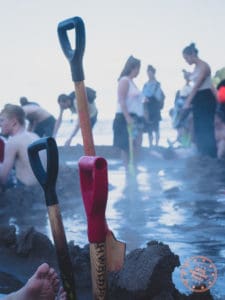
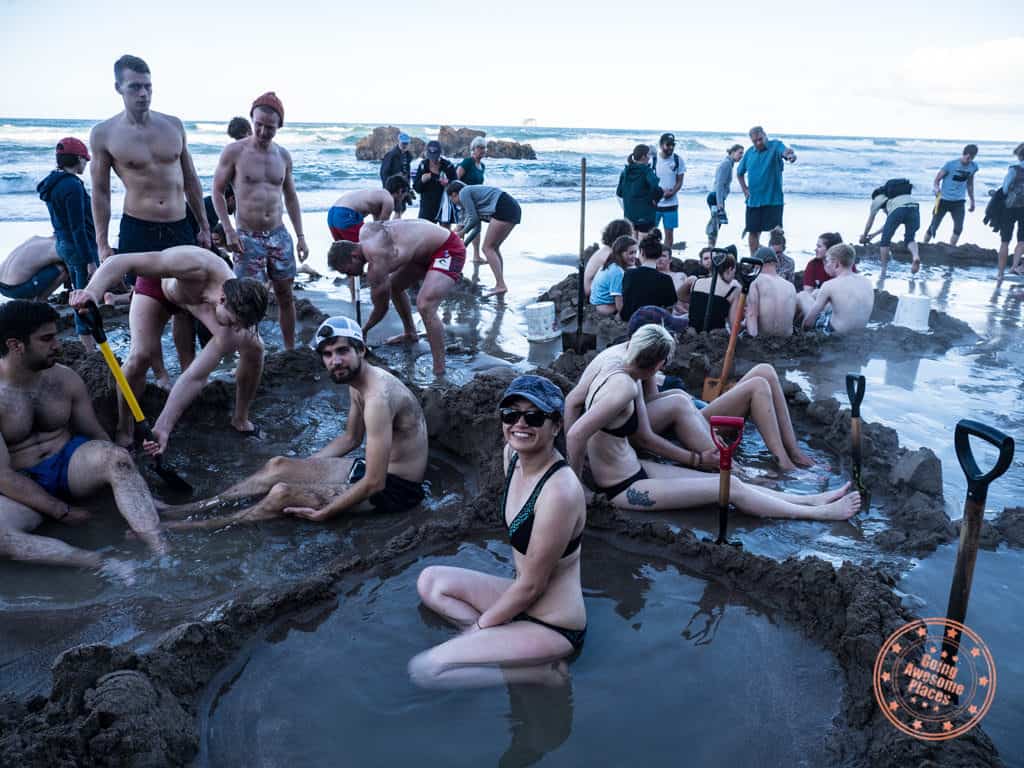
Hot Water Beach highlights an incredible phenomenon where volcanic activity well below the surface heats up an underwater river and bubbles to the surface at low tide. Armed with a spade to dig up your own personal pool and bucket to bring cold water from the sea to cool the water down, this is the most outrageous way to spa that I’ve ever experienced but you’ll love it because you’re forced to get your hands dirty. It’s a cross between treasure hunting and frantic digging and re-digging to maintain your own spa pool in the sand. It’s hard to describe but once you get there, just look for the crowd of people and you’ll know what to do. Budget 2 hours here.
WHAT YOU NEED TO KNOW
Location: From the main car park, cross the stream and the good places to dig are just north of the first giant boulder and before the rocks that stick out in the water. In most cases, just follow the crowd.
Low Tide: Check for low tide before going
Parking:
- There are 3 main lots: The Main Beach carpark (free), Te Waiwai carpark (free) and the Main Store carpark (paid)
- You can also pay for parking at Hotties Cafe, Hot Waves Cafe and the Hot Water Beach Top 10 Holiday Park
- If the free lots are filled, look out for open spots along Pye Place road before or after the Main Beach carpark
What to bring:
- Spade and bucket – You can rent them at the beach if your accommodations don’t have them to borrow
- Swimwear
- Towel
- Shower gel, shampoo and conditioner
Tips:
- For the best experience, show up 1 hour before low tide or right at low tide. If you show up later, the beach will be littered with holes and there won’t be any opportunities to dig up a fresh hole since they’ll already be taken. Showing up earlier will also have the advantage of finding free parking
- Instead of renting a spade and bucket, just ask to borrow one from someone else on the beach
- Use the bathroom at the change rooms as there are no facilities by the beach
- The easiest way to tell if there’s hot water underneath is to use your spade once and then dig your feet in to feel the temperature. If it’s cool, there’s no point in digging further and move onto another spot
FAQ:
- Where can you put your bags? – I’d recommend keeping your valuables in the car as there’s you’ll have to put faith that nobody will take your things. Most people will put their bags on or near the mound of boulders inland from the beach. I recommend putting your things close to others and cover your things with your towel
- Where can I change? I’d recommend putting your swim wear on in the car or at your hotel/B&B ahead of time. When you come out of the beach, there’s a new change room facility which is well maintained and clean
- Where can I shower? There are open showers just outside the change facility to rinse your feet and wash up
When you’re done, drive back to Whitianga and have the best seafood of your trip at a restaurant called Squids.
What you’ll see:
- Whitianga
- Hot Water Beach
What you’ll do:
- Hot Water Beach
Where you’ll eat:
- Lunch – No specific recommendation as we snacked in the car but if you’re hungry, I recommend eating near Auckland because there is not much once you head out
- Dinner – Squids Bar & Grill (unfortunately permanently closed)
Where to stay:
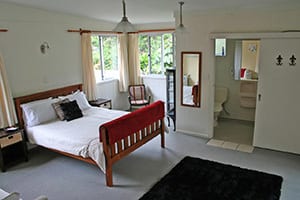
WE STAYED HERE

Friendly hosts, fully-stocked rooms (including breakfast items), easy parking, and extremely comfortable, and available spade/bucket makes this a favourite of ours from our trip to New Zealand.
GREAT ALTERNATIVE
An adult-only accommodation that’s extremely well rated and affordable. Like Arthur Street B&B, there’s really no need to look at hostels because the prices are comparable and you don’t have to deal with shared bathrooms.
Day 19 – Cathedral Cove
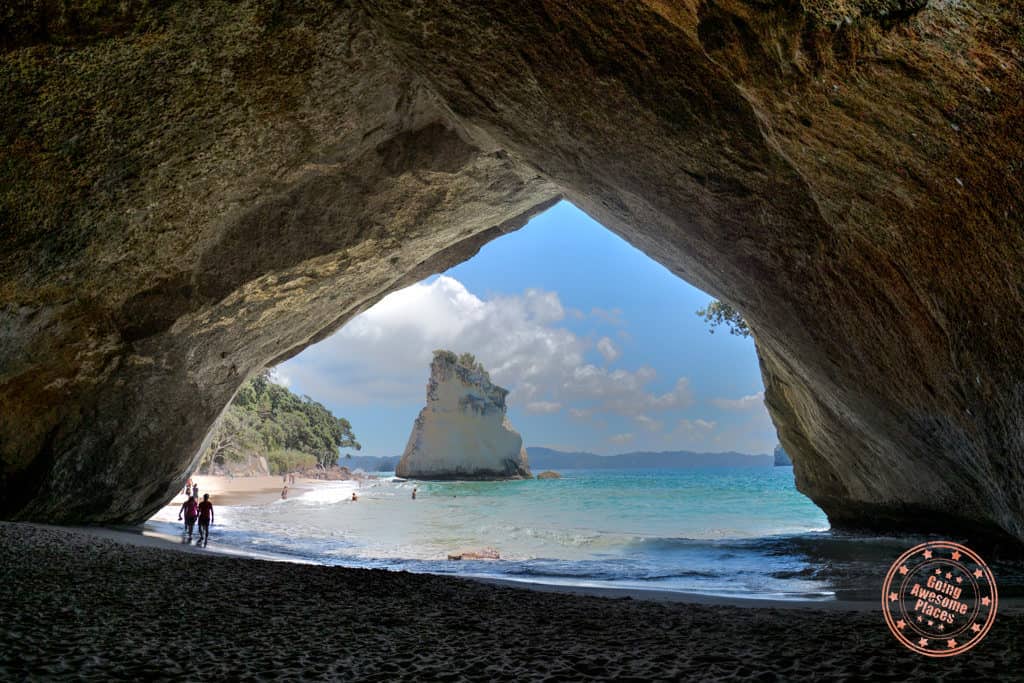
This naturally formed stone archway between two secluded coves in the Coromandel Peninsula should not be missed. Expect stunning views at Cathedral Cove as this easy hike hugs along the coast, dramatic cliffs, pristine waters, and lush forests.
Start your day early by heading out to Hahei Beach. While you could take the shuttle to the start of the hike trail, I recommend parking right by the beach itself and make the gentle ascent that only adds an extra 20 minutes.
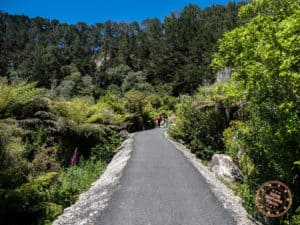
One thing that you’ll immediately notice about the hike here is that it’s very well-paved and which makes it very easy and stroller-friendly. Along the way, you’ll also have a few opportunities to do a few side hikes to additional coves and lookout points.
At the end of the trail that takes no more than 50 minutes from the beach, you’ll descend down into the the cathedral-like arch and the twin beaches on each side of the arch.
WHAT YOU NEED TO KNOW
Hours: No official hours
More info: Website
Parking:
- The parking lot at Hahei beach is free
- The lot at the start of the trail is closed from October 1 – April 30 and NZ$15 for 4 hours from May 1 to September 30 (quite limited)
- There is private parking from house owners on the road up to the top car park
- Hahei Visitor car park (on the right as you enter Hahei) is free and from there you can take a shuttle to take you to the top (NZ$5 return for adults, NZ$3 return for children, and NZ$10 for 2 adults and 2 children. You can pay the driver by cash, use the machine, or pay online.
What to bring:
- Swimwear and towel if you plan on swimming at the beach
FAQ:
- Are there change rooms? – No there aren’t any facilities here
- Are there stairs? A majority of the trail is smooth paved however steps are required when making your way down and up from Cathedral Cove. There are also stairs on the beach walk up to the start of the trail
Grab lunch in Hahei as you’ll then need to make the long drive down to Taupo which will take 3.5 hours. In Hahei, there’s the one plaza that has all o the food. Coastal Co-Op has pretty awesome pizza and ice cream.

When you finally make it to Taupo, you’ll only have time to check out Huka Falls. Here you can witness the true power of 220,000 litres of water barrelling down a narrow passageway with ferocity. The parking lot is only minutes away from the main bridge and with only a few lookout points, you can easily complete your visit in 10-15 minutes.
TIP: The gates close at 5:30PM in the winter and 6:30PM in the summer.
With the big hike coming up the next day, take time to buy supplies as you’ll need to prepare your own lunch. For the best prices, go to the Pak’N’Save. What we did was buy a bag of croissants, slices of cheese, and ham with extra water as well.
Sleep early because the pick up tomorrow is really early.
What you’ll see:
- Cathedral Cove
- Huka Falls
What you’ll do:
Where you’ll eat:
- Coffee – Hahei Beach Cafe (they have a bathroom)
- Lunch – Coastal Co-Op
- Dinner – Mole & Chicken
Where to stay:
WE STAYED HERE
A popular hostel in Taupo that is very affordable. The location is convenient as you’re walking distance to the Pak’N’Save and the restaurants by the lake. A lively place with a large kitchen and open lounge. Take advantage of their $5 burger nights.
GREAT ALTERNATIVE

One of the few Hilton properties in New Zealand. A first-class hotel with a free pool, gym, and on-site Bistro Lago Restaurant by chef Gareth Stewart. Rooms are spacious and luxurious.
Day 20 – Tongariro Crossing
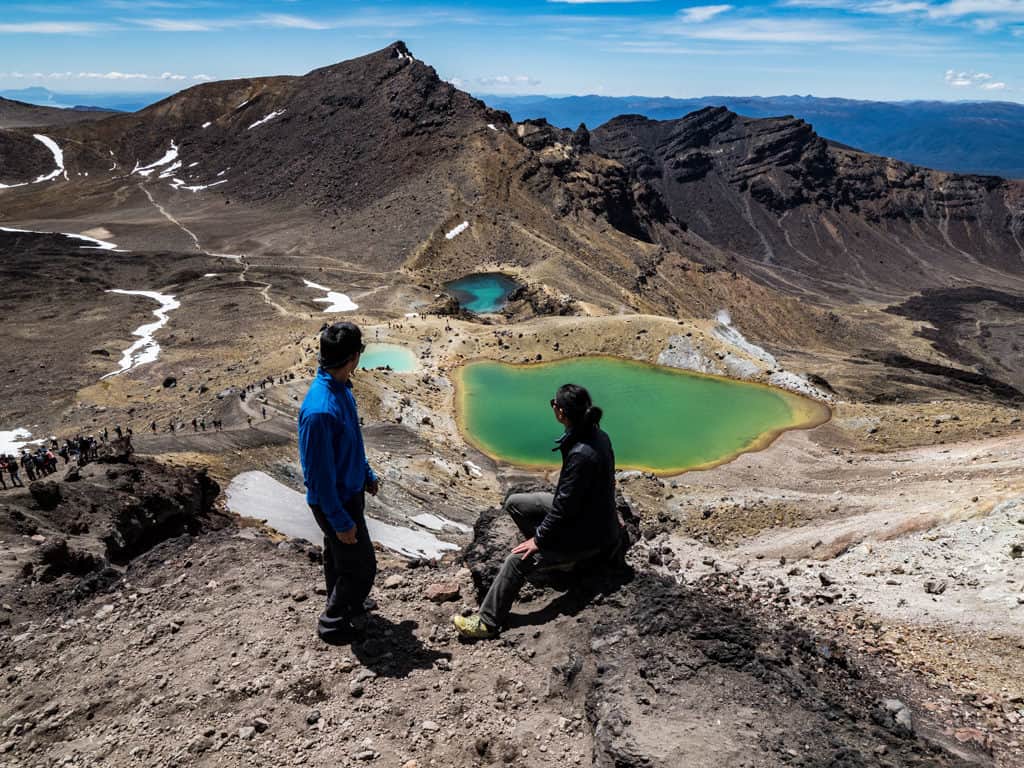
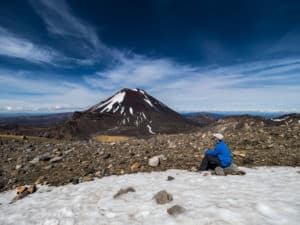
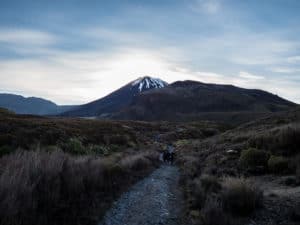
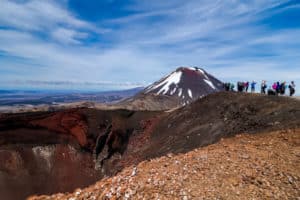
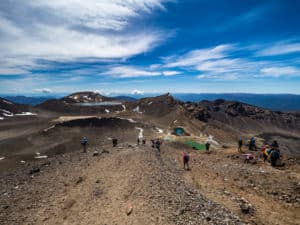
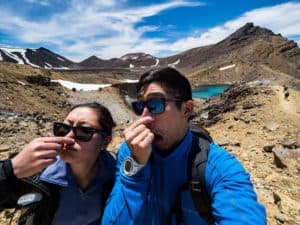
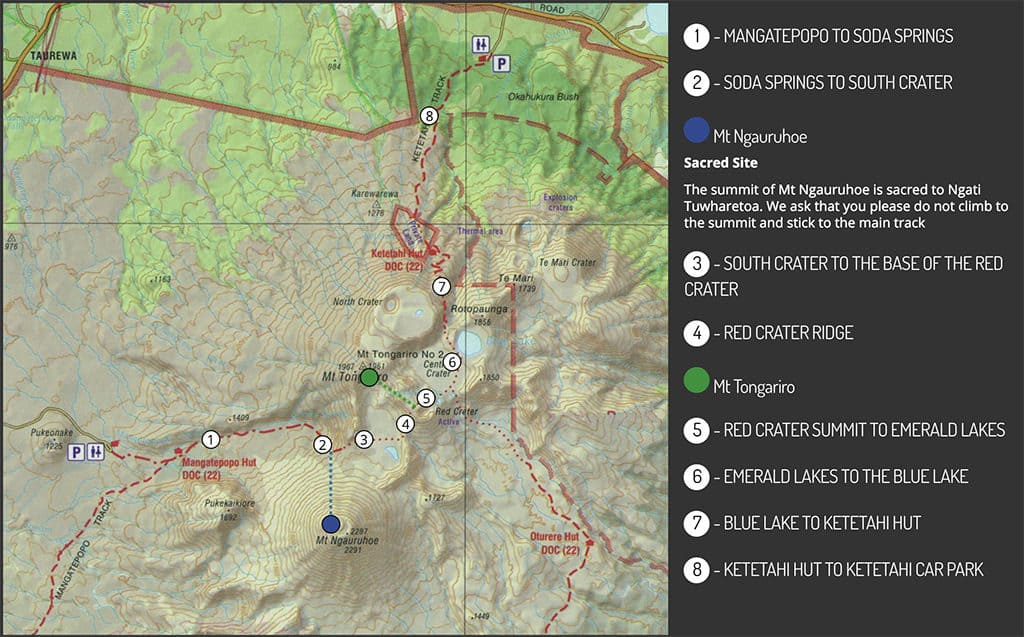
Dubbed the “hike through Mordor”, the Tongariro Alpine Crossing has grown to international fame thanks to Lord of the Rings. It’s a track that takes you through an other-worldly volcanic landscape, vivid Emerald Lakes, mysteriously red crater, and switchback plains, and ethereal jungle forest. At 19.4km long, it’s also described as the best one day hike in New Zealand and I have to agree.
The trek is an incredible experience because it takes you through such a dynamic change of landscapes. It truly gives you an appreciation of the awe-inspiring power of mother nature at work at its rawest form. That said, it’s still one hell of a work out and solid preparation is critical.
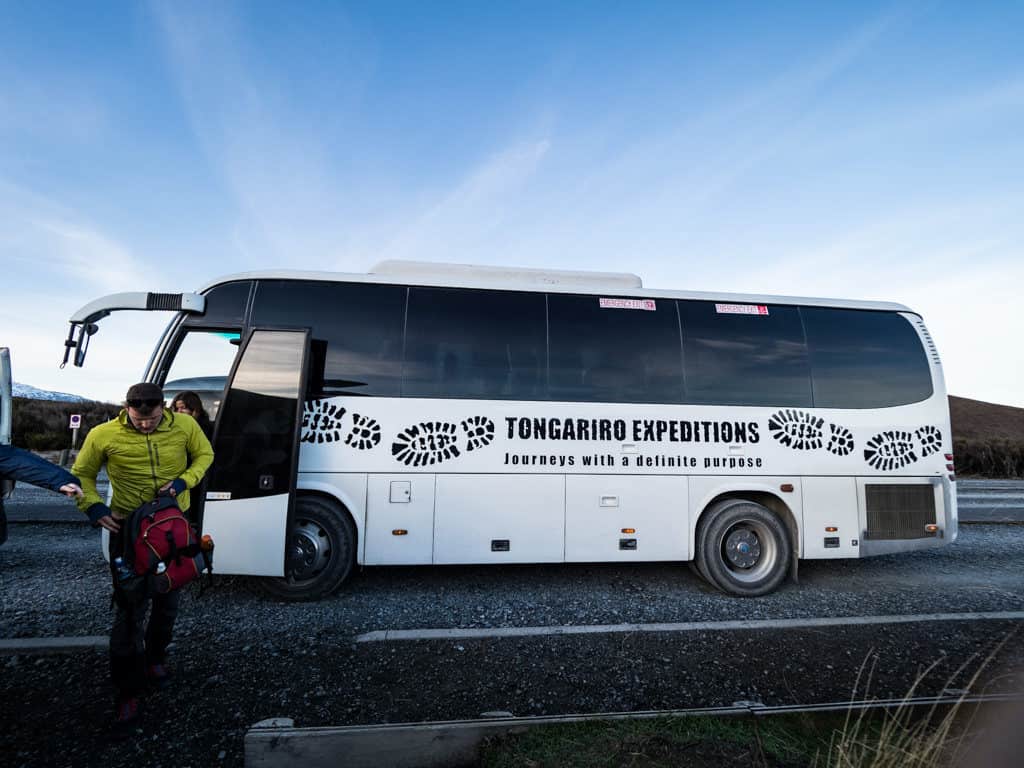
To do the hike, you need to reserve your spot at Tongariro Expeditions, the best shuttle company out there who will have you covered whether you’re staying in Taupo. I loved how they were able to pick us up and drop us off directly from the hostel we were staying at. It really made things so easy.
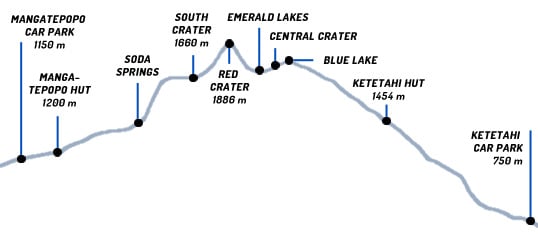
If you take a look at the cross section of the entire 7-9 hour hike, you’ll see elevation profile from start to end. It’s a hike that ascends the saddle between the two mountains of Mt. Ngauruhoe and Mt. Tongariro before descending into a collection of sulphuric lakes and down the backside.
Here are a few lessons learned from our experience:
Favourite part – My favourite part of the hike was near the beginning of the trail where you’re threading through the valley while the sun rises above the towering Mt. Ngauruhoe which surprisingly was more beautiful than its twin mountain and the hike’s namesake. This is also the part of the hike that gave me serious flashbacks to Frodo and Sam as they snuck through the razor-shop rocks of Mordor.
Manageable uphills – The truth is that most of the hike wasn’t insanely hard and nothing compared to something like Dead Woman’s Pass on the Inca Trail. All the ascents were manageable as long as you took lots of breaks in between. When you’ve had enough, the trail usually levels out for a nice long pause.
The hardest part – The hard part was actually the descent from Red Crater Summit to Emerald Lakes (#5 in the map below). This part consists of massively eroding loose gravel that seems like a short distance but lasts for an eternity because 1) there’s no good foothold at all 2) the ground slips underneath you without notice 3) others that really don’t have the right footwear act as big obstacles and 4) it’s the spine of a ridge and so there’s drop off on both sides. It’s not something that most guides talk about so that’s why I highly recommend good shoes and perhaps a bit of slip and slide confidence
Crowds – We weren’t even there during high-season (mid November) and the trail was already quite packed. Let’s just say there was never a point when it was just us. Don’t expect to get any clean photos unless you start really early and hike really quickly.
Time management – We’re not fast hikers and what makes us even slower is the fact that I was also taking a lot of photo and video for the blog. By the time we made it to the snow near the Red Crater Summit, it was already 10:40AM. We didn’t make it to the Blue Lakes until 1:45PM.
Without a good grasp of time, I thought we were still good until we saw the signs. By the time we made it to the Ketetahi Hut, it was 2:45PM and the sign said there was still another 1 hour 30 minutes left. If you take a look at the Tongariro Expeditions guide, they recommend at least 2 hours. Needing to make it to the car park by 4PM, we had to literally speed-hike/run back down in 1 hour 15 minutes.
Also don’t underestimate that last stretch. It’s designated as hard for reason – it is never ending and just when you think the forest should clear into marking lot, it keeps going. Somehow we pulled it off but I wouldn’t recommend this to anyone.
WHAT YOU NEED TO KNOW
Location: Book with Tongariro Expeditions to start your hike at the Mangatepopo Car Park
When: There are two pick up times in Taupo – 5:20AM and 6:20AM. Pick up times at the end of the trail happen between 1:30 – 4:30PM but in our case, it was 2PM – 4PM (seasonal reasons).
Price: NZ$70 adult or NZ$35 child round trip from Taupo. Alternatively if you’d like to park at the Ketetahi lot, you can hire a shuttle
Alternative services: If you have a car and you’d like to park on the Ketetahi side, you can hire a one-way shuttle to Mangatepopo. Pickups are from 6.30AM-8.30AM. There is a special Tongariro shuttle parking lot for this
What to bring:
- Lunch and snacks
- 1.5 – 2L of water per person
- Real hiking shoes (i.e. Columbia’s Conspiracy Outdry shoe)
- Sunscreen – You’re completely exposed the whole trail. With the ozone layer depletion near New Zealand, it’s so easy to get burnt here. Re-apply at least once.
- Sunglasses
- Wear layers – be ready for all weather
- Beanie/toque in the winter
- Waterproof jacket and pants if it rains
Tips:
- This hike is very weather dependent so you do need to check-in with Tongariro Expeditions the day before to see if they’re running or not
- Stock up on lunch, snacks, and water the night before
- Shuttle buses leave on time – We did not want to find out what would happen if we arrived after 4PM. Our bus left at 4:04PM so that tells you just how on time they are
- Free hiking sticks – You’ll notice that hiking sticks can’t be rented from Tongariro Expeditions and that’s because they them for free to borrow on the bus. It’s not something they disclose but a pretty sweet perk
- Pay attention to colour of bracelets – Anyone with Tongariro Expeditions will have a rubber bracelet. Your bus will be one colour and other buses will be another colour. If you’re the first bus and notice other colours start creeping up on you, that’s when you know you’re starting to follow behind
FAQ:
- What happens if you don’t make the bus? – They instructed us to call them if we knew we wouldn’t make the last bus but I found that hilarious because I don’t had signal the whole hike. Just don’t be late.
- What’s the bathroom situation? – I was impressed with how many bathroom outhouses were set up along the trail. They’re frequent enough that you don’t need to really worry too much. Just expect long lines especially after lunch hour so I’d recommend going before summiting Red Crater and again at Ketetahi Hut.
You’ll be exhausted when you get to Taupo. Take a breather, reward yourself a great dinner over at Dixie Brown’s, and watch a brilliant sunset over Lake Taupo.
What you’ll do:
Where you’ll eat:
- Lunch – Packed lunch
- Dinner – Dixie Brown’s
Where to stay:
- The same as the previous day
Day 21 – Hobbiton
End off your trip on a high with a couple of things two things that the North Island is best known for – geothermal activity and Hobbiton.
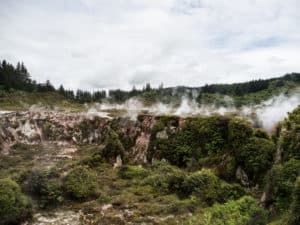
Start of your day by heading to Craters of the Moon which minutes outside of Taupo and across the street from Huka Falls. While this might not have the scale or diversity of Wai-O-Tapu Thermal Wonderland, it is one of those things that makes sense logistically, doesn’t take too long to do, and is quite affordable (NZ$8 for adults, NZ$4 for children).
Walk through the guided boardwalk which takes you through bubbling craters, hissing steam vents, and colourful soil.
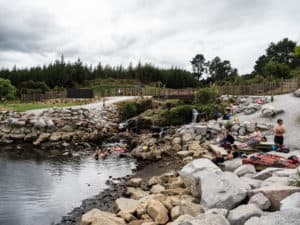
Nearby town is a secret treasure that’s been known to locals for a long time but is now becoming a big attraction on its own. The name gives it away – Spa Thermal Park. It’s part of a large green space that features walking paths, playground, and open park but what makes this place special is the thermal stream at the edge of the Waikato river.
The hot stream mixes in with the river water and naturally forms several small rock pools. Each pool is at its own temperature and cools down as you get closer to the river.
WHAT YOU NEED TO KNOW
Address: County Ave, Tauhara, Taupo 3378, New Zealand (look for Otumuheke Thermal Stream)
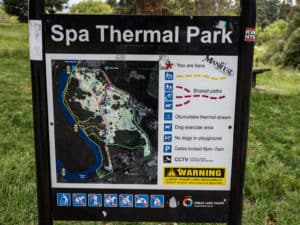
Hours: 7AM -8PM
Price: Free
Parking: Free at the park’s lot but spaces fill up quickly
What to bring:
- Swimwear
- Towel
FAQ:

- Are there change rooms? – Yes, a brand new facility was built with individual change rooms
- Are there lockers? – Free lockers are provided as part of the new building but if you’re comfortable, you can easily put your things on the rock near the water where you’ll be soaking
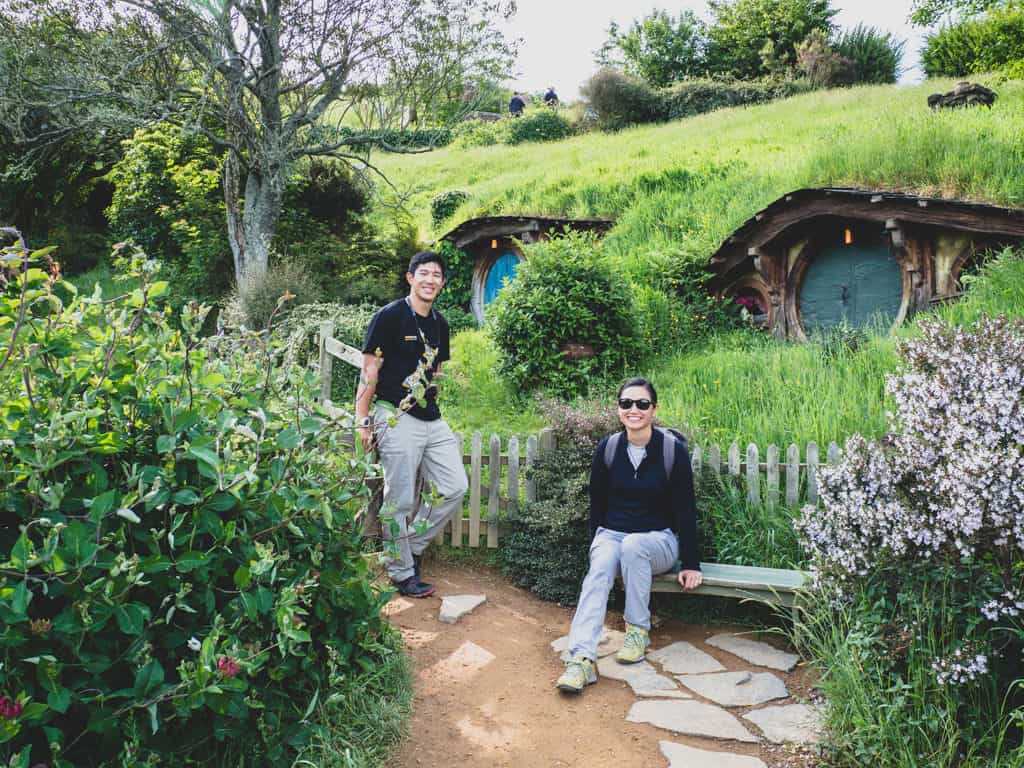
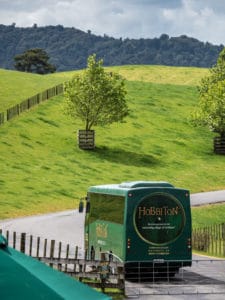
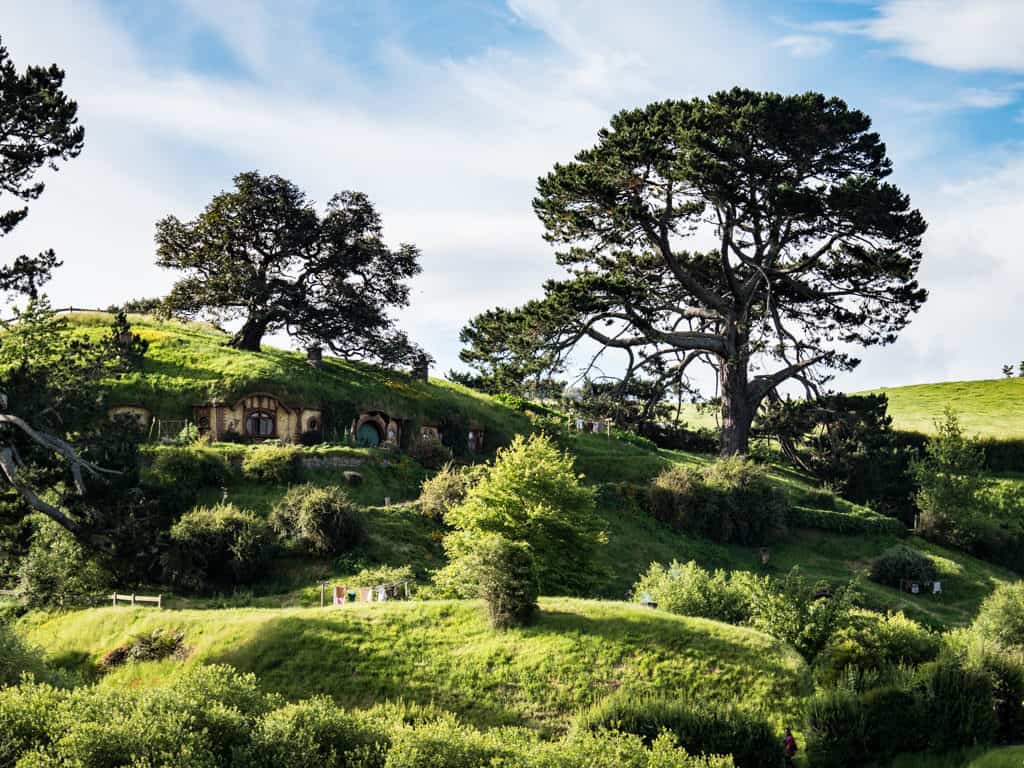
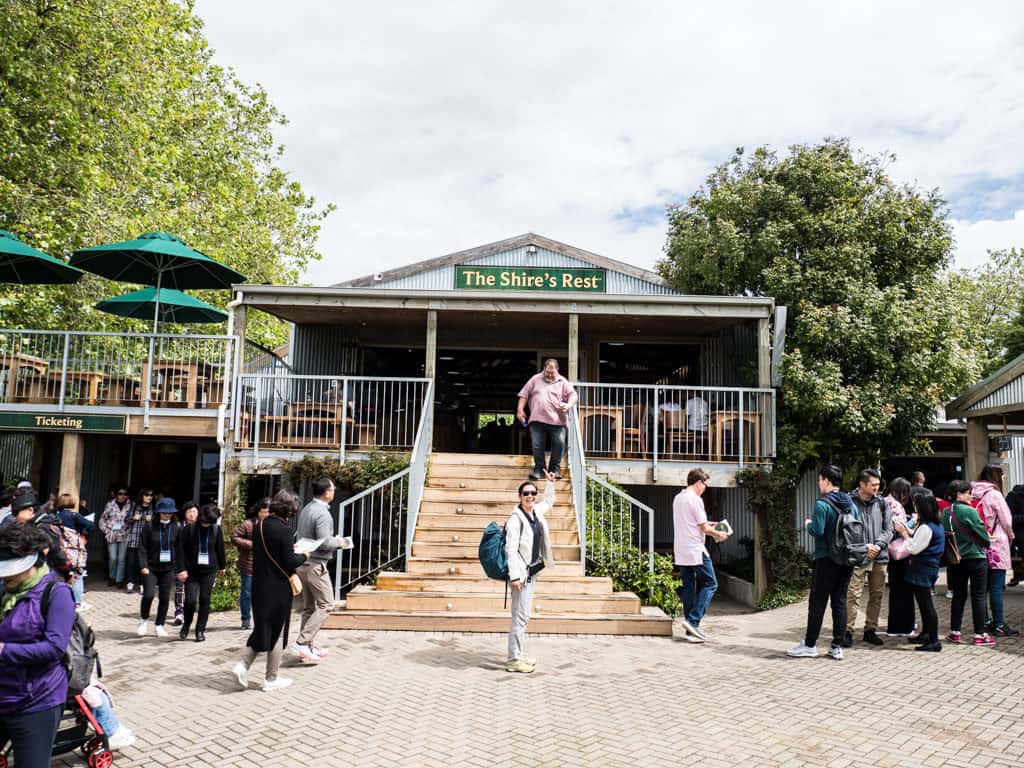
Hobbiton is the stuff of legends. Scouted by Peter Jackson’s team for Lord of the Rings, the story is that they flew over this 1,250 acre sheep farm in Matamata and discovered that it was strikingly similar to The Shire with its giant pine tree and rising hill overlooking a lake. They completely converted the rolling green hills into Hobbiton but at the time, they created it as a temporary set with the intention to return it back to a farm after filming was done. When The Hobbit rolled around, they decided to re-build everything permanently for visitors to tour for years to come.
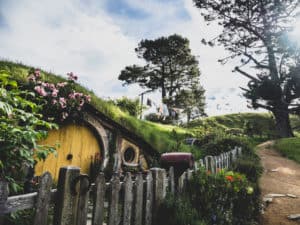
While it is as touristy as things come in New Zealand, its must-do for any Lord of the Rings pilgrimage. The 2 hour tour takes you through the entire grounds of Hobbiton where it hits you just how thorough, detailed, and complete it is. When you first enter in, you’ll have that out-of-body experience as I did where you realize that it’s all real. The only disappointment is the fact that there’s nothing much behind those round doors but being able to stand inside one will make you forget pretty quickly.
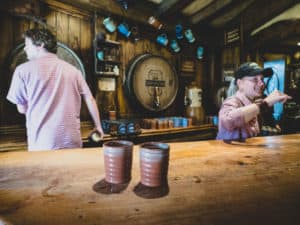
From the farmer’s garden, hobbit-scale holes, human-scale hobbit holes, the beekeeper’s mailbox, chimney’s that puff real smoke, the house of the hobbit that picks his nose, and of course Bilbo’s Bag End, it’s easy to forgive the large group of tourists. To round out the experience, you get to have a pint of Southfarthing’s own ales in the iconic Green Dragon pub.
WHAT YOU NEED TO KNOW
Address: 501 Buckland Rd, Hinuera, Matamata 3472, New Zealand
Hours: Tours depart daily from 9am until 3:30pm. (Extra 4PM and 4:30PM tours between September 1 – April 30, and 5PM and 5:30PM between December 27 and February 28)
Price: NZ$84 for adults, NZ$42 for youth (9-15), and free for children 0-8
Parking: There’s plenty of parking in Shire’s Rest (where you wait for your bus pick up across the street from Hobbiton)
Tips:
- Reservations in advance are recommended
- If you have the time and spots are available, I highly recommend booking the evening banquet tour which lets you tour Hobbiton at dusk (best lighting) and a dinner feast in the Green Dragon
- Note that there are also pickups from the Matamata I-Site (info centre) or Rotorua
- There’s a Hobbiton Movie Set Store in Rotorua (1235 Fenton St, Rotorua)
- If you want to get photos of you in the Hobbit holes, your best bet is to stay near the back of the pack. You won’t be able to hear too much of the commentary but it’s really the only way to get clean shots
- In Green Dragon, go around and pay attention to the random notes, pictures, and objects. There aren’t any easter eggs but we found a few signs that gave me a chuckle
- The hobbit clothing at the back exit of Green Dragon are free for visitors to put on so take advantage of this photo op
The drive back to Auckland will take 2 hours and 15 minutes. Check into where you’ll be staying at night or have dinner first, depending on your timing.
What you’ll see:
- Craters of the Moon
- Hobbiton Movie Set
What you’ll do:
- Spa Thermal Park
Where you’ll eat:
- Lunch – Paulys Diner
- Dinner – Sri Penang
Where to stay:
WE STAYED HERE

This was the perfect B&B-type of place to end off our trip. We wanted some something comfortable, not in the city, with easy parking and this ticked off all the boxes. The room was super spacious and perfect all around.
GREAT ALTERNATIVE
If you’re looking to stay in the Central Business District (CBD) area, this is a great affordable option that is still a private en-suite room. Well rated and close to a lot of food in the area.
The trip costs
As I mention in the New Zealand travel guide, you’ll know that this isn’t the cheapest country to travel through but if you do it smart, you don’t have to spend as much money as you think.
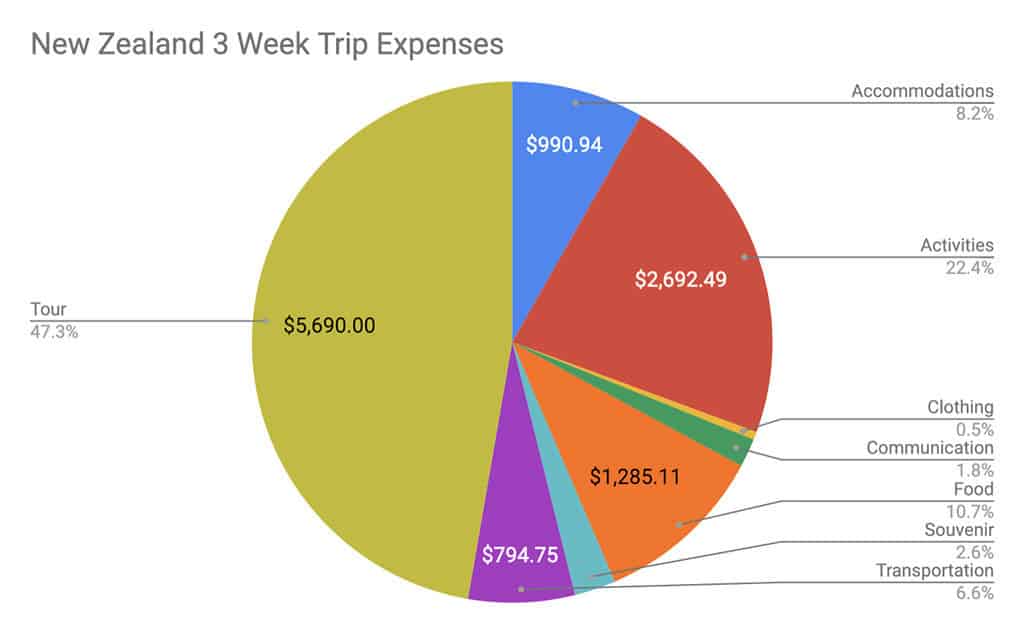
To give you an idea of the kind of money you’ll have to spend on a 3 week New Zealand trip, here’s a break down of all of our expenses. Note this doesn’t include any flights, is for the two of us and is in NZD.
- Flying Kiwi – $5,690
- Activities – $2,692
- Food – $1,285
- Accommodations – $991
- Transportation – $795
- Souvenirs – $309
- Communications – $213
- Clothing – $60
Total = NZ$12,035.39 (for two)
What we missed
No itinerary is perfect and there were plenty of things that I wish we could fit in but just couldn’t with the 3 week restriction we had.
As you can see from the trip map, you’ll see that this itinerary focuses on the western side of both islands of New Zealand which leaves the eastern side largely skipped. If you’re considering alternatives or have a serious case of FOMO, take a look at some of these activities that may be worth adding if you want to expand from the 3 weeks.
- Kaikoura – Swimming with dolphins
- Rotorua – Maori cultural experience (highly recommended to us)
- Fox Glacier or Franz Josef Glacier – glacier heli-hike experience (thanks to the weather)
- Lake Wanaka – the famous tree
- Mt Cook National Park – Hooker Valley track
- Milford Sound – Routeburn track
The whole experience
Our full 3 week New Zealand itinerary was simply epic. It was an unbelievable journey that spanned both the South Island and North Island, giving us a chance to see treasured highlights and experience bucket-list worthy activities.
This is a trip where we mixed and matched a traditional road trip with a guided bus tour and it was quite unique as a result. For one, it made trip planning a heck of a lot easier because all I had to do was focus on the beginning and the end. Through Flying Kiwi, we were able to make new friends with people we would’ve otherwise never encountered and it was our fun dynamic of travellers that really made things memorable. The adventure bus tour also provided a nice change of pace between travelling as a couple and as a group.
New Zealand is somewhere that I could go again and again. In 3 weeks you’ll be transported over climates that range from alpine, glacial, fjord, sub-tropical, rainforest, and full tropical. More importantly, it’s a country that emphasizes doing just as much it does seeing which means there’s never a dull moment. The adrenaline never really wears off while you’re out there and smiles run end to end all day long.
Helpful New Zealand Resources
Make sure you read these next!
Comprehensive New Zealand travel guide
Top 5 things to do from Queenstown
Got questions from your own trip to New Zealand? Let me help you by dropping a comment down below!
Travel Resources For Your Next Trip
If you’re in the process of planning your trip and putting together your itinerary, these are genuinely the best resources that the Going Awesome Places team stands by 100%.
Credit cards: Don’t get burned by hidden fees on top of terrible exchange rates. When we travel now, we use the Wise Card. Simply load it with the currency you need before you go and use it as a regular VISA or their digital wallet card. Use their free app to track how much you have and top up when you need to.
Flights: Of all the booking search engines, Skyscanner is the most helpful and easy to use thanks to their Everywhere feature. Kayak is also another that’s we will often check as well.
Car Rental: If you’re looking to save money, these car rental coupon codes will be a true game-changer. Otherwise, DiscoverCars and RentalCars are great places to start.

Airport Parking: You’ll need a spot to leave your car at the airport so why not book a spot at a discount. Use code AWESOME7 to get at least $5 off at Airport Parking Reservations or Park Sleep Fly packages.
Data: We’ve been a huge fan of wifi hotspot devices like PokeFi because their rates are so good and you can use it globally but recently, we’ve really loved using eSIMs. The best one is Airalo. Save money by getting region-specific eSIMs and use referral code WILLIA9500 to get $3 USD credit on your first purchase. Ubigi is another one that we’ve had success with where they uniquely offer 5G coverage. Use code AWESOME10 to save 10% on your first order.
Hotels: Our go-to is Booking.com because they have the best inventory of properties including hotels and B&Bs plus they have their Genius tier discounts. The exception is Asia where Agoda always has the best prices. TripAdvisor is also useful for reviews and bookings.
Vacation Rentals: Your first instinct will be to check Airbnb but we always recommend checking VRBO as well if you’re looking for a vacation rental.
Tours: When planning our trips, we always check both Viator and GetYourGuide to at least see what’s out there in the destination that we’re going to. They often have different offerings and prices so check both.
Travel Insurance: Learn how to buy the best travel insurance for you. This isn’t something you want to travel without.
- Insured Nomads – Popular insurance provider for frequent travelers and comes with great coverage and special perks.
- RATESDOTCA – Search engine Canadians looking for the cheapest insurance including multi-trip annual policies.
- SafetyWing – A perfect fit for long-term nomads.
- Medjet – Global air medical transportation.
- InsureMyTrip – Best for seniors, families, and those with pre-existing conditions.
If you need more help planning your trip, make sure to check out our Travel Toolbox where we highlight all of the gear, resources, and tools we use when traveling.
Allister Watkins says
[email protected]
Are you receiving emails ,I ask as I messaged you a few days ago.
sincerely
Allister Watkins
William Tang says
I don’t believe I received your e-mails but give it one more shot!
Allister Watkins says
Hello William. I am delighted to have found your site and the wealth of information contained herein.
I wonder if you have any real idea when the ten day self isolation requirements will end for new Zealand. I am looking to book for 2023, but am reluctant to make any moves til it’s more tourist friendly again.
Also, do you manage itineraries for rocky mountain trips of just under two weeks from England.
William Tang says
I believe New Zealand just released news of their 5-step process of opening back up with the last step slated for October 2022 so that’s looking promising for 2023. I think the only wrinkle could be another variant but it’s hard to predict how this year will play out! If you’re looking at 2023, I’d go ahead and book and just try to make sure most of what you have is cancel-able. I haven’t done too many Rocky Mountain trips as most of mine have been quite piecemeal within Canada.
evelyn says
Very comprehensive and full of useful tips. Thanks
Will Tang says
I appreciate it, thanks for stopping by and taking the time to leave a comment!
Tomas says
We spent over 1 year in New Zealand and your post is absolutely amazing. The itinerary is very good and I think this is the best I’ve ever seen… All the places visited only in 3 weeks that’s great!
Will Tang says
Thanks Tomas! Love your piece as well. Wow I’m jealous that you guys got to spend a full year there – New Zealand is absolutely stunning but you already know that ;)
Lesley says
This is THE most comprehensive post, Will! I’ve bookmarked it for future reference. I hope Hobbiton was as wonderful in person as it appears in the photos :-)
Will Tang says
Thank you so much! Glad you enjoyed this post and if you ever have any questions about your own trip to NZ just let me know :)