So you’ve decided you want to hike the Inca Trail and see Machu Picchu. You’re excited as heck and you may have even booked your flight there but when it comes time to plan it all, you’re utterly overwhelmed. Yep, I was there mere months ago. The ironic thing is that it’s not for lack of information that makes it hard but it’s more like there’s too much out there because of how well-travelled it’s become. I wanted to share with you all of my knowledge about planning for Machu Picchu and everything you need to know with this Inca Trail hiking guide.
When we first started thinking about planning the trip, I remember not even knowing where to start. Not wanting others to be in the same position, I decided to put everything I learned and distilled it into a nice little (but somewhat long) package. This is an exhaustive list of EVERYTHING. It’s everything that I wish someone had told me before going. It’s also everything that I told myself to write down because I knew I’d forget.
Keep in mind throughout this that my trip to Peru included the Amazon Rainforest but in order to keep things focused, I will only be talking about the 4 day 3 night Inca Trail trek. Make sure to get to the end because if you’re looking for a discount on Alpaca Expeditions, I got you covered.
Read more about Peru
- How to pick which Machu Picchu hike to do
- What they don’t tell you about the Inca Trail
- The serious truth about hiking the Inca Trail
- The full Peru 2 week itinerary
Where should you stay in Cusco?
- If you’re looking for great places to stay, my recommendation is to take a look on Booking.com. For a really comfortable luxury stay, the Palacio Del Inka was incredible for us but on a budget, we equally loved the Hostal Illapa Inn. For our one night in the Sacred Valley, the Tambo del Inka was another Marriott property that blew us away.
Get ready to become an Inca Trail pro with this information-packed post. Let’s go!
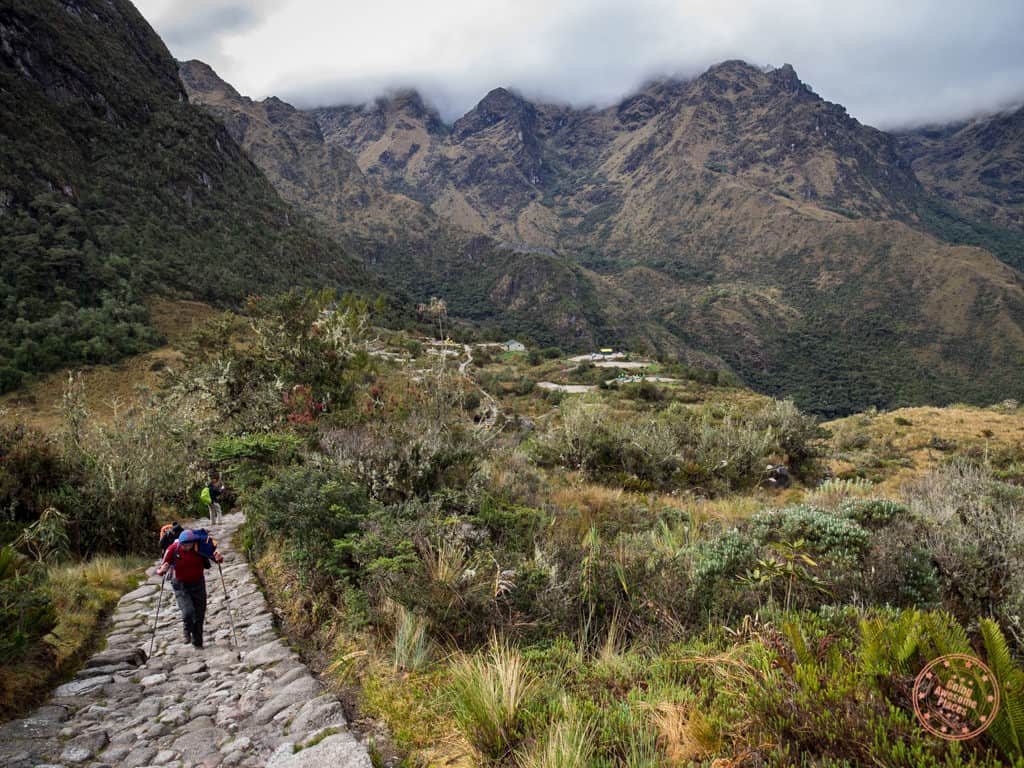
Table of contents
- Machu Picchu Hike Guide
- Top 10 Tips for Hiking the Inca Trail
- Where to Stay in Cusco Before And After
- Recommended Activities in Cusco
- Frequently Asked Questions
Machu Picchu Hike Guide
Is the Inca Trail open now?
Yes, the Inca Trail has been re-opened since July 15, 2021.
What has changed?
For the most part, things are back to normal, with permits set accordingly for the Inca Trail:
- 500 total permits per day
- 300 permits for guides, porters, and other staff
- 200 permits for customers
How to Get 2024 Inca Trail Permits
The first batch of 2024 Inca Trail Permits will be released the first week October 2023! It’s worth noting that it looks like it’s likely that operators like Alpaca Expeditions will increase prices in 2024 so if you book with them before October, you can lock in the 2023 prices.
Don’t get fooled by the Alpaca Expeditions Inca Trail availability system which shows availability of 500 spots in 2024. That is just a placeholder until the tickets get released in October. Of the 500, 200 permits are reserved for guest trekkers like you, and 300 go to porters and guide staff.
Remember, if you book through Alpaca Expeditions, you get free hiking sticks and sleeping mats included (details at the bottom).
Does Peru have any travel restrictions?
No, Peru no longer has any travel restrictions. Currently all public transportation (airports, trains, buses, and roads) have reopened. The Inca Trail and Machu Picchu are also fully reopened.
Which hike to get to Machu Picchu?
The very first thing you need to figure out is how you’re actually going to get to Machu Picchu. Naively, I thought there was just one trail. I quickly found out that this was not the case. In reality when someone says “Inca Trail”, most people refer to the “Classic Inca Trail”. That begs the question though, what’s the difference between all these different routes? Each has their own advantages and disadvantages but I’ll be honest, none of that was particularly obvious from my initial searches so I’m going to do my best to break it down.
In combination with the pamphlets collected from my own trip to Peru from Alpaca Expeditions and my research, here’s a breakdown of the various hikes. If you’re looking for something more detailed, I’ve written a separate piece on ALL the options with a guide on how to pick which Machu Picchu hike to do.
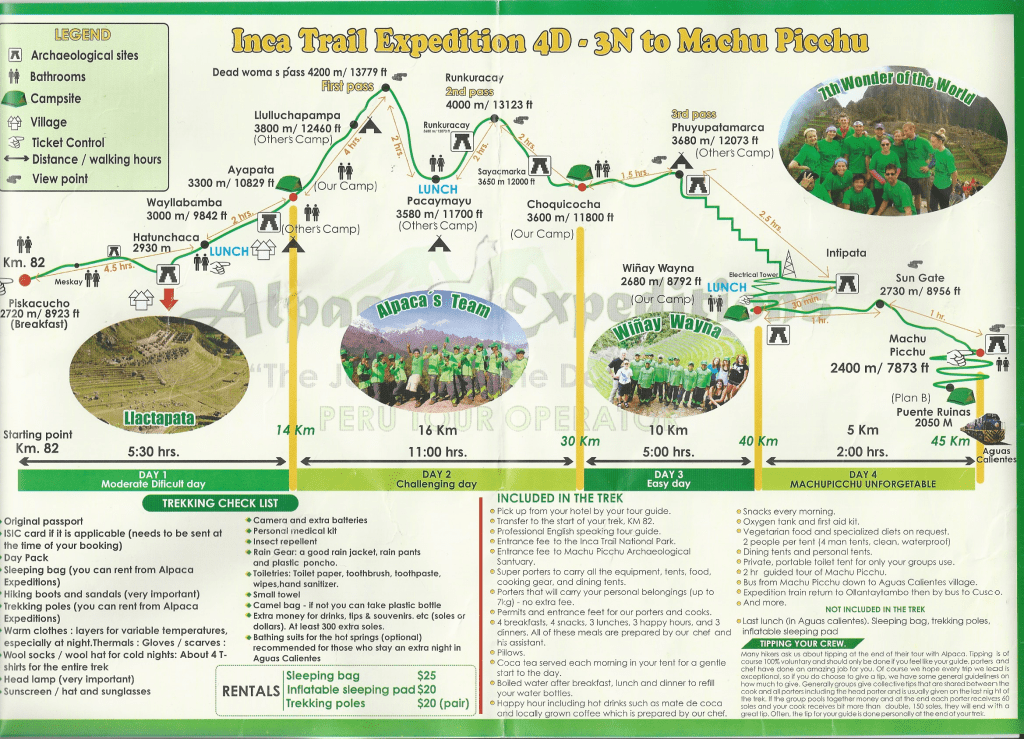
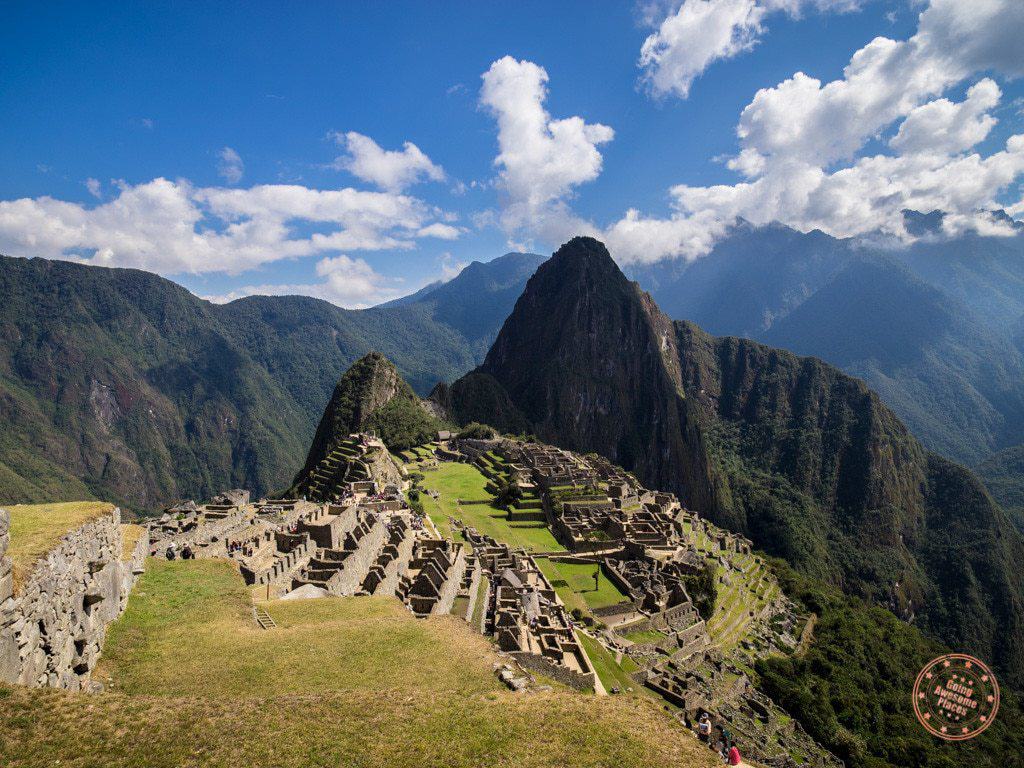
Classic Inca Trail to Machu Picchu hike
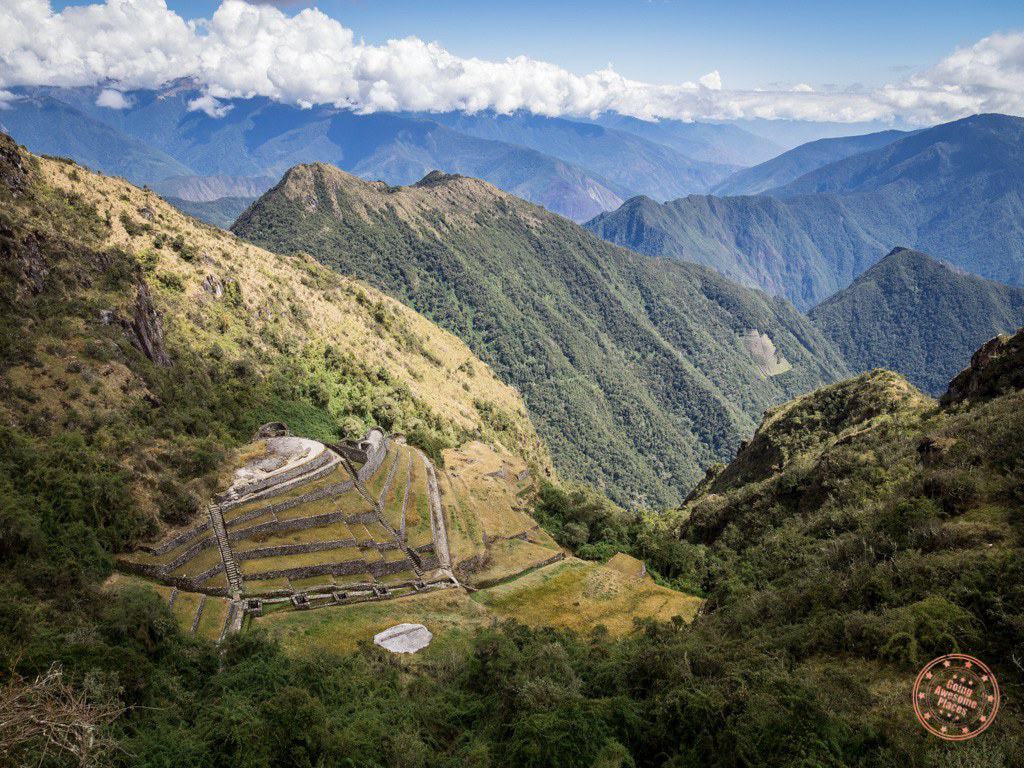
This is perhaps the most famous hiking trail in South America. It has been even listed as one of the top 5 trails in the world. As you traverse through the mountain, the trail takes you through a dramatic range of landscapes that includes lush forest, subtropical jungle, and arid high altitude zones. In addition to all of that, you also get an impressive mix of Inca paved stones, tunnels, and incredibly well preserved ruins.
- Difficulty: More challenging than you think
- Distance: 43 km (26 mi)
- Highest Altitude: 4,200 m (13,779 ft)
- Pros:
- It’s the only trail where you hike directly into Machu Picchu through the Sun Gate.
- Being the main trail that the Incas used, the stones are intact and feels like a complete trail.
- There are also a TON impressive Inca sites to explore along the way.
- Cons:
- Despite the trail being limited to only 500 trekkers at any given time, at times, it will feel pretty busy. You’ll either be passing other hikers along the way or get passed. The only time we felt all alone was when we fell significantly behind from the other groups that started around when we did.
- With the permit restrictions, you need to book at least 6 months ahead of time. If you can’t work with those lead times, you may be out of luck.

Get to the end of the post to find out the detailed instructions on how.
Salkantay Trek

Salkantay is essentially Inca Trail’s lesser known cousin but beautiful in different ways. Taking a completely different pass, you’re treated to stunning landscapes of forests in the clouds, glaciers, and dramatic mountain terrain. You’ll also be taken through remote villages and less trafficked camp sites. The difference in landscape to the Classic Inca Trail is just how much closer you are to the snowcapped mountains.
- Difficulty: Harder than Inca Trail (primarily because of the higher altitude)
- Distance: 60 km (37.28 mi)
- Altitude: 4,650 m (15,157 ft)
- Pros:
- This trail has lower demand but as a result, it will not be crowded and you’ll be able to literally show up to Cusco and sign up on the spot.
- With Salkantay you’ll get to even higher altitudes and there’s a chance you’ll even see snow. More off the beaten path.
- Since you start off from Aguas Calientes, you do have the opportunity to get into the city of Machu Picchu a lot earlier than the Inca Trail hikers if that’s what you decide to do.
- Cons:
- Only part of the path is a legitimate “Inca Trail” which is that well-groomed path you get with the Classic Inca Trail.
- There are Inca sites along the way but I would say less impressive.
- The biggest drawback is the fact that the hiking ends at Aguas Calientes where you then become part of the hoard of tourists that arrive by train.
- If you decide to do the Sun Gate you’re guaranteed to show up later than the Inca Trail trekkers.
Lares Trek
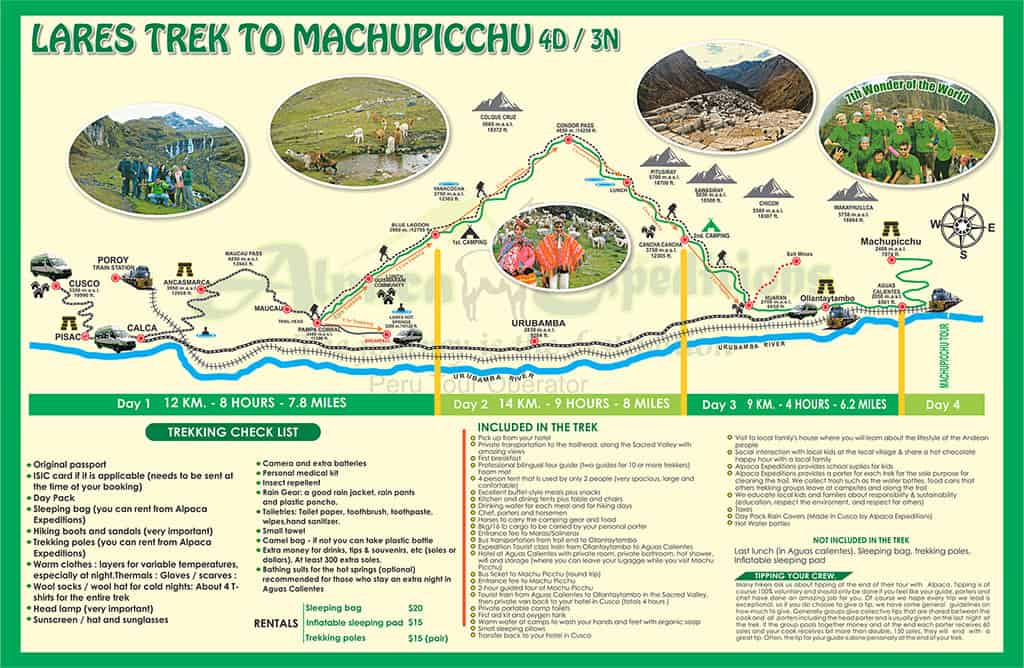
There seems to be a gazillion ways to do the Lares trek simply because there’s no fixed trail and it’s a mishmash of a few components – trekking, crossing some mountain pass, and visiting a local families. The Lares trek may not be as well known as the first two but it does provide a very well-balanced experience.
- Difficulty: Moderate
- Distance: 42 km (26.10 mi) (varies)
- Highest Altitude: 4,500 m (14,760 ft) (varies)
- Pros:
- Passing through local Incan villages where you’ll get a glimpse into local life. You do not get this on the Classic Inca Trail or Salkantay Trek.
- This trek is much easier so there’s less worry of altitude affecting you.
- Usually there’s a stop at the Lares Hot Springs which is a nice spot to relax.
- Cons:
- Does not go through any of the “official” Inca trail. Th exception is the 5D4N Lares Trek which combines with the Inca Trail 2D1N with camping option.
- The trek will feel disjointed because you’ll hop on a van to the start of the trek, trek a bit, then spend some time in a few villages, and when you’re done, you’ll end up in Ollantaytambo where you’ll take a train to Aguas Calientes. Like Salkantay, you’re not really hiking right into Machu Picchu.
The Others
Beyond the above 3, there are actually a ton of other options that vary in route, length, and difficulty but personally I wouldn’t really consider them unless there’s no other choice. If you’ve gone this far down the list, I might just consider taking the train up to Machu Picchu. Trust me, there’s nothing wrong with that considering everything we went through along the Inca Trail.
At the end of the day, you want to make sure you pick the trek that suits you the most in terms of what you want to see and how much of a challenge you’re willing to take on.
Picking a Trekking Operator
Out of everything this was the hardest because there was so much choice out there. You take a quick look at TripAdvisor and Cusco’s top activities, and you’re presented with an overwhelming list.
What To Look For
For most, I think your three deciding factors are going to be 1) price, 2) experience reviews 3) options. These two are self-explanatory but the trick is to find a nice balance between the two.
- Price – As you start researching, you start noticing that the prices range quite wildly from low to high. Alpaca Expeditions for us was on the cheaper end of things and I’ll say that I can’t see any big differences from ours to the other companies we saw on the trail that charged significantly more.
- Reviews – We all know that reviews matter. At first I was skeptical of ones that had a crazy number of reviews but after reading through a few, they all looked legitimate and touted good experiences. The trouble was that I barely saw any negative reviews for any trekking operator.
- Options – We didn’t realize it initially but we definitely looked favourably at companies that had availability on a daily basis, offered a range of trek lengths and also a private option.
While I wish I could say definitively which operator is “the best” but that’s pretty much impossible unless you get to try each one first-hand. The best I can do is reflect on our experiences with Alpaca Expeditions and why I’m pretty happy with how everything turned out.
Why Alpaca Expeditions
My opinions here are obviously biased because Alpaca Expeditions is the only trekking that I’ve had personal experience with. Overall we had a great professional experience with the company from start to finish and I’d highly recommend them. There’s a reason why they’re ranked #1. They have such a large number of reviews because so many people have good things to say about them.
Booking
The booking process was done with ease via e-mail. A deposit of $200 USD per person was required by Paypal and the remainder we paid when we arrived in Cusco. More on payments later.
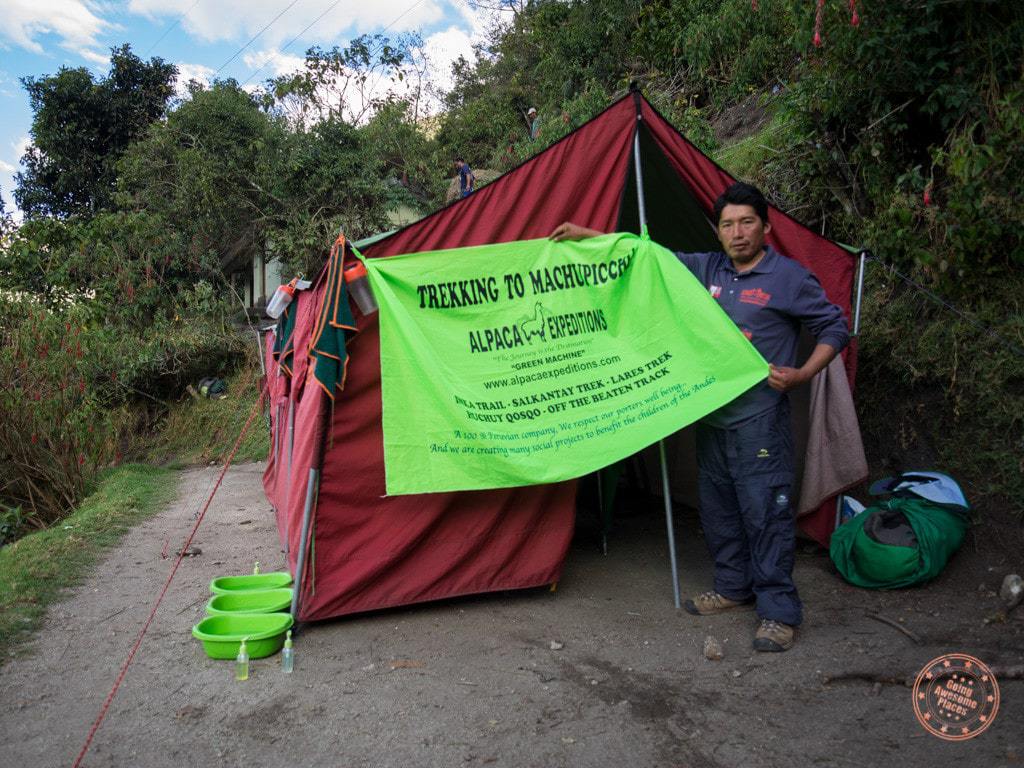
Porters
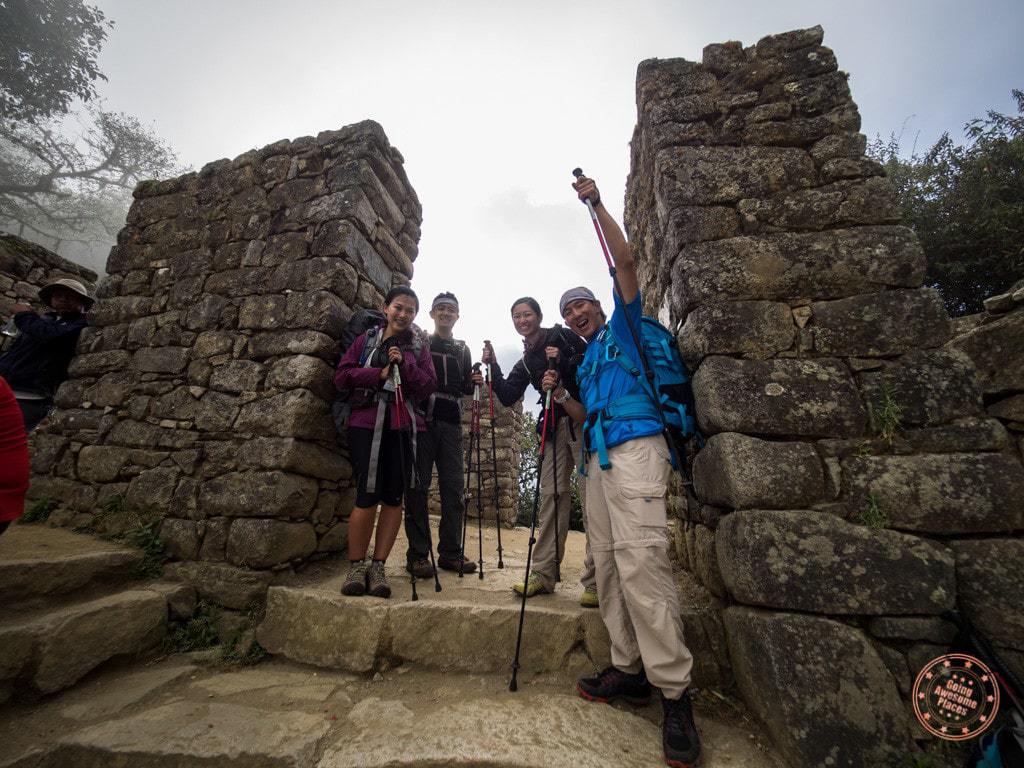
For the trek itself, there’s not enough that can be said for the team that was assembled for our private 4D/3N trek. We had a little over a 2:1 ratio of porter to hiker and they did a fabulous job everyday with the setting up of camp, cooking incredible meals, and running the Inca Trail. They were the true super stars of the trail.
Food
Every meal along our Inca Trail to Machu Picchu hike, I was blown away by the food they were able to cook for us given that everything they used had to be brought up along the way. From delicious portions of chicken, beef, and fish to a nice balance of quinoa, beets, potatoes, and other mixed veggies, there was aways more than enough food to go around the table. Chef Yuri was masterful with his presentation as well, making sure that we were always surprised with his carvings. If that wasn’t enough for food you can have in the mountains, we were also treated with flambé on our first night and even full sized cake to close things off. I can’t even explain it.
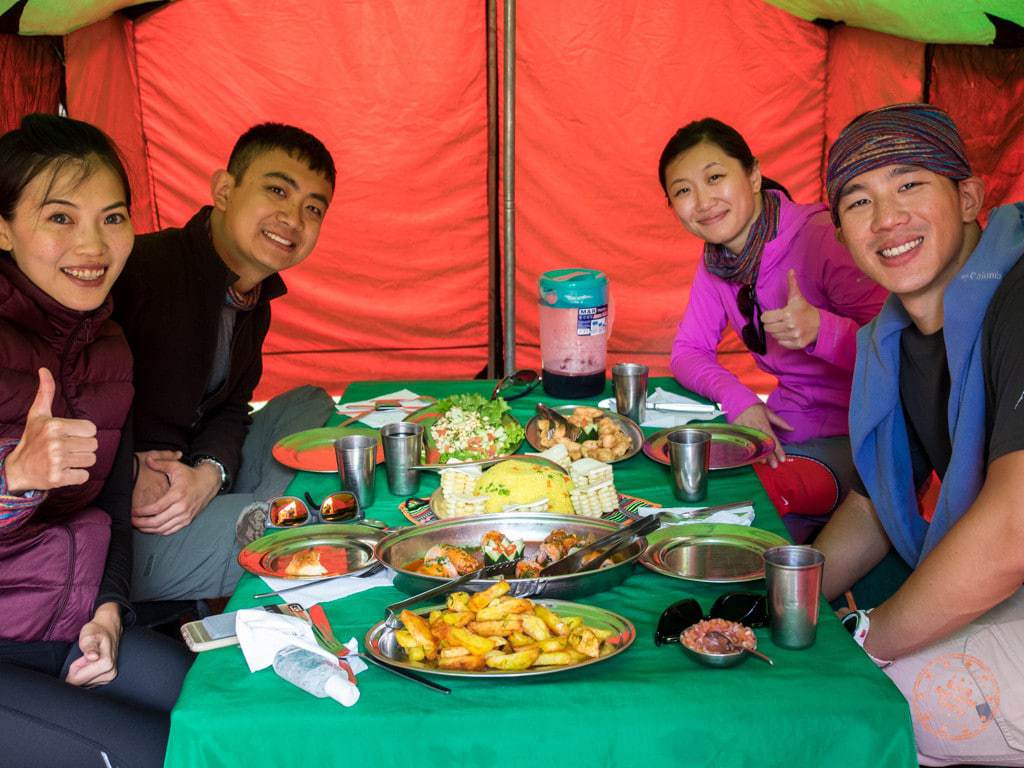
Beyond the breakfast, lunch, and dinner, every morning we’d also receive a little snack bag of goodies that would help us energize along the way. This meant that I didn’t even get a lot of chances to eat all of my Cliff Bars. Upon arrival at camp in the afternoon, there was also a “happy hour” as they’d call it where you could eat an assortment of snacks like biscuits and popcorn to tide you over before dinner.
Guided
Our guide, Juan Carlos, was quirky and random at times but he was great to be around as he guided us through the trail. As a private tour, we had the ability to largely set our own pace and take breaks when we wanted. He also helped set the pace when we needed to get our butts moving. Along the way we encountered numerous Inca sites and he did a fine job of explaining the history and story behind each one.
When we needed medical help, he also had the necessary supplies to triage the situation. Lastly, I was carrying quite the significant daypack load because of my camera gear. His experience really shined through in the few instances that we either needed medical help or one of us felt ill. In my case, I was feeling the effects of exhaustion on the first day and with one look he was able to determine if I was good enough to make it through. Another time, I was struggling with the camera weight on my back and he offered to carry it for a stretch which helped a lot. When my girlfriend fell, Juan Carlos had anti-inflammatory cream and compression wraps ready in his backpack. He even gave us a brand new tube of the cream before we left. Sufficed to say, he made sure he took care of us.
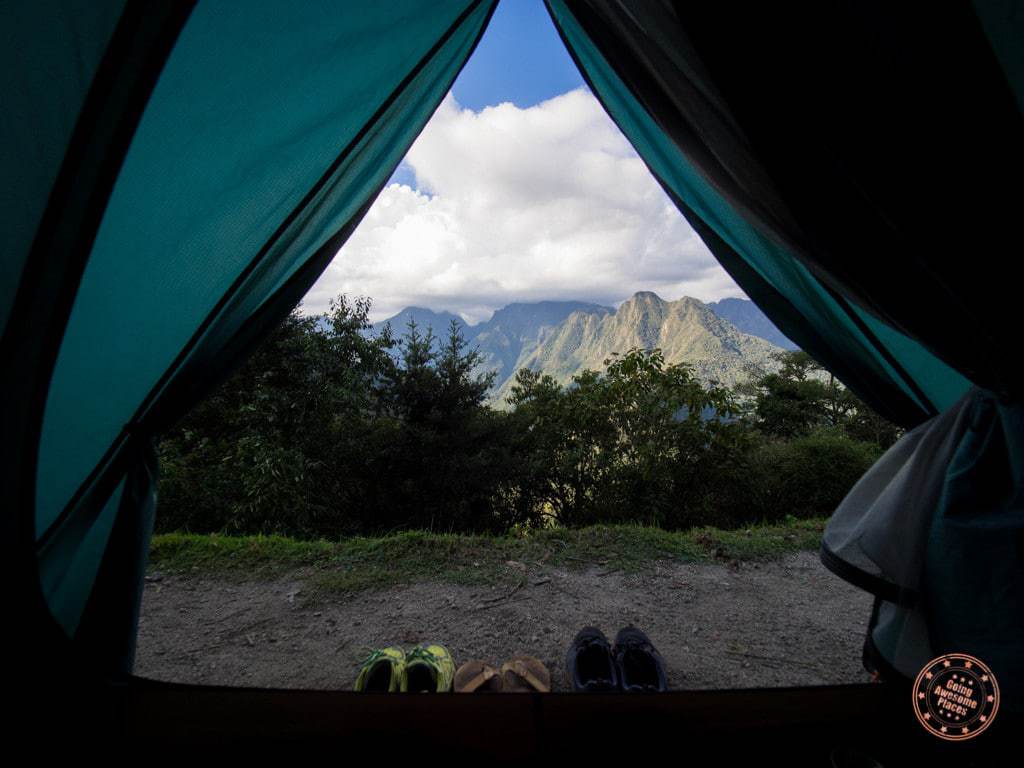
Camp
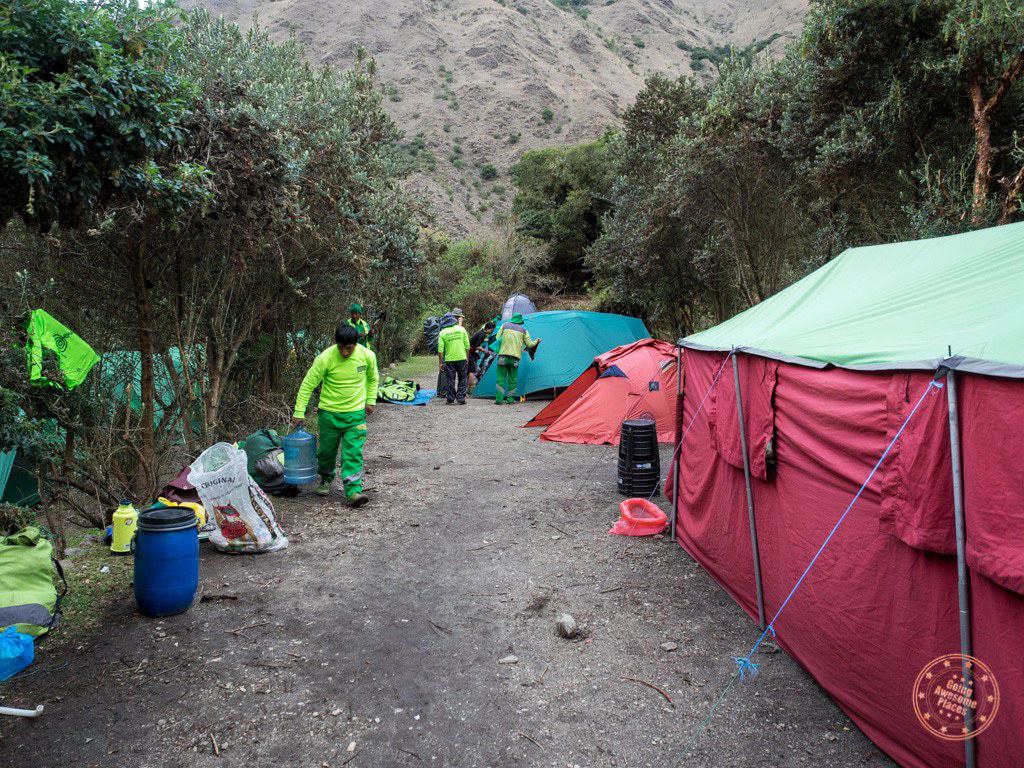
Every night we’d set up camp in a different area of the trail and typically we’d share the area with a few other trekking companies. This was never really an issue though because we always had our own contained space that didn’t mix with other groups. Our set up looked like this: 2 tents for the 4 us + 1 tent for the guide + 1 main tent that tripled as a kitchen, dining area and also sleeping area for the porters + portable toilet.
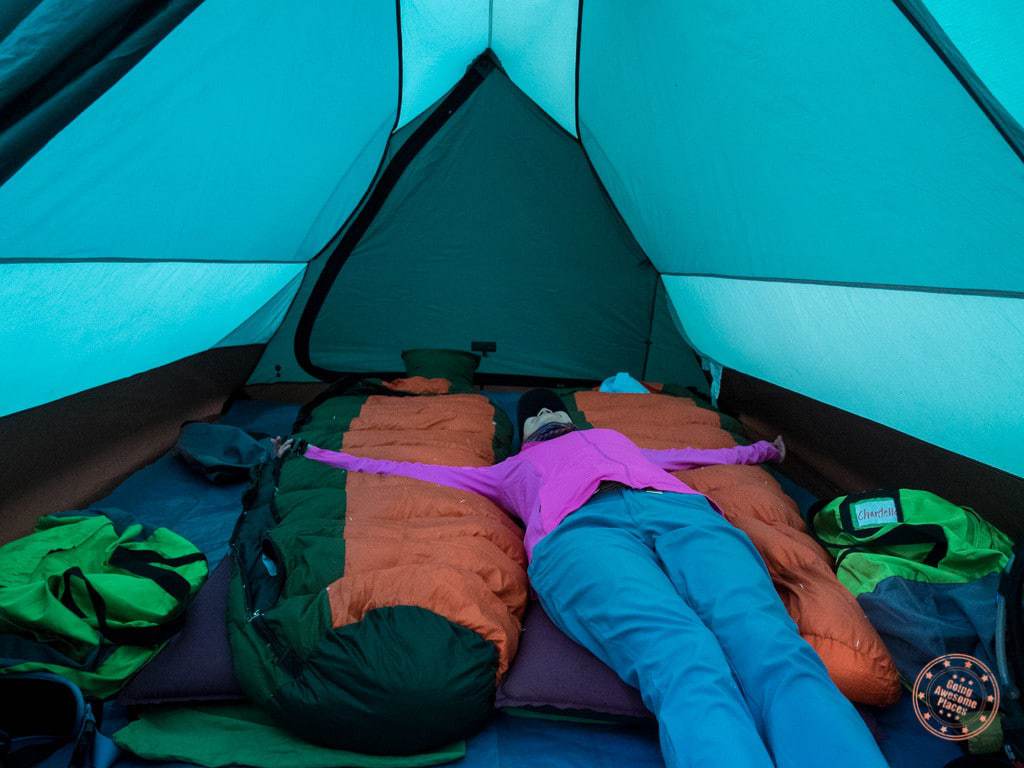
One of the biggest things that impressed me was the quality of the equipment and how comfortable our tent arrangement was.
Regarding the tents, they were very spacious for two people with enough space to put your daypack and duffle bag by your side plus room to spare. It was incredibly comfortable because there was the luxury of having two whole sleeping pads on your back, a plush pillow for your head, and clean sleeping bag liner. My tent set up for camping trips back home aren’t even this fancy!
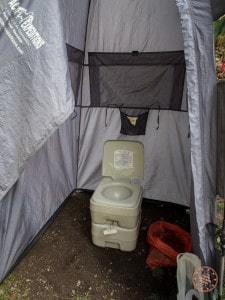
Undoubtedly, one concern is going to be the toilets but that turned out to be a non-issue because our group essentially had our own tent set up overtop a portable toilet. The tent could be zipped opened and closed to keep the bugs out. The toilet itself was comfortable to sit on and even had its own water pump flushing mechanism built in. The only learning curve was in not throwing the toilet paper into the toilet. Hand sanitizer was provided to wash up.
The Alpaca Difference
You could tell that Juan Carlos truly loved his job. In chatting with him throughout the hike, we learned how the company was founded by a former guide and someone local to the Sacred Valley. As a result, the company was built around the philosophy of making sure they took care of the needs of their guides and porters.
For instance, they run extensive training programs for new hires with guides getting English training. Understanding the need to increase knowledge and the importance of technology, the company also runs training programs on how to use smart phones and computers which I thought was a really great idea.
Lastly, I also found out that the company was planning on building housing in Cusco since most people live in the countryside and a significant cost to their employees is the need to pay for rent when they’re working. All of this just proved to me that they truly do care for their employees.
What to Pack for Machu Picchu Hike

Prior to leaving for Peru, I shared everything I packed for Peru. This article is an exhaustive list of everything I brought for the entire trip but now having come back from the trip, I can provide additional insight that will be invaluable for how you want to think about your travel gear.
The Green Duffle
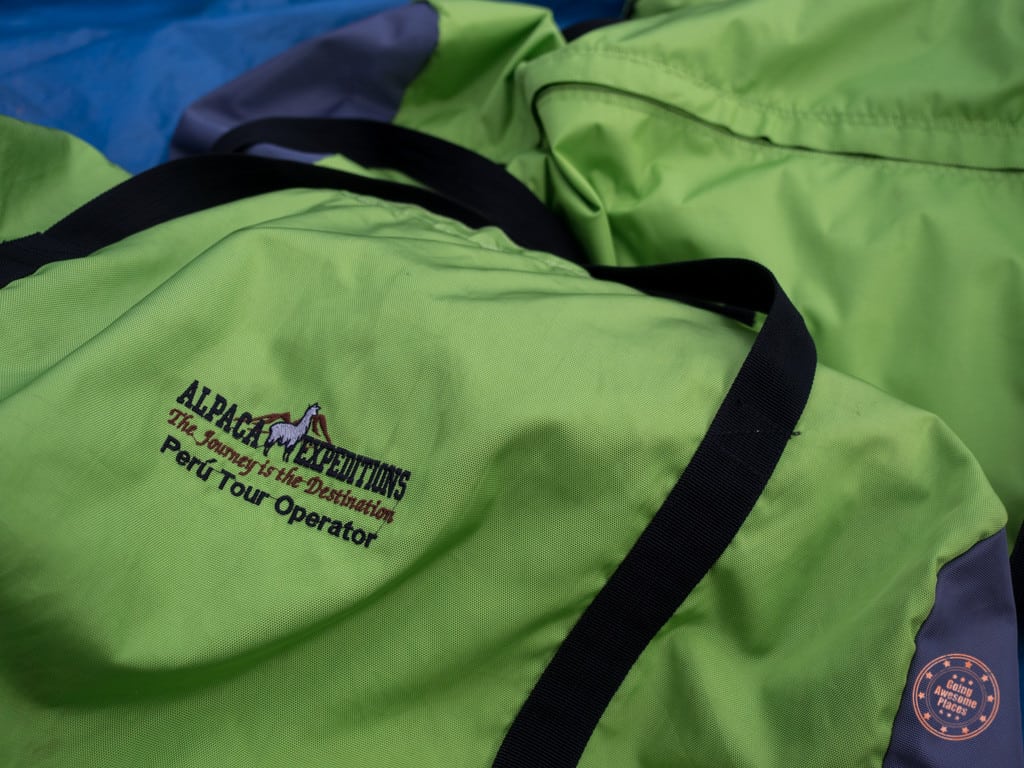
What took us by surprise prior to going on our trek was just how little you’re actually allowed to bring on the trail. You’re allowed to bring a lot less than you think.
Prior to the trek, each person is given a duffle bag where you’re supposed to throw in everything you need beyond your day pack gear. This means things that you need but don’t want to carry all day like your clothes and toiletries.
The detail that is easy to miss is the fact that each duffle bag can only weigh a maximum of 7 kg because the government strictly enforces how much weight each porter is allowed to carry. The kicker here is that they don’t tell you that this includes the pillow, day pack rain covers and poncho. With those items included in the mix, that means you actually only have 4 kg of things you can bring.
As a result, we ended up spending a lot of time the night before repacking, weighing and cutting more and more things out. We didn’t get a whole lot of sleep the night before.
In Hindsight
You always try to pack with all sorts of situations in mind and based on prior experience but as you know, travel is unpredictable and there are a ton of things that I would do different knowing what I know now.
Bring less of:
- Camera gear – This one was a hard one for me but for the hike itself, I definitely shouldn’t have brought my 40-150mm lens. Never used it at all.
- Tripod – I got a few cool star trail shots but were they worth it? Not really. The tripod weight made it really tight to fit what I wanted to in my duffle.
- Gym gloves – Not particularly useful because they don’t keep your hands warm.
- Wipes – A friend said it would be a good idea to bring a lot of paper wipes but Alpaca Expeditions was so well equipped that we didn’t end up needing them because every morning and night we were given a piping hot bucket of water, soap, and a towel.
Bring more of:
- Toilet paper – When you have stomach problems, toilet paper goes FAST!
- Hand sanitizer – Ditto.
- Bug spray – If mosquitos love you, you’re going to want to bring more than you think.
What I’m glad I brought:
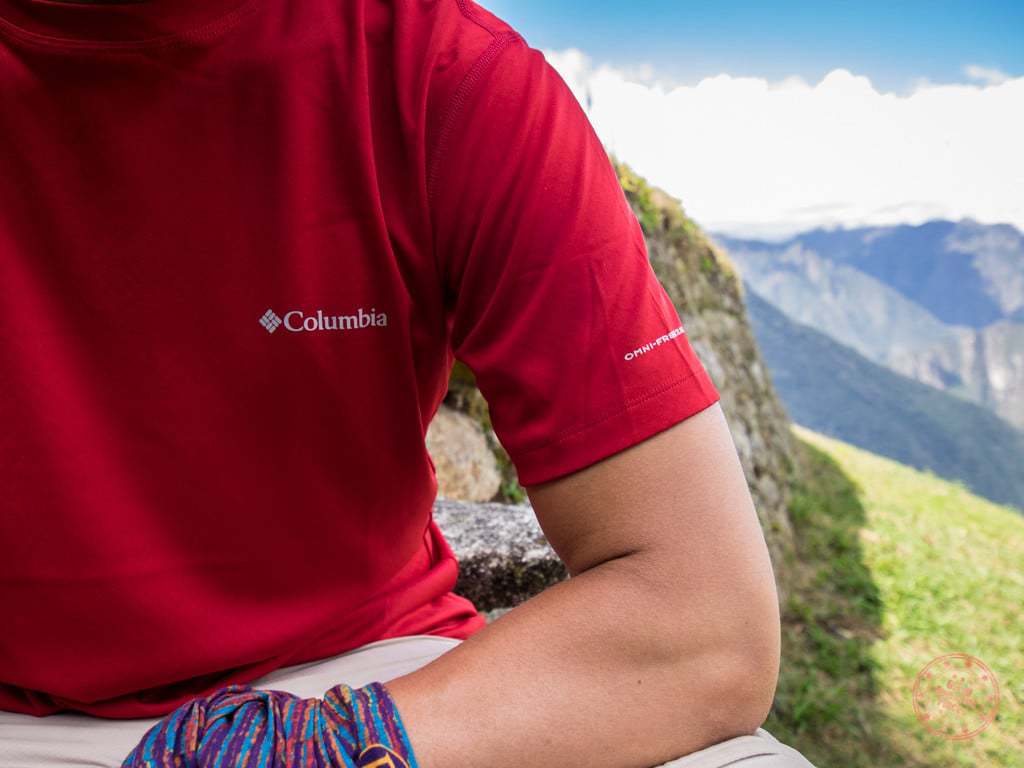
- Columbia Conspiracy Razor Outdry – These shoes were incredibly comfortable and performance oriented. They gripped like crazy no matter what the condition with the type of tread it has. Since it was fully waterproof too, I never had to worry when we had rain come down on us along the Machu Picchu hike.
- Dry fit clothes – These were comfy to wear and had the benefit of drying super quick especially as sweat built up on my back.
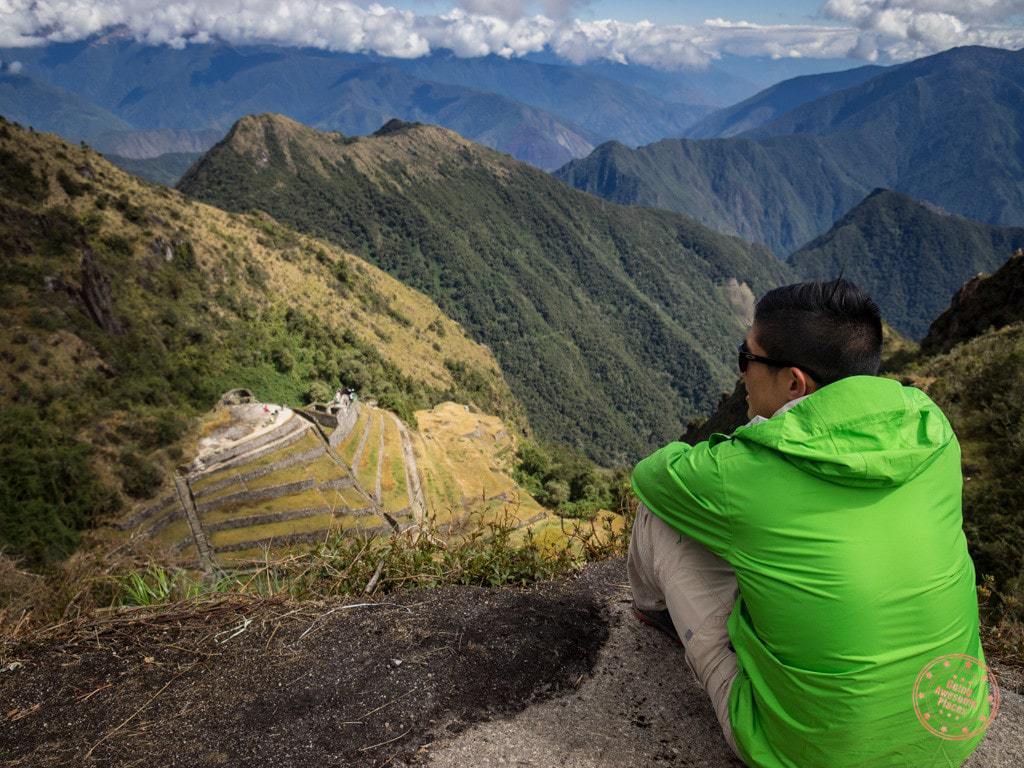
- Lightweight poncho – The poncho they provide is heavy duty and way too bulky to carry in a daypack but I was able to substitute it with my own that I picked up at the dollar store.
- Medicine – Advil, Pepto, Tylenol Cold & Sinus, and Emergen-C came in handy.
- Hand sanitizer – Goes hand in hand with the toilet paper.
- Camera quick draw – My f-Stop Loka has a pretty neat feature of being able attach a side holster called the Navin by f-Stop. This allowed me to pull my camera out for shot while hiking really easily. Today though, I’d probably just rely on the Peak Design Capture since I shoot Olympus mirrorless now.
- Geigerrig hydration bladder – Water bottles are flat out a bad idea on the hike. Bladders like Geigerrig make it incredibly convenient to get that constant sip of water as you’re hiking to keep hydrated. My backpack has a special compartment for the bladder and all I had to do was run the tubing out of it.
- Buff – This was clutch as always. I could put it over my head and ears when it got cold or around my wrist at other times.
- Warm gloves – Gym gloves weren’t useful at all but having something like knitted winter gloves was a good idea. I didn’t actually pack these but in Cusco I bought fingerless Alpaca gloves that helped keep my hands warm when it was cold.
- Cliff Bars and other snacks – While Alpaca Expeditions provided snacks for the day and the meals were packed, it was still nice to have these on hand for a nice energy boost.
- Hiking socks – Having good socks was key to make sure I didn’t have any problems with my shoes. They also kept me warm at night. Highly recommend merino wool ones.
- Headlamp – We actually needed our headlamps during our hike because we were so behind on Day 2.
Wish I brought:
- Second pair of long pants – I had my one pair of khakis for the whole hike but towards the end it became pretty gross.
- Long johns – I only mention this because Day 2’s campsite was frightfully cold at night. I didn’t feel warm all night.
- Legitimate camera batteries – This was perhaps the most frustrating thing. I’ve never had issues with third-party batteries but starting in Cusco, I started noticing that my batteries were abnormally expanded. This may be an altitude thing but that meant that my 6 or so backup batteries became instantly useless. That stressed me the heck out because there’s no way to charge during the trek.
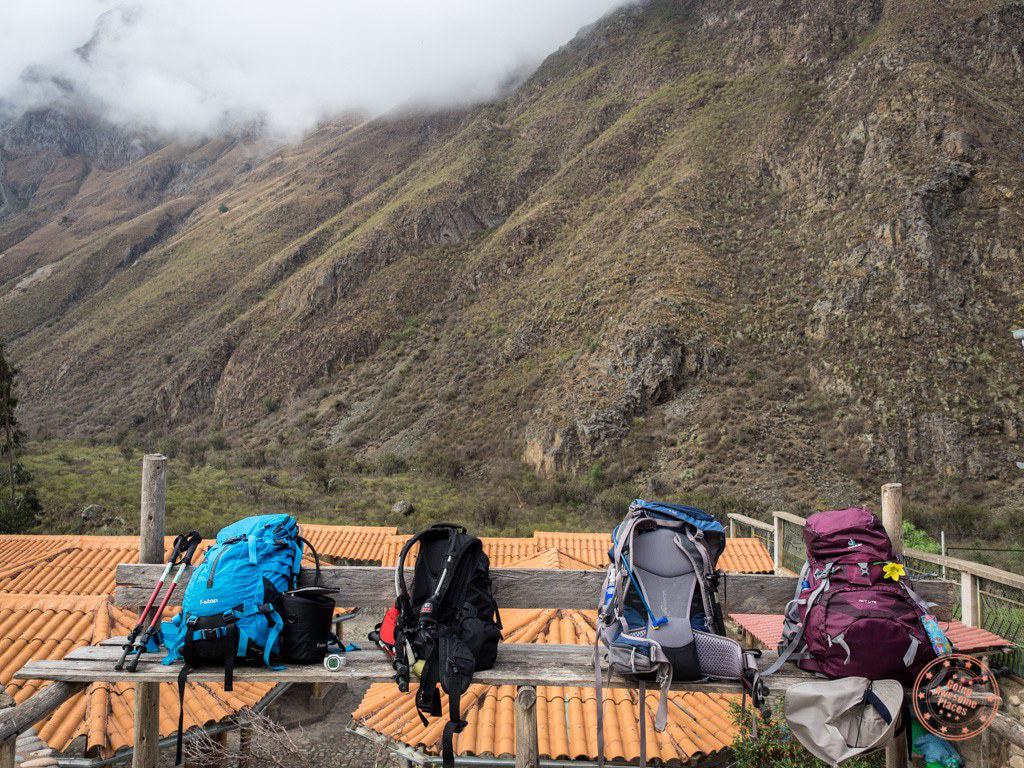
Daypack Considerations
If there’s anything to take away from this is the fact that you want to pack as light as possible. Weight is directly proportional to hiking misery. I won’t tell you what to put in your daypack but here are things you want to think about.
- Water is a must but it’s a double edged sword because it’s a significant part of the daypack weight. As a general rule of thumb, you’ll want 1-2 litres with you for each half-day. Keep in mind that you’ll be able to refill on water at lunch.
- Alpaca Expeditions provides a daypack cover so no need to bring one. This also helps keep your daypack clean because you’ll be dropping it on the ground all the time.
- Layering is key. It was handy having that fleece for when it got cold.
- Don’t bring your own hiking sticks. I thought about buying them from back home but ultimately it didn’t make sense to lug that weight around for the whole trip. They’re cheap to rent. The same goes for sleeping bags and pads.
Inca Trail to Machu Picchu Hike Itinerary Guide
The trail itinerary is pretty standard in that all companies take the same route. The only difference I could discern was that each company had it’s own camp sites whether for lunch or the evening. With that said, there are a few micro details that are easy to miss when planning out your itinerary.
- Bag Drop Off – You’re going to travel to Peru with way more than you’re going to want to bring on the trail. Have a plan for where you’ll be leaving your bags. Luckily, most hotels and hostels will be used to this so they should have luggage storage. I would double check to make sure.
- Acclimatization – Unless you’re a glutton for punishment, make sure you schedule in 2-4 days in Cusco where you can do what we did which was explore the city and do the tour around Sacred Valley.
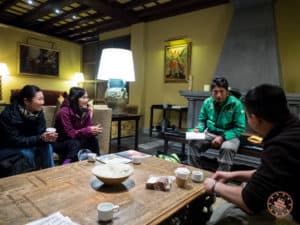
- Remaining Balance + Briefing – We planned a pretty tight itinerary and we only realized after the fact that we didn’t account for time to go to the Alpaca Expeditions office to pay the remainder of what we owed (oh yeah make sure you have enough $$$ for that). The other thing we didn’t account for was the hike briefing. This is done with your assigned guide. Our schedule was so packed that the only time we had for this was at 8PM on the day before the hike. Luckily Juan Carlos was able to accommodate and arranged to meet us at our hotel.
Best time of the year to go
So far I’ve talked about which trek to do, which operator to go with, and what to pack but what about when to go? Ultimately there are a few factors to think about when planning a trip to Machu Picchu.
- Wet vs. dry season
- High vs low season for tourists
Here’s my breakdown of when you should come:
- January – March: This is rainy season. February is so bad that the Inca Trail is fully shut down.
- April: Nice pleasant weather as the temperatures are warmer side but not extremely hot. Low season for tourists.
- May – June: The weather continues to cool down through the transition into winter and can be considered fresh (remember that Peru is in the Southern Hemisphere). Tourism starts to pick up again but is still manageable
- July – August: This is the height of tourism which means that the trail will be packed and so will Machu Picchu. High season of course corresponds to the summer holidays in most parts of the world. Ironically, this is also the most comfortable time of the year to go because nights are cool, climates are pleasant, and there is very little chance of rain.
- September – October: These two months are great shoulder months. Tourists starts to taper off a bit and the great weather continues to hold.
- November – December: These months are decent but you’re taking a risk on weather with higher chances of rain and temperatures continuing to climb as it moves into the height of Peru’s summer.
The long and short of it is that if you had to choose, May, June, September and October are really the best times to go that give you a good balance of dry weather, balanced climates and drop-off in tourists.
Dealing with Altitude

No matter how you slice it, high altitude sucks for us sea level dwellers. While it’s really hard to say how your body is going to react, I will speak from personal experience how it was to do the hike.
Completely counterintuitive is the fact that Cusco’s altitude of 3,339 m (11,150 ft) is higher than Machu Picchu itself which is 2,430 m (7,972 ft). This matters when you plan out your Diamox prescription. You don’t hit high altitude when you start your trail. It starts when you land in Cusco so make sure you count out your days properly because most doctors won’t know.

Coca tea is the local solution to altitude and we drank it the whole time. It was the kind of thing that didn’t taste bad and so we figured there was no harm. Some people say it tastes bad but to be honest it tasted like green tea.
I already mentioned it above but acclimatization is important. When you plan out your trip, make sure you account for at least 2-3 days in Cusco where you don’t do anything too physically demanding. While this didn’t exactly help with the challenges that were ahead of us on the Inca Trail, it made sure that our time in Cusco was a good one. The only effects I had was a bit of tingling in my fingers.
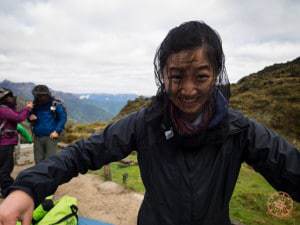
On the trail itself, there’s a mix of a bunch of things that can make you feel sick. I had tingly fingers and face for parts of it and it seemed to take longer to digest meals but where you’ll feel it most is just the lack of oxygen. With limited oxygen and never ending stair climbing, my lungs were working on overdrive. It actually felt like they were overworked and overstretched. The biggest adjustment I had to make was 1) not to push myself and 2) learn how to breathe properly. Pace yourself because going too hard will drain away your energy so fast that you’ll fall into serious exhaustion like what happened to me. Breathing is important because you need all the oxygen you can get up there.
Money
This certainly isn’t the top of your list of things to plan for but we found ourselves wondering about two things as we were wrapping up our time in Cusco and preparing for the Inca Trail.
Spending Money
We were told prior to going on the trek that we should bring at least $100 USD worth of Peruvian Nuevo Soles (PEN) in case we wanted to buy something along the way. Turns out you don’t need that much but you’ll want to make sure you have some in your pockets for the few spots where you’ll need it.
On the first day you eat breakfast at a restaurant called Sexy Llama in Ollantaytambo and here, you’ll have one last chance to buy last minute gear. Our friend Helen left her hat at the hotel in Cusco and so she was able to buy one here.
From a money perspective, what I will say is that you should make sure you break up your bills for dollar PEN coins. I say this because during the first half of day #1’s trail, you’ll be passing through a lot of local farmer’s properties and if you have to relieve yourself, you won’t be able to dash to the nearest bush. The locals there have of course learned how to monetize this fact and there are a few houses along the way that are open to trekkers. For 1 PEN, they let you use their toilet. It even comes with toilet paper!
Other opportunities to use money include a few stands that locals set up along the trail. You’ll encounter them mainly on the first day and at the way station right before Dead Woman’s Pass ascent. Beyond that, there aren’t any locals trying to sell their wares along the way as I was lead to believe.
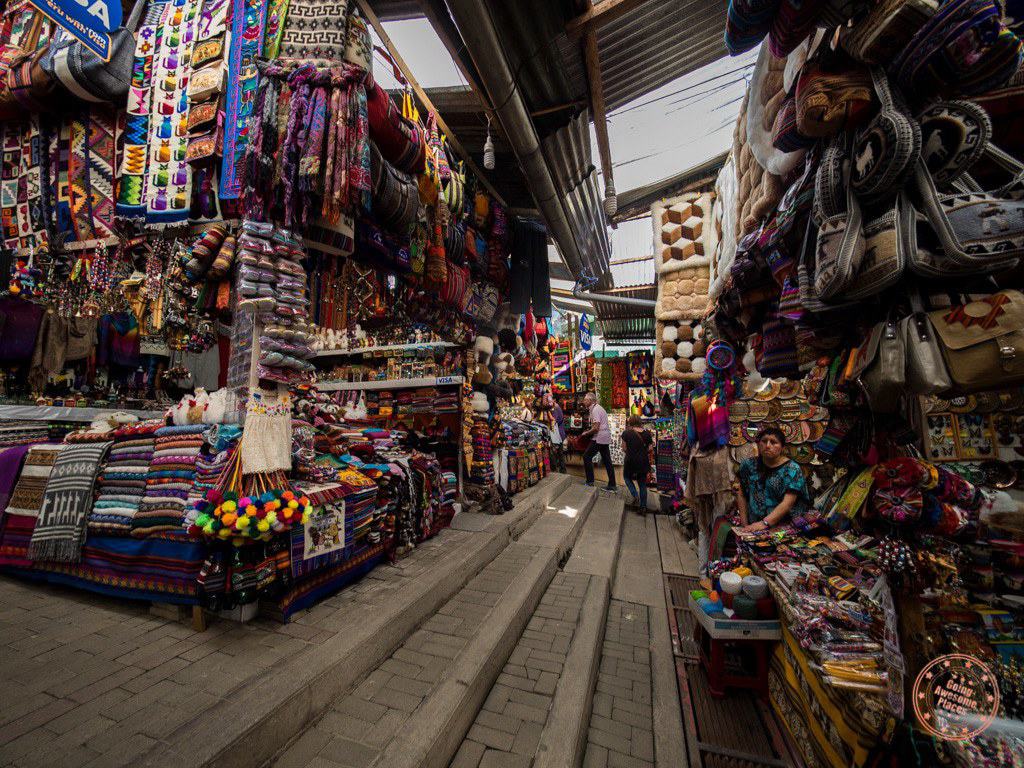
The remainder of the money you want to prepare is for the toilet at Machu Picchu, lunch in Aguas Calientes, souvenirs you may pick up at the market set up right outside the train station, and of course tips.
Tipping
This is always a sensitive subject and of course you want to make sure you tip according to the quality of the service you receive. That being said, you kind of need a guideline to work off of because we sure as hell didn’t know what was reasonable or not.
Alpaca Expeditions recommends the following:
- 60 PEN per porter
- 150 PEN for the cook
- Whatever you feel like for the guide
For us, our breakdown per person was this:
- 190 PEN for the porters and cook
- 70 PEN for the guide
My recommendation is to figure out your tips before your last dinner at the end of Day 3 otherwise you’ll end up scrambling at the table. Since we were in a rush, we ended up accounting for 2.5 porters per person. The calculation looked like this: 60 PEN for the porters x 2.5 porters / 4 people + 150 for the cook.
Another piece of advice is to not do what we did which was bundle the cash together for the porters and cook. We realized after that this left a lot of guess work to the porters when trying to figure out how to split it between the cook and porters. Keep it clear and pay the cook separately from the porters.
The guide is paid last and at first we thought this was going to happen at dinner but it actually happened at lunch in Aguas Calientes when we said our final goodbyes.
Withdrawing Money
Before coming to Peru I exchanged a bit of PEN from the local bank but there was no way I was going to convert enough for the whole trip. So as with any other trip, I planned on withdrawing money along the way.
Using my debit card I was able to successfully withdraw from several ATM’s. The key thing to pay attention to is whether the machine itself will charge you a fee or not. Stay away from those. ScotiaBank in Cusco worked pretty well for us.
Another way to get more local currency is to convert (ideally) USD to PEN. Banks aren’t going to give you competitive rates so what I did was walk around the city to find out what the local money changers were quoting. All of them seemed to have the same rate so I eventually settled on one near the main square. I of course made sure the double count all the money in front of them.
You’re probably wondering why I didn’t just keep the USD and spend it straight up as a lot of guides and forums will suggest. Sure this is possible as USD is widely suggested but every local we talked to said it was a bad idea. At the end of the day, you’re going to get ripped off on rates if you spend USD. Only do it in a bind. At the markets, I noticed this was particularly the case because when I asked for PEN prices, I’d get one price but when I asked in USD and did the conversion on my phone, the prices were way higher. Locals will often use this as a sales tactic.
For me, the best strategy for money was just to have some in hand before arriving in Peru and convert along the way. You’ll have to judge how much you need for certain legs of the trip because you also want to make sure you don’t over withdraw/exchange either.
Total Costs
So how much is this going to cost?
- 4D/3N Classic Inca Trail with Alpaca Expeditions – Private Tour = $750 (now $1,250 so the prices have gone up since 2015)
- Huayna Picchu = $65 (now $75)
- Sleeping Bag = $20
- Hiking Poles = $15
- Sleeping Pad = $15
- Tips = $80
Total cost = $1,455 USD per person
Mosquitos
You’d think that dry, cold and high altitude climates would dissuade blood sucking creatures from thriving but let me tell you, they’re vicious up there. I almost feel silly having a special section just for this but no kidding amongst everything else we encountered, this was the biggest surprise. We knew the Amazon would get bad but seriously the Inca Trail as well?
What makes these mosquitos so brutal is the fact that they’re really tiny and pack a wallop when they bite. They’re small which means you think they’re just regular flies at first. When you realize they’re mosquitos, it’s already too late. I say that the bites pack a punch because 1) they leave a drop of blood where they chomp and 2) these bites swell into hardened welt and seem to longer for a long time. Not to scare anyone here but 2 months later, my bite scars are still there and some have even come back to itch out of nowhere. These are next level mosquitos.
The only solution we had for these guys was deet. Spraying it on exposed skin was the only countermeasure that seemed to keep them away. Case in point, when we stripped down to shorts at Machu Picchu because it was so hot that day and forgot to spray, those parts of my leg were hit the hardest. Be vigilant and deet up.
I’m not convinced that you need this for the Inca Trail but we did pull out our mosquito head nets on the morning of Day 3. After breakfast, we came out to pack up our gear and we were literally swarmed by hundreds of black specks. It was so bad that even the porters were asking for deet.
To Huayna Picchu or Not?
After 4 days of strenuous hiking and bouts with altitude, I remember coming down from Machu Picchu and asking Juan Carlos which one was Huayna Picchu. Let’s just say it’s not that little hump on the left as I had originally thought. When I realized it was the towering mountain to the right, doubt started creeping in. It’s hard to see in this photo but from afar you could see the outline of the sheer vertical climb that outlines the spine of Huayna Picchu. It looked crazy.
Since we booked the permits for Huayna Picchu beforehand, we had a call to make. To climb or not to climb. Juan Carlos gave us as much time as we had to make a decision. In the end, 3 of us decided to do it and after our quick tour of the city’s ruins, we raced to the back where the entrance to the mountain is. We almost didn’t get in. At the front gates was a big sign that said that there are two groups that can go through each day: 7-8AM and 10-11AM. I looked down at my watch and it was 11:10AM. Luckily for us, Juan Carlos worked his magic and got the attendant to let us through. With only 2 hours to work with, Juan Carlos instructed us to turn back down after an hour no matter where we were on the mountain.
I can’t explain it, but we somehow founded another gear and ran to the top of Huayna Picchu and back down in less than 2 hours. It was remarkable. Part of it had to do with the fact that there was way more oxygen at this altitude and the other was that we knew we would miss our bus down if were too slow.
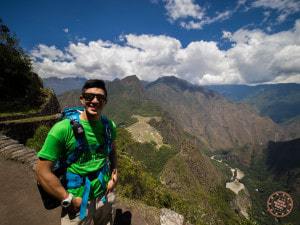
Was it worth it? Absolutely. I would recommend this add-on hike for anyone that wants to see Machu Picchu from an entirely different perspective. The trade off is of course that you take away from your time to explore the ruins. You also need a massive burst of energy to do this segment so make sure you think about whether your knees will be up for more punishment. The only regret I have is that we didn’t have more time to explore the side trail of the mountain that takes you to the Temple of the Moon.
We’ve written a full guide on whether Huayna Picchu is worth it or not. Make sure you check it out!
Do You Need Travel Insurance?
This is a common question that anyone planning a Inca Trail trek is going to have.
“Do I need travel insurance?” and “Is travel insurance really that necessary?”
The answer is yes to both.
While you may feel invinceable, I think the main thing I’ve been trying to hammer home with my Inca Trail truths and everything I learned about hiking to Machu Piccu is that you just don’t know how hard you’ll be hit with altitude and moreover, you just don’t know when something bad will happen.
Luckily, our group was able to pull through despite the severe diarrhea, twisted ankle, and massive exhaustion but if it was any more serious, we’re talking about hospitalization, emergency evacuations, or worse.
That’s why I never travel without travel insurance. How to buy the right travel insurance is hard but once you figure out what you need, you’ll have the peace of mind that you’ve got a plan if shit goes wrong.
For the Inca Trail specifically, you’ll want to make sure you’re going with something like World Nomads (read our review) that’ll cover you for high altitude. If you read the details for many policies, they only cover hiking for up to 3,000 meters (9842 feet) but the highest point along the trail is 4,200 meters (13,776 feet). This is considered to be Level 3 for Canadians which requires an add-on but included in the Standard Plan for Americans with World Nomads.
Everything Else You Should Know About
I’ve just about covered everything but there are a few final things that I wanted to throw in here to help you adequately prepare for the Inca Trail.
- It’s dry as heck here – I mentioned it in my Inca trail experience wrap up but Cusco and the whole Inca Trail was ridiculously dry during the time of year we were there (September). My nose was chapped all the way through. Make sure you bring a chapstick.
- Bonus shower – I don’t know if this is a service that all trekking operators have but you don’t know how good it felt to have a warm shower on Day 3. They call it an “Inca Shower” for a reason. It’s literally a shower where you scoop hot water from a bucket into a bowl and pour it over your head manually. It’s not fancy but it’ll be the best shower you ever have.
- Zip locks – These were very handy to have. Additional storage and organization is obvious but they were good to have to store all of your toilet paper you use when nature calls on the trail. I’ll leave it at that.
- Cell phone – You’ll only have signal the first few hours of Day, spotty data at Machu Picchu, and full service in Aguas Calientes and beyond.
- Cheating a little – As the days went by, we kept thinking of ways to shed weight from our day packs into the duffle bag. We were definitely over the 7 kg limit but turns out there’s a bit of wiggle room.
- Back out and in – There’s a weird rule that Inca Trail hikers can’t explore Machu Picchu with all of our gear. As we came down we were allowed to take photos but after that we actually had to leave the park and re-enter. When re-entering, you won’t be allowed to bring hiking sticks so at this point, you’ll be able to check that in. You can also use their bag storage here.
- One bathroom Machu Picchu – From what I could gather, there’s only one bathroom facility and it’s outside the entrance. It’ll cost you 1 PEN.
Top 10 Tips for Hiking the Inca Trail
I’ve covered all the core things but here’s the TLDR/essentials of what you need to know when planning a trip to hike the Inca Trail.
- Make sure to acclimatize – Arrive to Peru early and more specifically Cusco so that you have at least 2 days to get your body adjusted to the altitude. Remember, Cusco is actually at a higher altitude than Machu Picchu.
- Pack good sunscreen and bug spray – The bugs aren’t that bad but when they come, they hit you hard. For those in the US, you can treat your clothes with permethrin or use bug spray with deet. For sunscreen I recommend Sun Bum 50SPF.
- Have altitude meds on hand – If you’ve never hiked at altitude, you want to make sure you’re ultra prepared with Diamox which you might need a prescription for. You can also try chewing coca leaves, the local remedy.
- Pack your own med kit – Your trekking guide will have some of the basics in their first aid kit but don’t chance it and bring your own first aid kit with add your collection of bandages, blister kit, something for upset stomach (Pepto-Bismol), antibiotics (Cipro), Emergen-C, sore throat lozenges, and something for headaches (Tylenol/Advil). You’ll thank me for being over-prepared.
- Pack light – Everything you carry on your back will feel like a bag of bricks at altitude. Bring as little as you can in your own backpack and put everything else in the duffle for the porters . Leave all non-essentials in Cusco.
- Use hiking sticks – Take advantage of our exclusive offer with Alpaca Expeditions and use those free hiking sticks included. They’ll help you on your trek especially when going downhill.
- Get a hydration pack – I was a big fan of Geigerrig back in the day but any Camelbak hydration system will work. As our guide recommended, keeping your lips moist is key and drinking often. You can only do that with a hydration pack.
- Powerbank to charge – There are no outlets along the way so make sure you bring a large powerbank to charge your smartphone and camera batteries. Buy a camera battery charger that can charge via USB.
- Break in your shoes – You might be buying new hiking shoes for this trip but the worst thing you can do is wear it for the first time on the trip. Make sure your shoes are comfortable and don’t chafe in weird ways or cause blisters.
- Have cash ready – Pre-calculate your tips so you know what you need for your group and set it aside. You’ll also need local currency for the bathrooms at Machu Picchu.
Where to Stay in Cusco Before And After
If you’re starting to plan your Inca Trail to Machu Picchu hike, you’re going to need to find a place to stay before and after the hike which means, figuring out your time in Cusco.
Below are a few of the recommended places that I personally stayed in (yes all 3) during our trip so I can vouch for all of them when looking for a place to stay in Cusco.
BEST
Thanks to SPG points, we were able to stay here the night before our trek. We met Juan Carlos in the lobby for our pre-hike meeting and were treated with upscale rooms as you’d expect as this is part of SPG’s luxury collection.
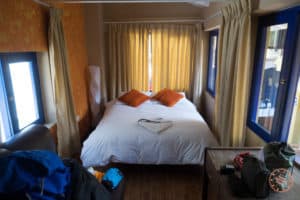
MID-RANGE
We stayed here after we returned from the Inca Trail and we were so glad to have this place because we really needed a place to rest with all of us recovering from some sort of ailment. This loft-style hotel was perfect for us as two couple with each of us with our own floor.
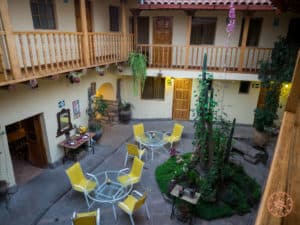
BUDGET
We stayed here our first two nights and for a guest house/hostel I was really impressed. Extremely clean, spacious, and really should be classified as a hotel. Came with breakfast and they were also nice enough to hold our bags while we were in the Sacred Valley.
Recommended Activities in Cusco
You’re going to be spending quite a bit of time in Cusco so while you’re acclimatizing, here are a few top activities that I recommend that you book before they sell out.
How to Get Free Hiking Sticks and Sleeping Pads
I highly recommend that you book with Alpaca Expeditions. They’re best in class and only have good things to say about them. If you want to know more, don’t hesitate to reach out to me.
Exclusive Alpaca Expeditions Promotion
If you’re looking to book with Alpaca Expeditions, mention that you were referred by “Going Awesome Places” and you’ll be able to get free walking sticks and sleeping pads. Also make sure to email me as well so I can resolve any issues that you may have.
How? When you fill out their booking form, their second step has a drop down for “How did you hear about Alpaca Expeditions”. Select “Going Awesome Places Blog” in the drop down.
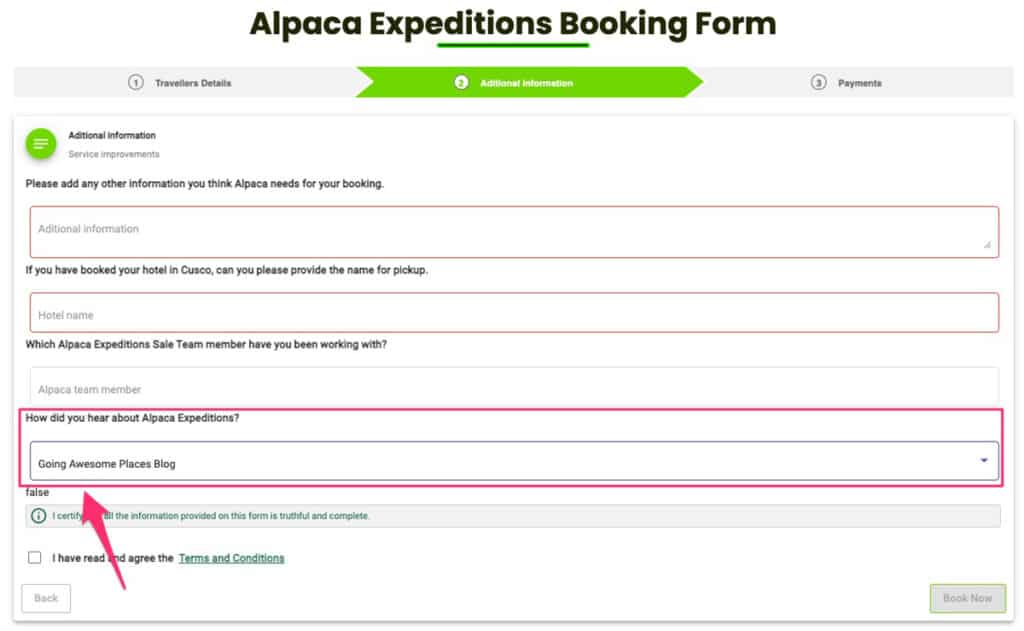
This is the best Alpaca Expeditions discount you’ll find on the market.
Frequently Asked Questions
With all things considered, you really can’t beat the Inca Trail itself because it is the only one where you arrive at Machu Picchu early in the morning through the Sun Gate. There are also a large number of ruins and sights to see along the way that the other treks don’t offer.
the 4 day 3 night option is the de-facto standard and what I’d recommend for most people that are coming to Peru to hike the Inca Trail.
There are a wide range of trekking companies that do the Inca Trail route but one of the best is definitely Alpaca Expeditions.
Yes, Going Awesome Places offers free walking sticks and sleeping pads as long as you say that you heard about Alpaca Expeditions from “Going Awesome Places Blog”.
It costs $895 USD to do the standard 4D3N Inca Trail including Huayna Picchu, equipment rental, and tips. The private tour will cost $1,455 USD per person.
If you have any questions about your own Machu Picchu trekking trip and have questions about picking an Inca Trail operator or are wondering about some specific details about Alpaca Expeditions, don’t hesitate to drop a comment below!
What you should read next
