When we were planning our honeymoon and deciding where we could go, South Africa was on the top of our list because it was a country where we felt like we could get an incredible balance of wildlife, outdoor adventure, luxury while staying on a budget, city exploration, culture, and sweeping scenery. As we delved deeper in our trip planning, it became clear that the Kruger National Park and nearby private game reserves was the best choice for safari.
If you’ve ready any of my other guides like my Tokyo food guide, Atacama Desert, Torres del Paine, Taiwan, Newfoundland, Inca Trail, or Iceland, you’ll know I love to get right into the nitty gritty details so get your cup of coffee ready because there’s a lot of knowledge to share that you probably won’t find anywhere else. We spent a total of 2 weeks in South Africa but I’m going to be focusing on our nine days in the Kruger National Park region. There’s a small breather built in there but I’ll leave that for the full review of how to plan a trip around the Panorama Route. Let me show you how to plan a safari in South Africa. Let’s us help you plan your safari!
Read more about South Africa
- Kruger National Park for first timers
- 13 of the must-see things in Africa
- 1 week Cape Town itinerary
- What a South African safari is like
How to get the best deals in travel
- Hottest deals – Bookmark the travel deals page.
- Car rentals – stop getting ripped off and learn about car rental coupon codes.
- Hotels – Use corporate codes or get Genius 2 tier with Booking.
- Flights – Have you ever heard of the “Everywhere” feature?
- Insurance – Make sure you’re covered and learn more about where to buy the best travel insurance.

In This Article
First in our honeymoon vlog series
To whet your appetite, this is part one of honeymoon series that covers our journey from Toronto to South Africa. Feel free to start here or if you’d like to jump right into it, head to the Honeymoon Vlog playlist.
Planning A Trip to South Africa
Now I’m sure many of you reading this have the same thoughts when I first started building our itinerary – can I plan an independent vacation in South Africa without the support of a tour company? I was nervous about it because there seemed to be a lot of things I didn’t know or understand. Luckily, I had a friend that talked me through it. I had a lot of questions as you can imagine.
Before we can dive into the fine details of the 9 day South Africa safari itinerary, it makes sense to set the stage and talk about the basics for what you need to know.
What’s so tricky about planning a safari to South Africa?

Confusion and overwhelmed – the feelings I had when I first started planning for the honeymoon. I can’t be the only one right?
I’ve been to Africa before with my trip to the Omo Valley in Ethiopia and cruising the Nile in Egypt and I knew that I had to cater our travel style to the region but there were a ton of questions swirling that were unique to South Africa.
The truth is that South Africa is a more developed country and I suppose more Western friendly in some ways and so you’re afforded with more options in the country when it comes to getting around. More options though mean more research. Are the roads safe? Should you book transfers? Is it better to fly to Kruger?
Then there’s the safaris themselves which are a whole other animal (pun intended). This isn’t exactly a trip to the zoo. It was clear from the onset that Kruger was a great place especially for first-time safari goers. However, the deeper you go, the more you realize how massive the park is. Then there’s the question of private reserves versus doing the park. Oh wait, then there are all the outlying areas that have private reserves which leads to more analysis paralysis!
At this point you should be nodding your head off.
Being prepared for South Africa

I’ll get into more of the specifics but if I were to list my top 6 things that I learned that I would like to impart to you guys to make sure you’re as prepared as possible, it’d be this:
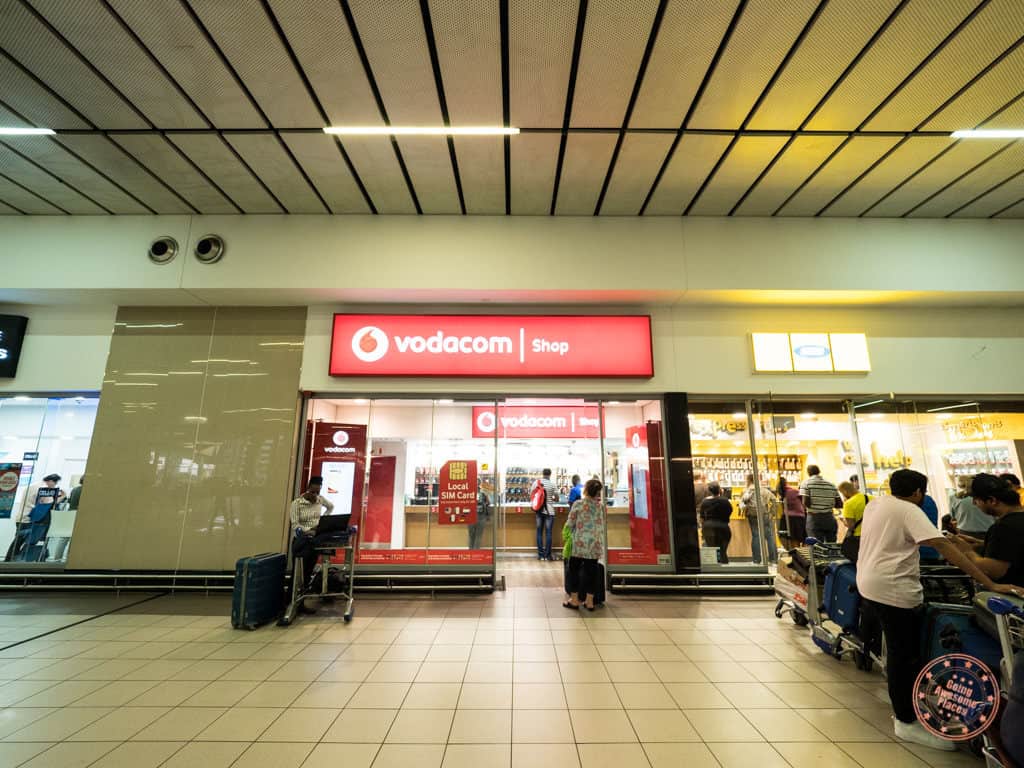
- Get data – The one constant with how technology has changed how we travel. Helpful in a jam and for most navigation purposes. We opted to go pick up a Vodacom SIM immediately once we landed in Johannesburg but there are other options which I’ll get into later.
- Print things out – The immediate contradiction to the first point. Google Maps is also going to get you in trouble especially to get to the private reserves. Don’t dismiss the instructions they send to you and make sure you have a print out. Printing out reservation confirmations is a good idea because there’ll be points in the trip where someone is going to be checking them.
- Beware of the traffic cop – Sadly, this is still an issue in South Africa. Know where to stick to speed limits and what to do if you get pulled over. Read the Getting around South Africa section for tips.

- Buy an animal book – I usually not a fan of buying books and certainly didn’t do it when we went to Peruvian Amazon but when you’re seeing so many animals every day and you want to keep track of what you’ve seen, it’s actually quite handy to have one of these Kruger animal guides.
- Withdraw Rands at home – Like the South African adapters, you’re not going to have time to worry about these things so my recommendation is to withdraw what you need for your safari at home. The exchange and commission rates are a rip off at the airport. Don’t do it!

Where did we stay?

This is a complex and loaded question but let me attempt to break things down to be as simple and as to-the-point as possible. Click into the other links where I go into more depth for Elephant Plains and Kruger National Park.
Starting off in Johannesburg
Since we ultimately decided to drive from Johannesburg, we needed a few accommodations in the city on the book ends of our safari.
SUPER AFFORDABLE

Quite the lovely property near the hotel. With ample parking and gated, we were given a spacious room that was perfect for our short overnight needs. Breakfast is included, airport transfers and wifi as well.
GREAT ON POINTS

Everything is what you’d expect from this large chain of hotels in South Africa that is under the Marriott umbrella. The lobby is quite beautiful with that vintage aviation feel. The rooms are clean, spacious, and modern.
Travel Hack – Protea is under the Marriott brand but what most don’t know is that almost all of them are low category hotels (Category 1 in this case). This means that South Africa is the perfect place to spend your Marriott points. It only costs 7,500 points to stay here per night. If you’re in Canada, just sign up for the Marriott Bonvoy Amex and get 50,000 points. That’s 6 nights right there.
Private game reserve lodge

The truth of the matter is that I wouldn’t have been able to figure out what private reserve to pick without the help of Andrea from Wandering iPhone. I seriously needed the recommendations because even when you narrow things down to the Sabi Sands Game Reserve and you browse through the list on TripAdvisor, it’s impossible to grasp all the nuances of how one is better than the other no matter how much you filter it.
When Andrea told me that Elephant Plains was a property that she stayed at and loved and on top of that was an amazing balance for price and quality of service, I was sold. I was glad to take the recommendation from someone that’s been there and true to her word, when I did some price comparisons, Elephant Plains was far and beyond the most reasonable and that’s even with the fact that I booked the honeymoon suite.
For the full review of my experience at this private reserve game lodge in, make sure to read the Elephant Plains review.
If I were to do it again, I’d go back to Elephant Plains without hesitation. The only reason I would look at trying somewhere else would be because I might want to see a different animals that don’t commonly pass through the lodge’s land.
Why Sabi Sands?
Located directly adjacent to Kruger National Park, Sabi Sands Game Reserve was a no brainer for me because it’s the most well known of game reserves in the region. It covers 65,000 hectares where the land is split between a number of game lodges owned by now third and fourth generation land owners. This is unique because if you take a look at the map, other private reserves are not necessarily directly connected with Kruger.

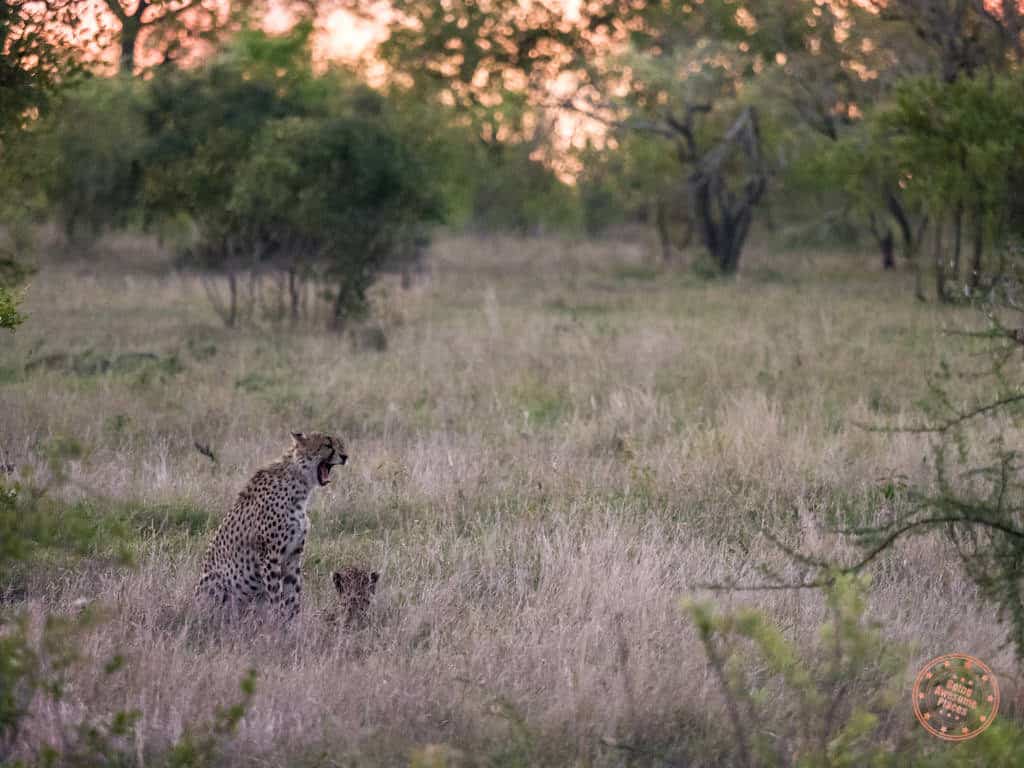
I didn’t understand what that meant before going but having seen it with my own eyes, the concentration of wildlife that tread through and call this their home is incredible. It’s so well known because of the high probability of close encounters with the animals that are considered elusive including the leopard. It was crazy at Elephant Plains because in a matter of 3 days we had handily seen Africa’s “Big Five” which includes the lion, leopard, buffalo, elephant, and rhino.
Biodiversity is intriguing as well because the Sabi and Sand Rivers run through the reserve. It also helps that there are no fences at the boundary between Kruger and Sabi Sands which means animals freely roam through both sides of the border.
Kruger National Park
This can be an incredibly complicated answer but if we’re taking this from the perspective of 1) This is your first time in Kruger and 2) You have limited amounts of time, your choices are going to start narrowing down to where it becomes much more manageable.
I do a full review of Kruger National Park as a first-timer so make sure you head there first because there is a ton of valuable information in there and some ranting as well.
Ultimately my decision process for how to plan a South Africa safari looked like this:
- We had 3 nights to work with
- The way things worked out with, Elephant Plains and adding Panorama Route in the middle, we were way closer to Paul Kruger Gate than any other gate
- Skukuza rest camp just seemed to make sense to start with because it’s the largest and somewhere that would be great to ease into the experience
- With one rest camp left, there were thoughts about bushveld camps or safari tents, and there was also the thought about going north up to Satara to get a change of terrain but ultimately Lower Sabie just made more logistical sense since we’d be exiting out of Crocodile Bridge
Bottom line, wherever you pick isn’t going to be a big difference as your first time. It was nice to be able to get a look at two camps so be able to explore different roads but I truly think you can’t go wrong with anywhere.
Travel Tips – Book early. You can start booking one year out so the earlier you can reserve your activities and most importantly accommodations, the better.
Alternative accommodations
One thing that could be an interesting option is, what if you didn’t stay inside the park but instead “commuted” in and out every day? You wouldn’t get the camp experience but there are a few advantages to this.
Pros
- More comfortable stay at a hotel vs the bungalow accommodations inside Kruger
- There is the Kruger Gate Hotel. This used to be a Protea property and connected to the Marriott but it now an independent hotel.
- Not be restricted by what’s available in the rest camp
- If you’re not interested in self-drive, you can work with a tour operator for a more all-inclusive experience
Cons
- You will end up wasting extra time each day going through the road that leads in and out of the gate
- More time management as you need to account for the time it takes to get to the gate right when it opens if you’re an early-riser or if you’re pushing the limits and wanting to just make it out of Kruger before the gates close
- Will not be able to take advantage of the activities offered within the camp since you need to stay at that camp to be eligible for booking them
- Will not get the full Kruger experience
- You won’t be able to venture that far if you’re staying at one hotel the entire time
- Will be much more challenging to go back to the hotel to rest in the heat of the afternoon. Instead you’ll likely have to just hangout in a rest camp or rest stop in between
Arriving and departing South Africa

If we just focus on getting in and out of the country, you’re most likely looking at quite a long journey unless you’re already in the continent.
The primary airport you’ll be flying into is the OR Tambo International Airport in Johannesburg with code JNB. This airport is serviced by a number of big carriers but not all so you’ll most likely have to rely on airline alliances to hop down here. It’s the closest you’ll be able to get to Kruger National Park as your first entry into the country.
This is my preferred search engine of choice mainly because it does a great job with price alerts, showing creative flight connections, and open ended “Everywhere” searches.
Find Your Flight
Travel Hack – South Africa is great destination to use your frequent flyer miles. I ended up using my Aeroplan points for this trip got amazing value especially when you consider all the stopovers I was able to pull off. I only paid $203.60 CAD per person.
Travel Alert – If you watch VLOG 5, you’ll see how we had our luggage broken into flying out of OR Tambo in Johannesburg. I would be very careful flying in and out of that airport. Do not leave any valuables inside.
Getting around South Africa

There are a 4 different options for getting to your safari experience assuming you’re starting from Johannesburg or connecting through there.
- Fly into Johannesburg and rent a car
- Fly into Johannesburg, connect to one of the 3 airports that service Kruger, and then rent a car
- Fly into Johannesburg, book a transfer or full tour
- Fly into Johannesburg, connect to one of the 3 airports that service Kruger, then book a transfer or full tour
Available Airports near Kruger National Park

The main international airport is of course O.R. Tambo in Johannesburg (JNB). From there, your best bet is to fly to Nelspruit Airport/Kruger Mpumalanga International Airport (MQP). This is your main gateway to the southern sector of Kruger National Park.
If you’re looking to gain access to the central sections of the park, you can fly into Hoedspruit (HDS). For the north, fly into Phalaborwa (PHW).
You can also fly straight into Kruger National Park with the Skukuza Airport (SZK). Flights from Airlink by South African Airways can take you in for roughly $300 USD round trip from Johannesburg. There are direct flights from Cape Town as well. Just do a quick search on Skyscanner.
Beyond that, then you’re talking about private chartered flights to some of the lodges that have airstrips.
Your transportation options
1. Fly into Johannesburg and rent a car
This is the option we selected and it worked out for us fairly well as it gave us full freedom to explore on our own and see the countryside as well.
Book a rental car with pick up and drop off at the Johannesburg airport and you’re off. The drive from Johannesburg to Elephant Plains takes a whopping 7 hours while driving from Kruger National Park via Crocodile Bridge back to Johannesburg takes 5-6 hours.
Pros:
- Cheaper option than flying and gets cheaper if you have more passengers in the car
- The N4 is uneventful but once you get of to the smaller roads, it’s quite the scenic drive
- There’s the possibility of exploring more around Johannesburg and places in between (not something we did)
Cons:
- You waste a lot of time driving and it’s tiring. 6-7 hours each way means you need to account for half a day at the start and end of the trip
- The car rental may end up costing more than you think once you add in insurance and tolls
In retrospect, it might’ve made more sense to fly into Hoedspruit or Skukuza to save on time and energy. I’m not sure why I didn’t look into it at the time but those are definitely viable options as you’ll see below.
CAR RENTAL BOOKING TIPS
Always look for a code. I’ve put together a handy compilation of all the best car rental coupon codes so try them out.
All the big car rental companies can be found in South Africa. My preference are for Avis and Europcar.
Make sure the credit card that you use for the reservation will still be valid by the time you go.
Travel Alert – There are a number of additional car rental costs that aren’t clearly laid out. Renting with Avis, we were quoted $336.85 CAD. However, when we got there, we felt it was a good idea to add on insurance just because we’d be out there for so long. There were also tolls along the way that surprised us. This ended up bringing the total up to $591.04 CAD.
2. Fly into airport near Kruger and then rent a car
Instead of driving from Johannesburg, connect on a flight to one of the nearby airports of Kruger National Park and rent a car from there. Pretty straightforward option that cuts the driving from Johannesburg and brings you right into the heart of action.
Kruger is very much a self-drive experience so I highly recommend that you rent a car. Your own car will also afford you the freedom to do the Panorama Route.
Pros:
- Saves you up to 14 hours in driving time since most likely you won’t be doing anything in Johannesburg
Cons:
- On average more expensive because you have to spend money on flight and car rental
- Can be restrictive depending on the flight scheduling and making everything align
3. Pay for a transfer to your private reserve lodge or book a package tour
This is more of the all-inclusive option where you pay a tour company for a full experience once you land in Johannesburg. There are a few options: 1) You can coordinate with your private reserve game lodge for a transfer or 2) Book a package tour that leaves from Johannesburg. You can easily do 1 day, 2 day, 3 day tours or look for bigger experience like the South Africa trips offered by G Adventures.
Pros:
- Be able to be a bit more hands off when it comes to planning
- No need to worry about driving at all
Cons:
- Cost will be the biggest tradeoff
- Less customizable experience
- If you’re looking to combine this with a self-drive through Kruger, you’ll have to rely on another private transfer to a car rental company or join with another tour group which could get complicated
4. Fly into airport near Kruger and then get a transfer
This is the last variation where you fly into Kruger and do something pretty much similar to #3 which is to get private transfers or hop on a tour. Pros and cons are pretty much the same.
Driving in South Africa

We elected to do the full driving experience in South Africa, having our own car starting from Johannesburg to Kruger and then all the way back. While I can’t say that the driving was complicated in this part of the country, there were definitely a few key things I needed heightened awareness of that you need to know.
Driving on the left side of the road – Not that big of a deal if you’ve done it before but if it’s your first time, just expect to take a day to get acclimated to it and just be weary of the slow drifts to the left.
Speed limits – Highways are 120km/h (75mph) and secondary (rural) roads it is 100km/h (60mph). In more built-up areas, it’s usually 60km/h (35mph), unless otherwise indicated. If you get a speeding ticket, the rental company pays the fine and passes it along to your bill + admin fee. I thought in general the speed limit was higher than what I was used to but I can’t complain.
Pay attention to the speed limits within Kruger as well which is typically at 50km/h (31mph) on tar roads and 40km/h (25mph) on dirt roads.
Traffic police – A sad reality of South Africa but essentially there are real traffic cops in certain speed trap areas on smaller local roads. Especially coming down hills and as you approach small towns, you’ll notice that they drop the speed limit down to 80 km/h and then almost abruptly down to 60 km/h. If you get pulled over by one of these traps and they want to give you a ticket, the key is that you insist that you take a ticket and that you’ll pay at the police station. This forces their hand and most will let you go because they don’t want to deal with the paper work. What they will try to do is tell you a sob story about how they’re looking for a few Rands to buy a sandwich and they’ll let you go. Most tourists end up panicking and falling for this “bribe” but it’s not encouraged because it just reinforces this corrupt behaviour.
I tell you all this but it didn’t happen to us. Follow the advice above and you should be okay.
Travel Alert – There was one situation where there was an intersection with traffic lights but it wasn’t working so we blew by it but we learned later that you’re supposed to treat it like a stop sign. Luckily we weren’t stopped.

Self-drive safari in Kruger – As much as you think you’re going to cover a lot of ground, you’ll always find yourself driving a lot slower than you think. You’ll be stopping a lot and with that, you’ll want to make sure that you safely pull off to one side and use your emergency signals. It’s easy to get caught up in the moment and swarm in to look at something but make sure other cars can pass through and you’re not doing a crazy maneuver to get in. Also make sure to keep a safe distance from the animals.
The nice thing is that all the main roads are all pretty well paved and all single lane, two way. The clearly marked dirt roads are fun to explore but of course make sure you drive a little slower as it will be quite a bumpy ride. That said, we were very impressed with how well even the dirt roads were maintained.
Lastly, you have to remember that you absolutely cannot step out of the car when you’re outside the rest camp. Windows are fine to be down but you don’t want to be that guy or gal on YouTube. The only exception are lookout points where you are allowed to get out of the car.
Passing Cars – On the single lane roads, you’ll be tempted to pass. All the regular passing rules apply except remember you’re on the left side of the road so pass to the right. One thing I noticed is that South Africans always do is that once you’ve completed the pass, you always blink your emergency lights 2-3 times as a courtesy thank you. Also, sometimes you’ll notice big trucks start lean to the left and that’s to let you pass more easily.

Filling up – The best place to fill up is roughly at the halfway point to Kruger at the Alzu N4 Petroport in Middleburg. It’s a very new and modern rest stop that has a gas station, convenient store, a Mugg & Bean cafe, restaurants such as Nando’s, restrooms, and even a mini-zoo to go along with it.

The gas station there is a little bit intimidating because it’s full-service and a whole crew of people come out to fill you up and wash your windows. You can certainly pay a tip if you feel like but it’s not mandatory. Tipping 2-5 Rands is fine. The other place you’ll definitely be filling up is in Kruger itself. While it’s definitely marked up, this is the kind of trip where you really don’t want to push your fuel warning light to the limit. I recommend always having your fuel topped up.
How to Plan a Safari in Kruger National Park

So far we’ve talked about how I picked the private reserve lodge and Kruger rest camps but what was safari actually like in these places. Well first, I think about how safari was different than what I expected in South Africa. The terrain was much different from what I expected and the contrasting styles of self-drive versus a private reserve safari was definitely eye opening
As you plan out your own trip, it’s probably worthwhile to talk about the differences between the two and what you can expect.
Kruger National Park
The ultimate “choose-your-own-adventure” safari. There’s no specific programming and you have complete control over where you want to drive everyday. Everyday you take a look at the map and pick a few roads to tackle. Sometimes you pick based on the sightings board but largely it’ll be completely random – and that’s okay!
The key to your self-drive through Kruger is to be patient. Drive slowly and keep your eyes peeled on both sides. Sometimes you’ll be able to catch something magical and then there’ll be long stretches of absolute nothing.
For the full low down, make sure to read the first-timer’s guide to Kruger National Park.
Private Reserves
The private reserve experience was very different in that I didn’t have to do much other than to making the booking for our 3 night stay and I’d say that’s the beauty about the private reserves. It’s an all-inclusive experience where you’re just along for the ride and you get pampered all the way through.
My full review of Elephant Plains in Sabi Sands goes through all the intricate details and gives you a really good insider look into a type of safari that is just so different from the self-driving we did in Kruger National Park.
Does order matter?
If we were to have it my way, I would’ve done the self-drive first and then over to Elephant Plains (read our review). However, because of availability of our private reserve for the dates that I wanted, we could only fit it in at the beginning of our trip. As a result, we ended up reshuffling things around to make it work.
The truth is, we don’t think we had any lesser of an experience doing it this way but there are certainly pros and cons to each. By doing the private reserve first, we went from a luxurious experience to something a bit more rugged and from something that was fully guided to one where it was all up to us. In a way, it felt a little backwards.
What did work out nicely for us was that we were much more knowledgeable about what we were seeing and perhaps a bit sharper in terms of knowing what to look for because we had our 3 days at Elephant Plains.
That’s all to say that I don’t think the order matters if you were to do both types of safari experiences. You really can’t go wrong.
What did we prefer?
If we were to pick only one, we’d have to say Elephant Plains just because of how well-rounded everything was from the food, the guides, accommodations, safari, and all the sightings we made.
The big advantage of private safaris is that you’re not limited to the rules of Kruger National Park where you have to stay on the roads. Safari trucks in private reserve lands just drive into the bush if there’s need to and because all of the lodges in the region are on the same radio band, they know exactly where to go. That’s why we were able to see the Big 5 by day 2. It was also nice to be pampered with every meal and game drive snack time.
On the other hand the self-drive experience was fun more because it was like a game. You had idea what you were going to see each day and you just hoped that the roads you picked for the day were going to turn up something good. Without a professional spotter, I’m sure we missed a ton of things in the far distance but we got to see a bunch of special moments in our car and I liked how we could stay as as long as we wanted to watch things develop.
Things you have to pack
As I was going through the trip, I started keeping a tally of things that I felt like were must-haves in terms of what you need to pack for a safari. It’s by no means comprehensive but this is mean to be safari-specific.
Everyday Items

- Sunscreen – It might feel nice and cool inside your air conditioned car but the sun is extremely strong here as you build up your driver tan
- Bug spray
- Water bottles for on the go – In both the private reserve and self-drive scenario, it’s a good idea to have your own bottle of water with you. Just don’t drink too much!
- Sunglasses with strap – I’ve been a big fan of these for travel for a long time as you know. Super handy when you’re needing to pop off your sunglasses to use binoculars or your camera’s viewfinder
- Malaria pills – Kruger is technical in a malaria area but the risk is relatively low. That said, we still protected ourselves with medication
- Moisturizer – It’s very dry in this region
- Eye drops – I seemed to need this a lot more
- Pen and pad – Do whatever works best for you but we found it convenient to write down our sightings on Post-It notes as we were driving along
Clothing
The biggest surprise from safari was that nobody really follows the typical safari clothing
- Loose safari clothing – The thing is, this doesn’t have to look dorky – Columbia makes a ton of awesome long sleeve and short sleeve shirts that are perfect for safari because they’re ventilated and provide sun protection
- Khaki pants – Versatile pants that are usually neutral coloured anyways
- SCOTTeVest – For bushwalks, I always wore my vest because I could put a lot of things in my pockets without having to carry a backpack which worked quite brilliantly
- Warm layers – Mornings and evenings are chilly especially if you’re in a safari truck because of the wind. Make sure to pack at least one fleece-type of layer
Tech Gear

- Binoculars – A no brainer here

- Lots of memory cards – You’ll be snapping a lot more shots in burst mode so make sure you have either enough memory cards or a way to offload them onto a hard drive
- Headlamp – for walking around camp and sunset/night drives
- Lots of South African adapters – I recommend at least 2 per person
- Car charger for camera batteries – With all that time in the car, it’s a good idea to have chargers that can take advantage of the cigarette adapter
- USB cigarette adapter – Not all cars have USB outlets and even if they do, you could always use more

Things I was surprised I needed
- Book on Kruger with maps – Having a proper good is just easier to flip through than the paper maps you get
- Book on animals in Kruger – It’s nice to know what you’re looking at
- Thermos bag – We did not have this but something to think about if you’re out on the road all day and want to keep drinks and food cool
Cellular data
You should go in planning to not find wifi in many places while you’re travelling through this area. As a result, you should look into data options that can keep you connected whether it’s through your smartphone or if you need to tether with your laptop.
The only two areas I had consistent wifi was in the main building of Elephant Plains by using the vouchers they provided and also at Skukuza in the restaurant area with their free wifi.
4 options you should think about:
- Grab a Vodacom SIM card right when you land and top up as you need to along the trip. Watch how I pick up a Vodacom SIM card in Johannesburg.
- Roam with your home SIM but this will most likely get very expensive.
- Get roaming data with a third-party SIM card like KnowRoaming which is very competitive in Europe.
- Pick up a wifi hotspot device such as Skyroam and this way you can share your data with multiple devices.
The speed really varies in Kruger National Park so you could have decent data speeds in one area and then drive into a dead zone immediately after. Rest camps have signal for the most part and private reserve lodges will vary.
Vodacom Experience

Overall Vodacom worked out for us quite well but what I didn’t anticipate was just how quickly I’d be burning through data because of the social media and tethering I was doing. By the 8th day, I had gone through 3GB from my original package.
The only thing we could do at this point was purchase data top ups up to a maximum of 1GB at a time. Luckily, you could buy top up vouchers at the gift shops.
Travel Tips – To avoid having to buy vouchers in-store, sign up for the My Vodacom app (iOS/Android) and link it with your number. Once you have this set up, you’ll be able to pay for top ups with your credit card on the fly.
A 9 Day South Africa Safari Itinerary
Here’s a breakdown of how you can plan 9 days in South Africa that’s based on how our honeymoon trip was. As the first major part of the vacation, this itinerary is focused on safari in and around Kruger National Park. This also includes a nice detour around the Panorama Route.
You can get the itinerary by downloading our Google Spreadsheet through the form below.
Day 1 – Joburg

The first day is always kind of a blur because of how long it takes to get to South Africa, depending on where you’re coming from. Many international flights arrive in the late afternoon and as a result, the day is also a write-off.
The focus of the day is to make sure you’re all set for the upcoming safari trip and so while you’re at the airport, make sure to do the following things:
- Head to Vodacom to purchase a SIM card if you need it
- Exchange for Rands (only if desperate)
- Pick up car rental
From there, head to your night of accommodations in the city. I recommend that you stay at the Aero Guest Lodge which is very close to the airport, is very affordable, and has free breakfast.
You’ll be undoubtedly exhausted so catch some early sleep because the next day starts off right at dawn.
Travel Tips – If you can avoid it, do not exchange for money at the airport. The commission fees are very high here. I recommend that you exchange for Rands in your home country.
Day 2 – Driving Up To Elephant Plains

The key is to start really early on this day because your goal is to make it to your private reserve’s check-in time at 1PM. It takes roughly 7 hours to get from Johannesburg to Sabi Sands so that means leaving at 6AM. You’ll likely miss breakfast at the hotel but you should certainly ask them to pack some food for you.
The drive is for the most part uneventful on the main N4 highway. Stop at the Alzu N4 Petroport to fill up, grab some food, and use the restroom. The scenery starts to change once you turn off the highway at Nelspruit and start heading north. It’s at this point where you need to start paying more attention to the speed limits and potential traffic police.
GPS apps such as Waze are still good to use at this point but depending on where your lodge is, you’ll need switch over to the paper map because GPS can really mess you up.
Once you turn off the R highways (in this case the R40), this is when the driving will get much more interesting because you’ll be passing through a lot of local small towns and the roads will be riddled with potholes. Between passing slow cars, watching for traffic police, and dodging potholes, you’ll have a steel handed grip on the steering wheel.
The paved tar roads end and it’s all dirt roads from here as you start making your way towards the Gowrie Gate of the Sabi Sand game reserve.
If all goes well, you’ll make it to the lodge just in time for lunch and that’ll be a nice way to get your lodge experience started. At this point you’re integrated right into the daily program that the private reserve has.
Once you’ve gotten a quick tour and have the keys to your room, you’ll be getting ready for your first game drive which starts at 4PM.
Dinner is shortly after your return from the game drive. It’s at this point where you’re completely taken aback but how incredible the whole experience is and can’t wait for more.
Day 3 & 4 – Full Days In Sabi Sands

I won’t go into too much here as you should head to the Elephant Plains review for all the details.
As I mentioned earlier, at this point you’re fully integrated into the daily programming for the lodge and that means you start with the morning game drive, breakfast, bush walk, lunch, afternoon game drive, and finally dinner.
Nothing is of course mandatory but when we were doing this, we didn’t want to miss anything so we said yes to it all.
What’s remarkable is that every single game drive is different as they try really hard to make sure they go to different spots for the guests and try to find the the animals that you may not have seen yet.
Day 5 – Farewell to Elephant Plains

For the final morning, you’re not shortchanged at all so you’re still able to fit in a morning game drive, breakfast, and bush walk. Since you may be in a bit of a rush to get the Panorama Route started, you may elect to not to do the bush walk.
While it would be possible to head straight to Kruger National Park, it would be a shame to be in the area and not drive through the famous Panorama Route.
Driving out is just as much of an adventure as it was to get in so make sure you ask for specific instructions from the front desk depending on where you’re going.
Head to the Panorama Route article (coming soon) for all the details of what you can see and where to stay.
Day 6 – Entering Kruger

As you wrap up the route through gorgeous waterfalls and a visit to the town of Graskop, it’s finally time to enter Kruger National Park through the Paul Kruger Gate.
When you arrive at the gate, security will check your reservation papers and ask you to open trunk for inspection. We were waved through quite easily without them going through any of our stuff.
The gate office is adjacent and it’s here where you’ll officially register your entry to the park, pay any outstanding fees (you shouldn’t have to if you paid the conservation fee online), and fill out indemnity forms.
Start driving towards the Skukuza rest camp. Pass through the entrance gate and you’ll again have to go to the main registration office to get the keys to your accommodations and also printouts for the activities that you’re signed up for at Skukuza.
In our case, we signed up for a sunset drive so immediately after, we had to rush out to the trucks.
What you might not expect at Kruger is a full-fledged restaurant but Skukuza actually has one in Cattle Baron. Grab dinner here after your game drive and then settle into your accommodations.
Travel Tips – One thing you’ll near is that it doesn’t really matter what you wear in the car while on safari. On those hot days, all I was wearing was essentially t-shirt, shorts, and flip flops.
Day 7 – Self-Drive Choose-Your-Own-Adventure

Since you’ll be at Skukuza for two nights, this is the one day you have where you don’t have to worry about packing up and moving to a new camp site. Take advantage of this and see as much as you can.

If you’re up for it, get an early start to the day and start heading north along the H1-2 road towards Tshokwane. This is a perfect rest stop because you’ll be able to get out of the car to stretch your legs, use the rest room, grab a coffee, and check out the gift shop.

While it’ll be temping to continue going up towards Satara, there simply isn’t enough time to make the return trip from Satara to Skukuza. Instead, make a short stop at Orpen Dam to see all the crocodiles down below. Start heading south and around the big hill that juts out from the ground before turning back northwest along the S30 back to Skukuza.
On the map, it may seem like this is a short drive but for this took us from 7:30AM to 3PM. What we learned from this drive was that once it was past noon, there really wasn’t much to see anymore because it was so hot.
After a short nap in your bungalow, it’s ready to head back out after 4PM for your afternoon drive. Your decision in the drive may be influenced by roads you don’t think you’ll be doing the next day. We ended up going west towards Phabeni Gate and trying our luck in and around the S1.

Back at camp, plan to have a quick dinner at the cafeteria and get in line with the rest of the crowd for the night drive.
Travel Tips – Always make sure you have back up meals and snacks in the car. It’s quite easy to miss meals when you’re doing self-drive so make sure have food ready in the car.
Day 8 – Relocating to Lower Sabie

Start the morning by packing up and getting ready to check out. Don’t load the car yet though because there’s still the morning drive to do.
Again, the goal was to try a different set of roads and this time you could look at heading south from Skukuza along the H3.
Come back in time to pick up your luggage and head to the registration office to check out before 10AM. Have brunch at Skukuza and it’s also a good time to fill up at the gas station here before heading out.
Drive along the H4-1 down to Lower Sabie and treat it as another game drive even though it’ll be scorching hot.
When you arrive at Lower Sabie, check-in at the desk there and get situated at your new bungalow.
For your last afternoon drive, you’ll want to make it count so try to see if there’s a road that’s had a lot of sightings.
End off your day at the Mugg & Bean at Lower Sabie which has a fantastic view of the Sabie River.
Travel Tips – Lower Sabie offered a South African bush BBQ experience called a brai. It’s not something you can book online but if there’s time to fit it in, it looks like something you should try.
Day 9 – Finale

The last day is an exciting one because you get to walk on the grounds of Kruger with the 4 hour morning walk before making the long drive back to Johannesburg.
You start off bright and early at 4AM and in a smaller 8 passenger truck, you get driven to a specific spot along one of the roads and start trekking into the bush. The two guides that accompany you are armed with rifles and well trained so you feel safe with them the entire time.
This walk is more about seeing the smaller things in the park and noticing the finer details of what’s happening around you from the sounds a bird makes and the paw prints of a big animal that may have passed through in the night.
In single file most of the time, there aren’t too many opportunities to stop and shoot but when we gathered around to look at something, there’s time to snap a few photos.
Halfway through is a snack break where a variety of crackers, cookies, and juice are shared amongst the group while looking out at the landscape that surround you.
The ride back to camp is always a good opportunity to spot more wildlife as it’s usually still a good time to spot a lot of action which is a nice bonus to the activity.
The check-out process is quite seamless and it’s a seamless exit out of Crocodile Bridge Gate and a straight shot 5 hours back to the city including another fill-up at the Middleburg Alzu Petroport.
One complicated maneuver you’ll have to think about is how and when you’ll be dropping off your car rental. If you have an early flight the next day to your next destination, it might make sense to drop off the car first on this day so you don’t have to deal with it tomorrow. The only challenge is that you’ll waste a bit of time here waiting for a shuttle ride to your hotel.
You can either stay at the Aero Guest Lodge again or spend your Marriott points at the Protea OR Tambo, both of which have free shuttle service.

Travel Tips – On our drive back, we noticed a lot of traffic cops along the N4 which we didn’t see coming up. Also, a quick note about tolls. You’ll hit 1 main toll along the N4 going both ways and driving back towards the airport area there was another photo toll. In both cases, we ended up just driving through as we realized car rentals are outfitted with transponders. The downside to this is that you’ll get billed this on your car rental + an admin fee. If you’d like to avoid this, you can flip the transponder to blocked and instead you can pay by cash.
This was information packed post that covers almost all aspects of our safari experience in South Africa. Don’t hesitate to ask questions by leaving a comment below if there’s anything that you want to know that I haven’t covered.
For those that have been to Kruger National Park, what was your experience there and are there any favourite moments that you have?
What you should read next
Travel Resources For Your Next Trip
If you’re in the process of planning your trip and putting together your itinerary, these are genuinely the best resources that the Going Awesome Places team stands by 100%.
Credit cards: Don’t get burned by hidden fees on top of terrible exchange rates. When we travel now, we use the Wise Card. Simply load it with the currency you need before you go and use it as a regular VISA or their digital wallet card. Use their free app to track how much you have and top up when you need to.
Flights: Of all the booking search engines, Skyscanner is the most helpful and easy to use thanks to their Everywhere feature. Kayak is also another that’s we will often check as well.
Car Rental: If you’re looking to save money, these car rental coupon codes will be a true game-changer. Otherwise, DiscoverCars and RentalCars are great places to start.
Airport Parking: You’ll need a spot to leave your car at the airport so why not book a spot at a discount. Use code AWESOME7 to get at least $5 off at Airport Parking Reservations or Park Sleep Fly packages.
Data: We’ve been a huge fan of wifi hotspot devices like PokeFi because their rates are so good and you can use it globally but recently, we’ve really loved using eSIMs. The best one is Airalo. Save money by getting region-specific eSIMs and use referral code WILLIA9500 to get $3 USD credit on your first purchase. Ubigi is another one that we’ve had success with where they uniquely offer 5G coverage. Use code AWESOME10 to save 10% on your first order.
Hotels: Our go-to is Booking.com because they have the best inventory of properties including hotels and B&Bs plus they have their Genius tier discounts. The exception is Asia where Agoda always has the best prices. TripAdvisor is also useful for reviews and bookings.
Vacation Rentals: Your first instinct will be to check Airbnb but we always recommend checking VRBO as well if you’re looking for a vacation rental.
Tours: When planning our trips, we always check both Viator and GetYourGuide to at least see what’s out there in the destination that we’re going to. They often have different offerings and prices so check both.
Travel Insurance: Learn how to buy the best travel insurance for you. This isn’t something you want to travel without.
- Insured Nomads – Popular insurance provider for frequent travelers and comes with great coverage and special perks.
- RATESDOTCA – Search engine Canadians looking for the cheapest insurance including multi-trip annual policies.
- SafetyWing – A perfect fit for long-term nomads.
- Medjet – Global air medical transportation.
- InsureMyTrip – Best for seniors, families, and those with pre-existing conditions.
If you need more help planning your trip, make sure to check out our Travel Toolbox where we highlight all of the gear, resources, and tools we use when traveling.
Amber says
Hi Will,
What was the total cost of your trip? I’m trying to plan a vacation to South Africa for a family of 4 adults. Thanks in advance!
William Tang says
Hey Amber! I didn’t do a full breakdown of the trips costs but if add up the costs from Kruger National Park and Elephant Plains, we spent roughly $3,795 CAD at the time with a big chunk of that going to Elephant Plains which was an all-inclusive experience.
Louise Bissell says
Hi Will….been reading your blogs which are awesome. Thank you. We are going to Kruger at the end of March and want to book the walking tour. Any advice on how to arrange this would be much appreciated. Thank you.
William Tang says
Hi Louise! Thanks for dropping by. I’m glad the content has been helpful. For a walking tour, have you looked at the available activities that are bookable in the camps you might be staying at? The bush walk we did was through SAN. Or were you looking for a private tour?
Linda says
Hello once again Will.
I read on the sanparks website that there car specifications when on self drive but couldn’t find the details. Do you have any insight? Can you help with that? Thank you
Will Tang says
That’s a good question. I don’t know about the specific car specifications but honestly if you’re looking at renting any sort of consumer vehicle you’ll be fine. Are you thinking of bringing in something unusual?
Prithie Doak says
Hi Will,
Really great post. We are thinking of leaving in September from Melbourne and staying at an AIRNB in Mjejane for 5 nights as that accomodation is exactly what I want. We’re self driving, but looking at booking a game drive for 1 day.
Which gates/ parks should we go to/ distances etc
Will Tang says
That’s awesome! So since you’re at Mjejane, you can pretty much choose between Crocodile Bridge Gate or Malelane Gate – to mix it up you could decide to do a few entrances from one gate and a few other from the other gate so you can change up your drives within Kruger. My recommendation is to start super early in the morning (as soon as the gates open), eat lunch and break at camp for lunch and during the peak of the heat and then begin again in the mid-afternoon until closing. Just make sure you can get out of the park before the gates close since you’re staying outside of Kruger. For distances and time, you can take a look here.
Nick says
Hey Will, great post. What did you guys do for malaria prevention?
Will Tang says
For Malaria prevention we just took the standard malaria pills (I believe it was malarone) that we picked up at home as a prescription. On-the-ground in Kruger, we used mosquito repellent although I honestly don’t remember it being really bad at all in the park or private reserve the time of the year we were there (October/November). Hope that helps!
Ana Katrina Lopez says
Enjoyed reading this Will! Very helpful and insightful. I actually felt like I was traveling along with you while reading through it. Hahaha! I’m planning to head to South Africa sometime this year so this definitely gave me a good feel of what I could possibly do and expect when I’m there. I specially liked reading about the things you were surprised with that you needed. That’s really helpful to know. Looking forward to reading about your future adventures!
Krisan Sablaon says
I loved the pictures and details of your blog! Reading it feels like I’m in South Africa, too! The itinerary you had sounds exciting, more so, most of your trip are self-drive. I’m interested to know more about group-joining tours, though, since I’m not too familiar in South Africa. However, will it be cheaper to rent a private car and drive around the areas than to book a group-joining tour? Your blog, on the other hand, is super helpful, especially for first-timers. I’m glad to read about the essentials that I should bring and what I can expect in Kruger and a private game reserve. I can definitely use this article as a reference when planning for a trip to South Africa. Keep it up!
Will Tang says
I’m glad you found this piece helpful! If you’re looking for a budget holiday, I’d for sure recommend renting a car and doing your own self-drive around Kruger. That’s probably the best way to go because you’r not paying a big mark up on services. Now even if you’re interested in doing a private lodge like Elephant Plains, that’s also something we did on our own and not with a group tour so I’m a good example of how someone can certainly plan this all on their own. Resources like my own and other bloggers definitely have made it easier as I can totally relate to how overwhelming a first-timer experience is.
Paul says
Thank you for the very comprehensive information for diy safari trip. I was planning to drive form JNB to Kruger Park, but I don’t feel safe after reading Turkish Airlines crew robbed in South Africa. Article here “https://www.aa.com.tr/en/africa/turkish-airlines-crew-robbed-in-south-africa/1368351”
Will Tang says
You’re welcome! I just read the article and I’m not surprised that this happened in Johannesburg. I made a mention in my article about the issues we had with our luggage at the airport. Overall, that’s the reason why we didn’t spend anytime in the city and drove straight up to Kruger. I hope the article won’t deter you from going – it’s an amazing place to go safari and you’ll love it if you do go.
Paul says
Question about car rental insurance in S. Africa, what other insurance I need to buy beside what my Amex Platinum covers? Thanks
Will Tang says
Hey Paul, so for the Amex Platinum in Canada anyways, the coverage is MSRP of up to $85,000 in either theft or damage. Depending on who you rent from, they may offer you additional coverage in which case that’s when you decide whether it’s worth it. There are also a few things that aren’t covered by Amex that you should be aware of:
The Car Rental Theft and Damage Insurance only covers vehicle loss or damage and does not include the contents of the vehicle. There is no coverage for third party liability, personal injury, damage to property, normal vehicle wear and tear or mechanical/electrical vehicle breakdown. The Car Rental Theft and Damage Insurance is only available when the Cardmember fully charges the rental to an eligible American Express Card and does not accept the Collision Damage Waiver (CDW), Loss Damage Waiver (LDW), or their equivalent offered by a rental agency. The coverage only applies to rental autos with a MSRP of $85,000 Canadian or less, and for rental periods of up to 48 consecutive days.
I hope that helps!