Now this should sound familiar. You’re traveling to a new country and you’ve decided to save money on data and rely on wifi. You’re now out and about but you want to be able to navigate to places you’ve pinned but you can’t. Or perhaps you do have a data plan but you’re doing a road trip through a remote region that doesn’t have any cell coverage. You want to punch in a new destination but the map shows up blank.
Here’s a secret that we’ll let you in on. There’s a hidden feature that allows you to save Google Maps offline so you can use it even if you don’t have data.
Lucky for you there’s a better way.
What You’ll Get Out of This Article
- Detailed instructions for how to create Google Maps for offline use.
- Learn why this hidden Google Maps feature is useful for travelers.
- Find out what the best way is to utilize offline maps.
In This Article
How To Use Google Maps Offline
This travel hack has been around for many years and to this day is still inconveniently tucked away as a hidden feature on the Google Maps app.
In this article you’ll learn step-by-step, how to make Google Maps offline ready. It’s much easier than you think and once you know it, you’ll be able to do it for all of your trips.
Who can use this Google maps hack
The latest version of Google Maps on both Android and iOS have this available so effectively, everyone has this on their smartphones.
As a pre-requisite, to do this, you need to have Google Maps installed (iOS/Android) and you need to be connected to the internet through wifi or cellular data.
Steps for how to use Google Maps offline
The below are step-by-step instructions for how to cache maps on Google Maps.
Before you get started, you need to make sure that you are not in Incognito mode.
Step 1) Search for a location
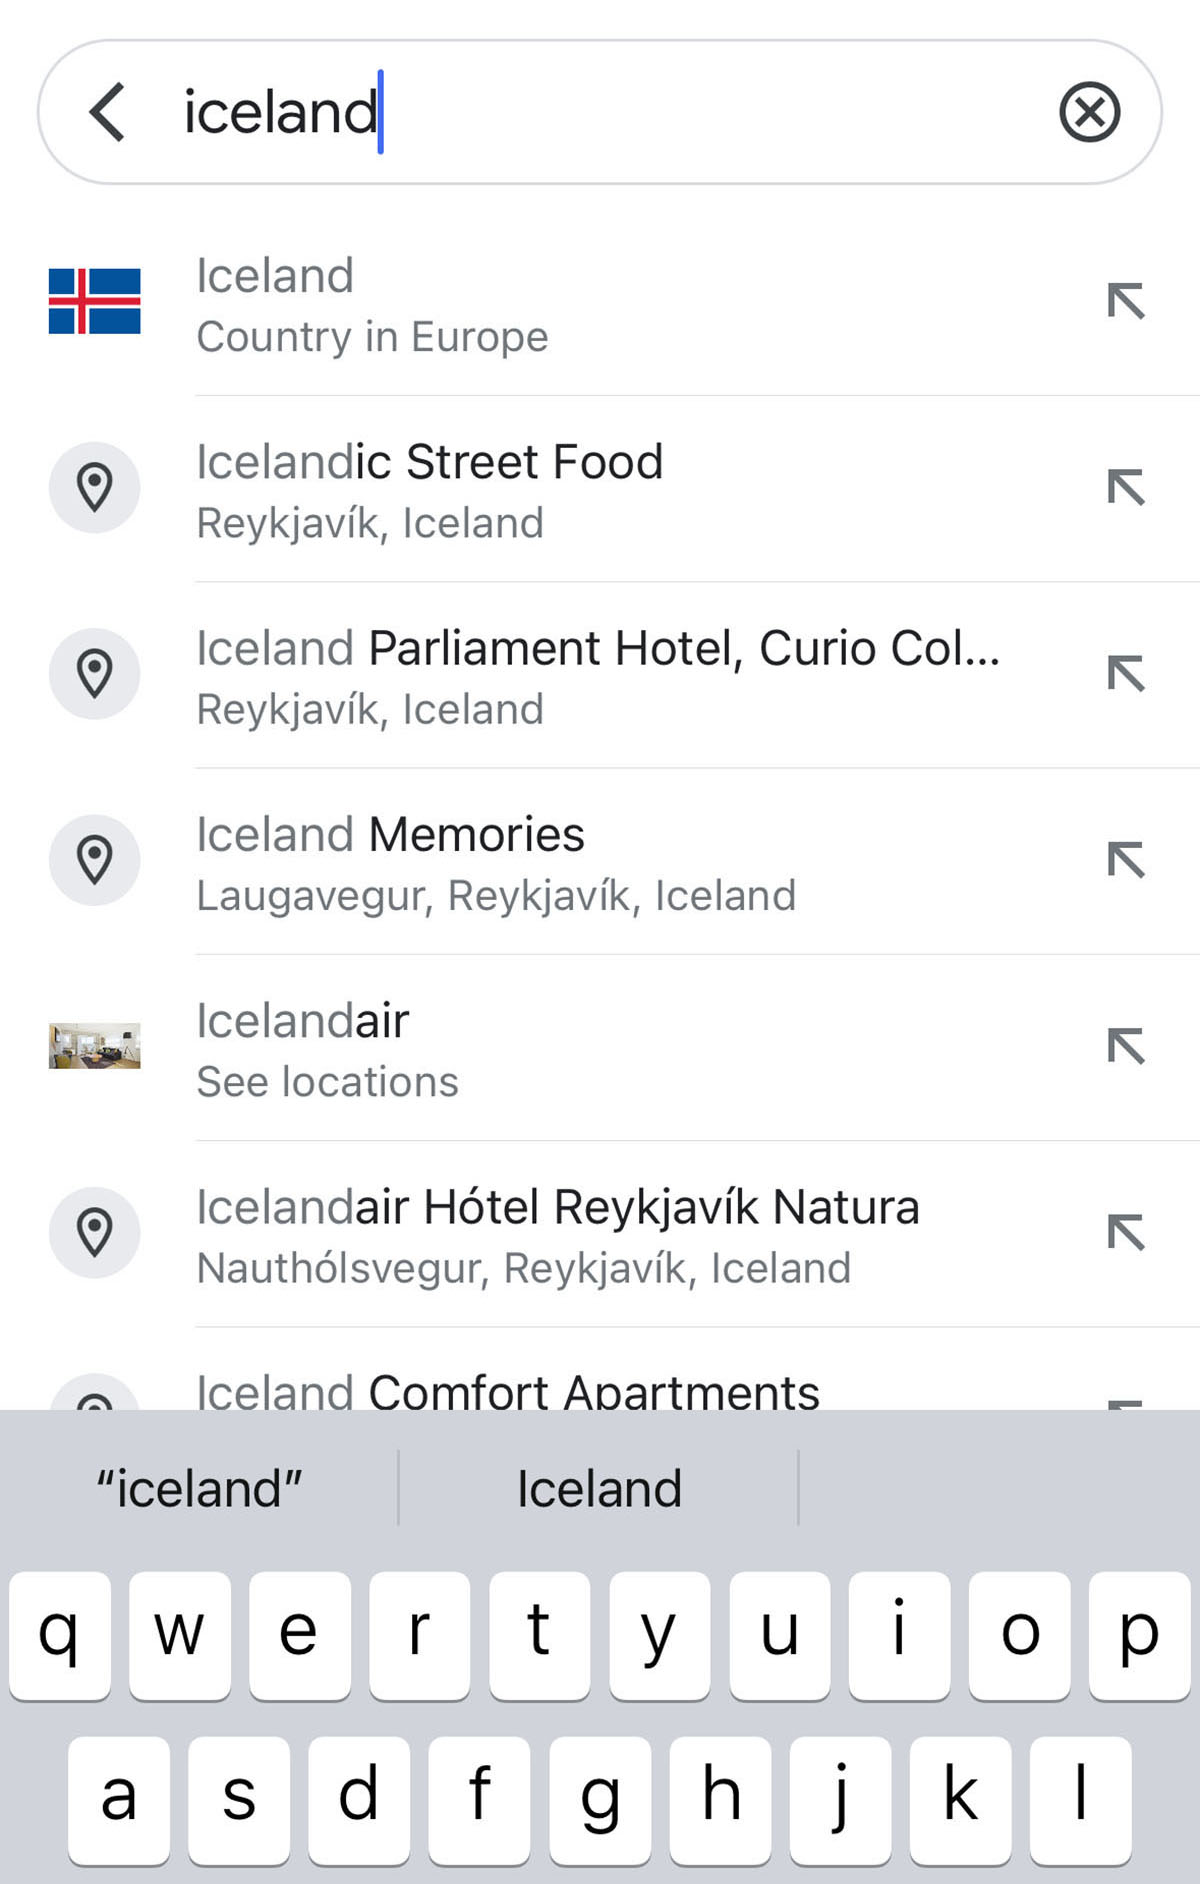
In this example, we type in “Iceland” in the Google Maps search bar.
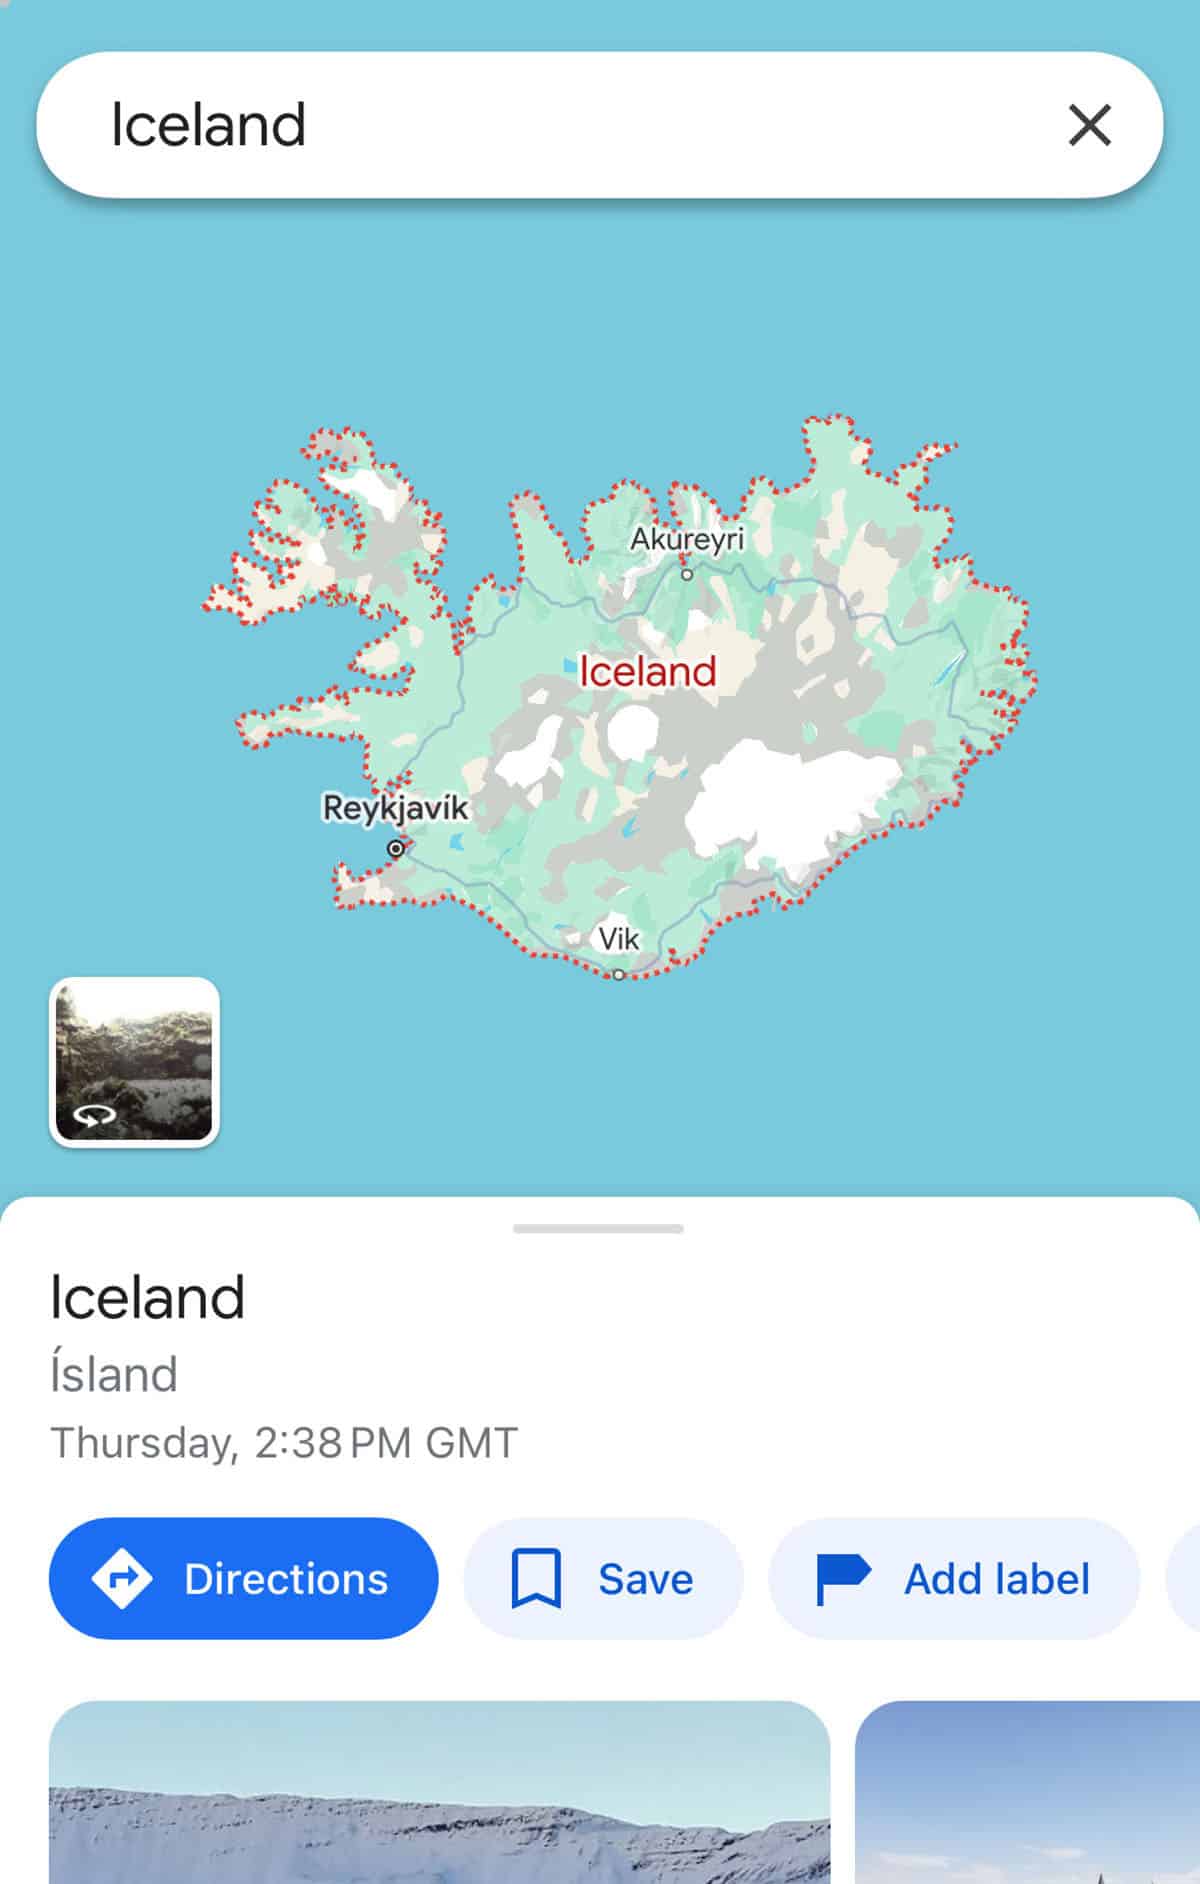
Step 2) Zoom in or out to get to your desired area you’d like to save offline
By pinching in or out, go to your desired area that you’d like saved for Google Maps offline use.
TIP: You don’t need to be super accurate at this point because in Step 4, you’ll be doing further refinement.
Step 3) Type in “Ok Maps”
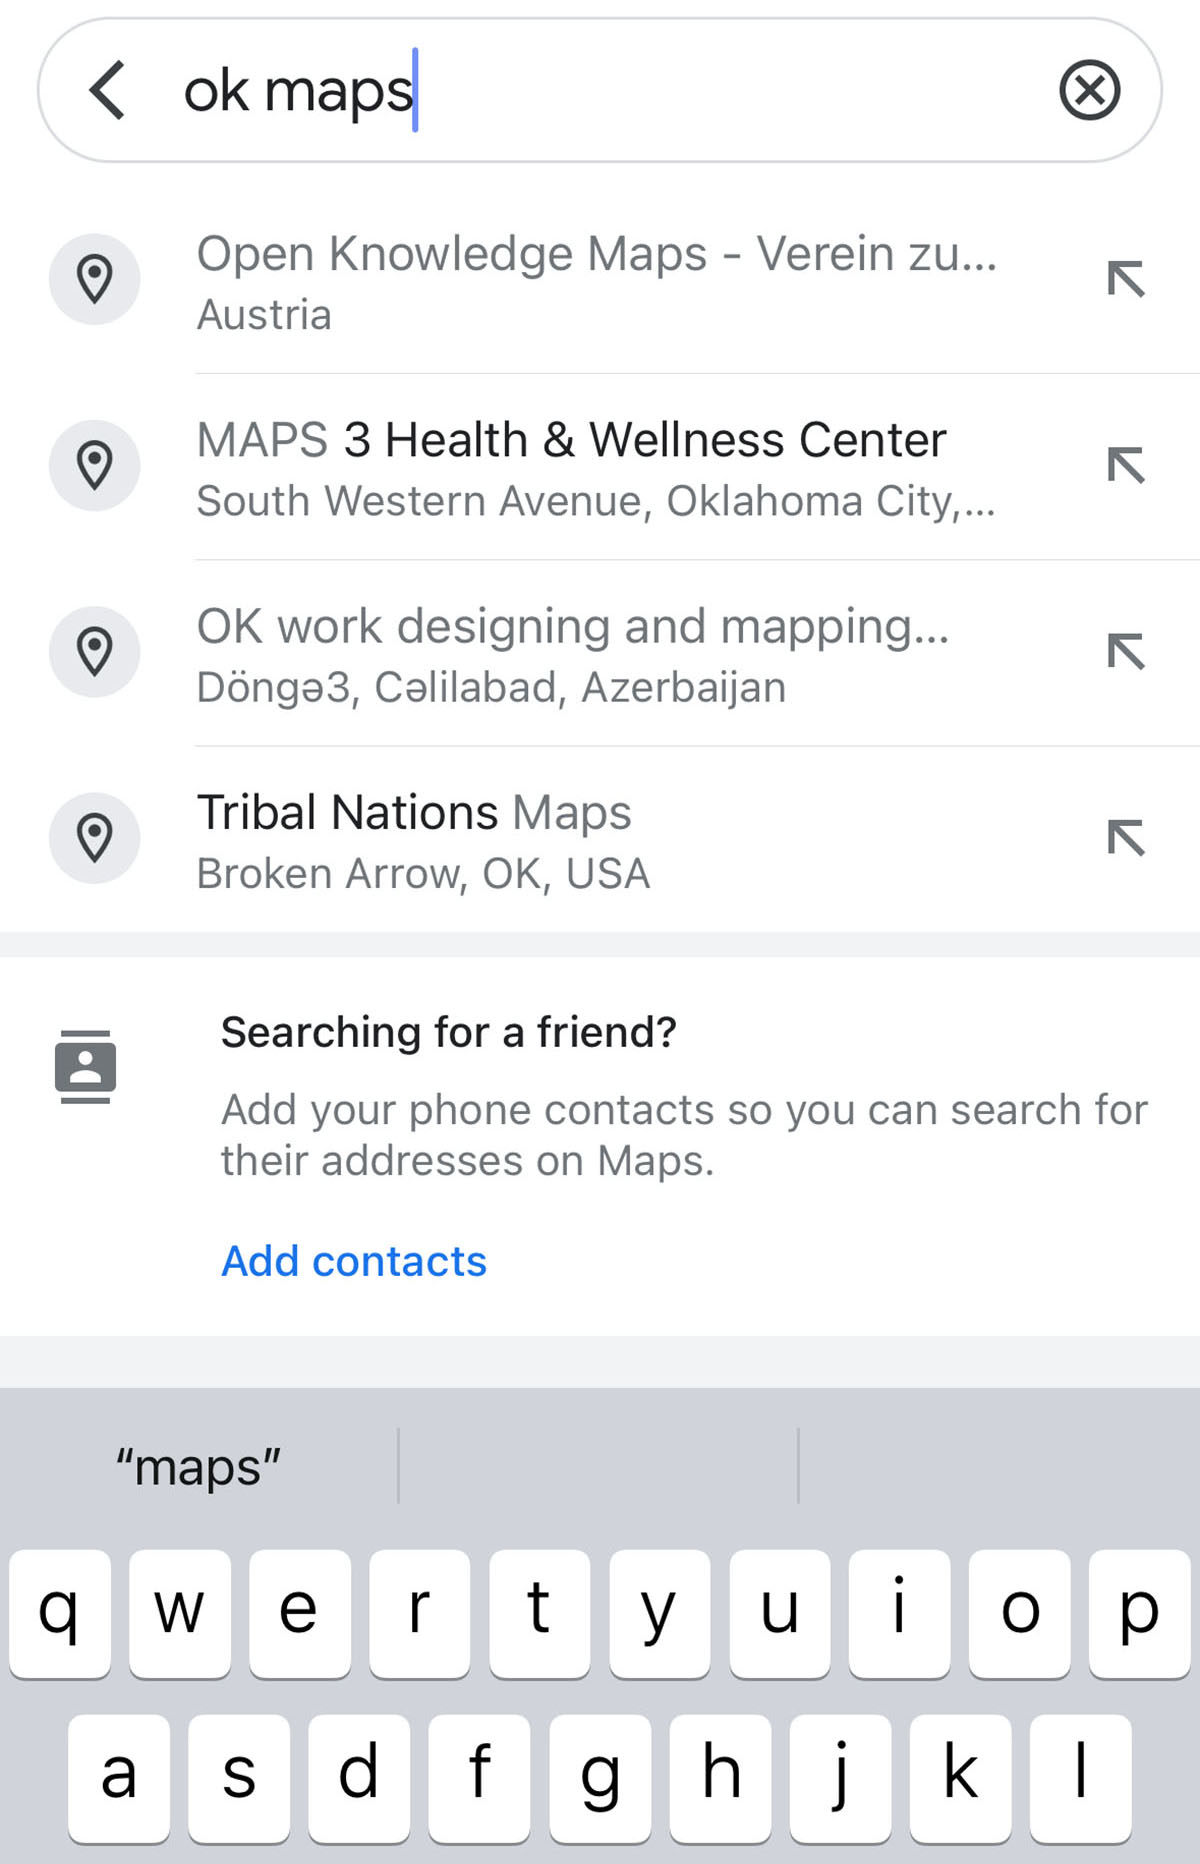
In the Google Maps search bar above, type in “Ok Maps” as if you’re typing in a new location.
Step 4) Refine saved area
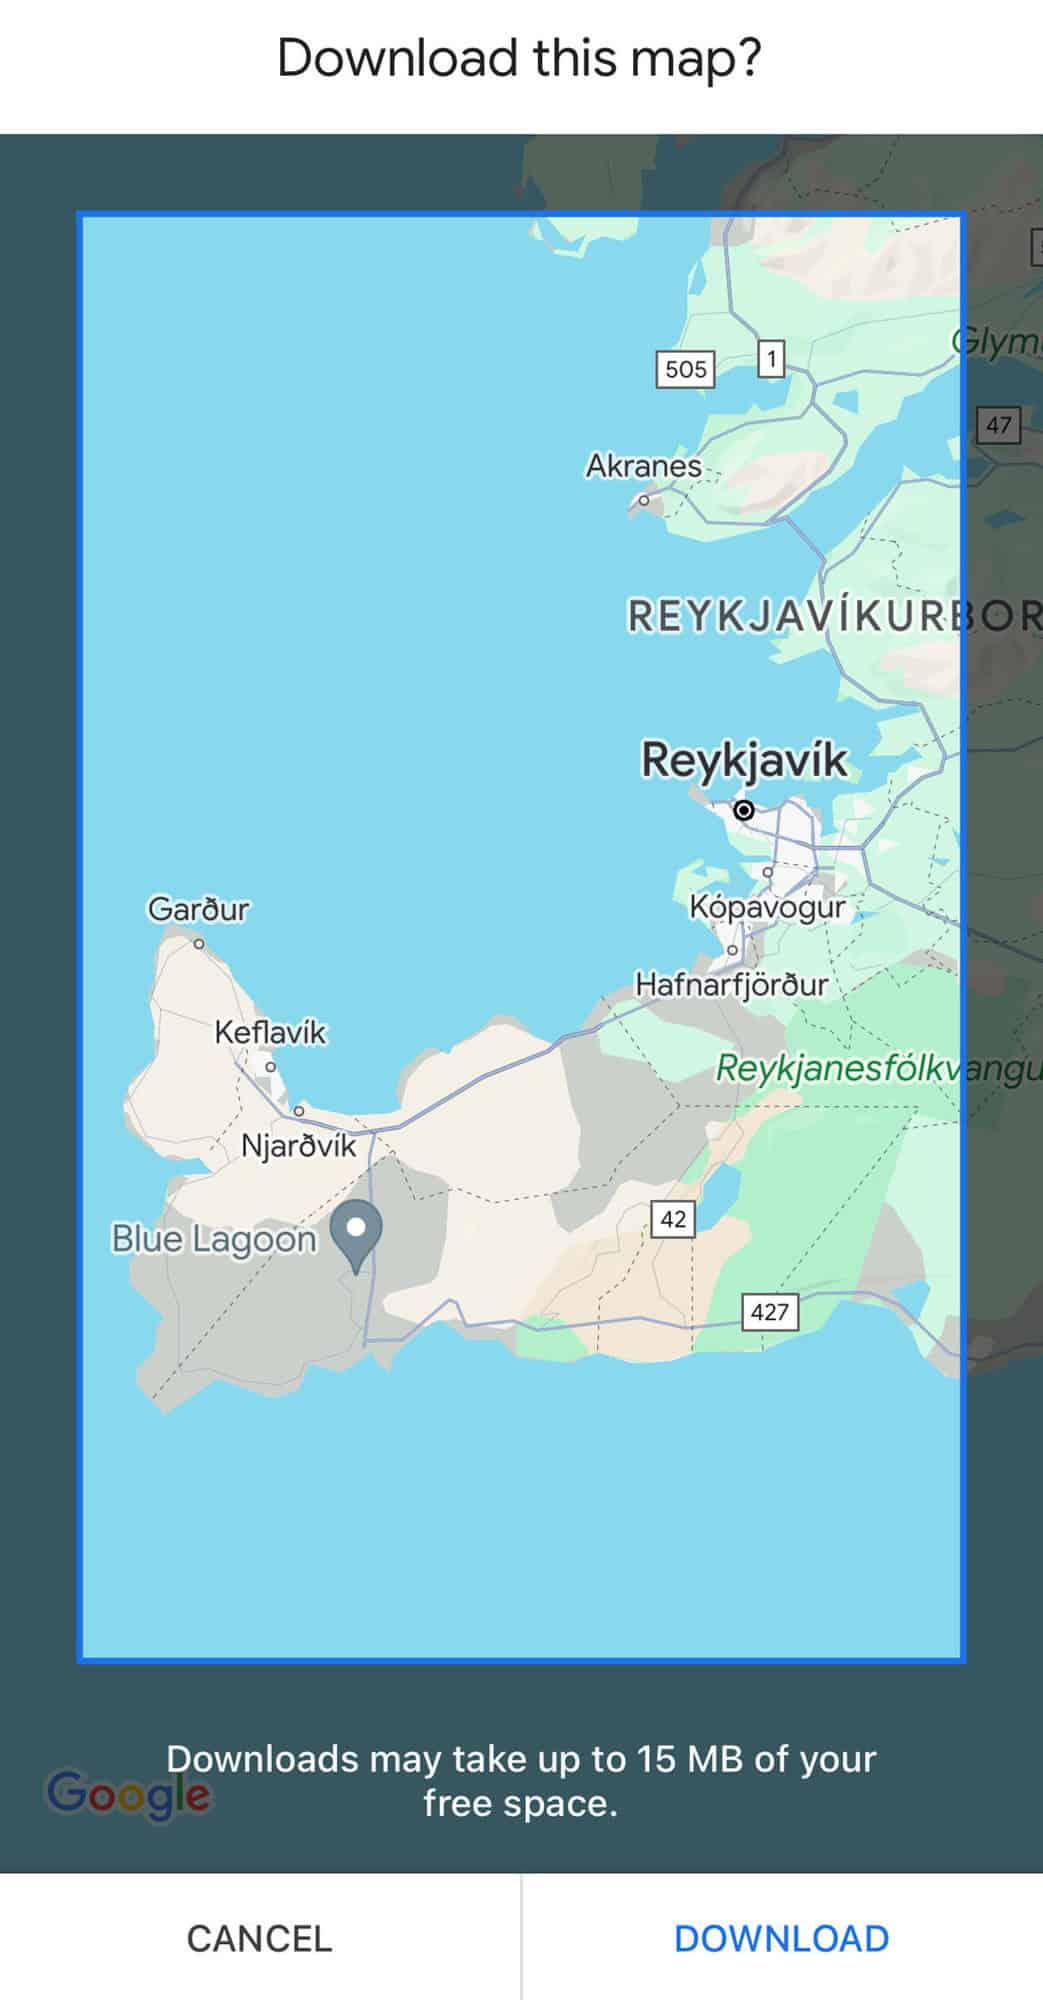
At this point, a box shows up with its surrounding darkened. This allows you to use your fingers to move the map around and pinching your fingers to zoom in or out.
The goal of this step is to further refine the offline map save area or give you an opportunity to change to a different area completely.
Depending on the zoom level, the box will change. As you zoom out to the entire globe, you’ll notice that the box turns really small because it can’t possible save a map that large. As you zoom in, it shows you the type of area that it’s capable of caching.
When you’re done, tap “DOWNLOAD”.
TIP: In most cases, you don’t want to make save the entire country for offline map use. Instead, we recommend that you focus on a specific area of the country you’ll be exploring, or perhaps going down to the level of the city where you’ll be on foot.
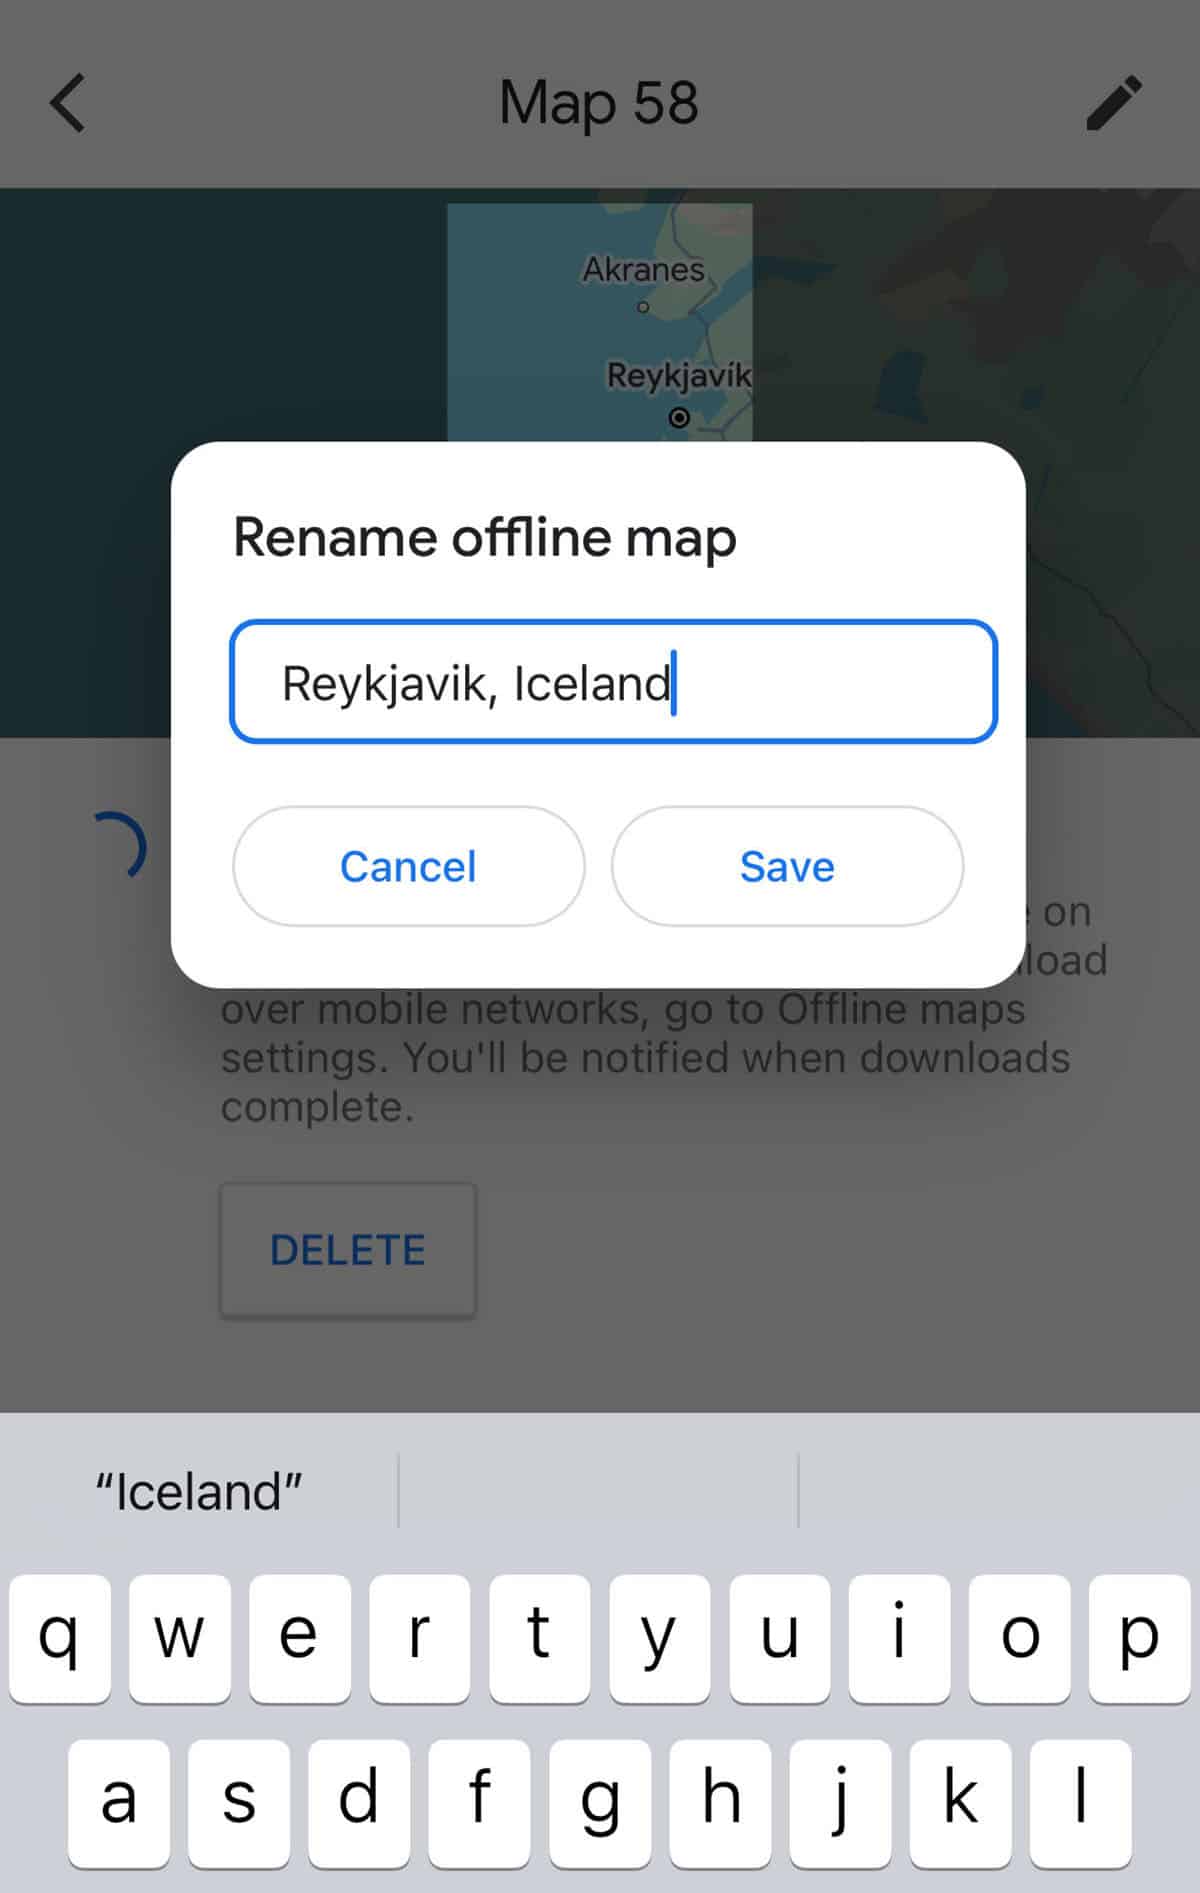
Step 5) Rename your offline map
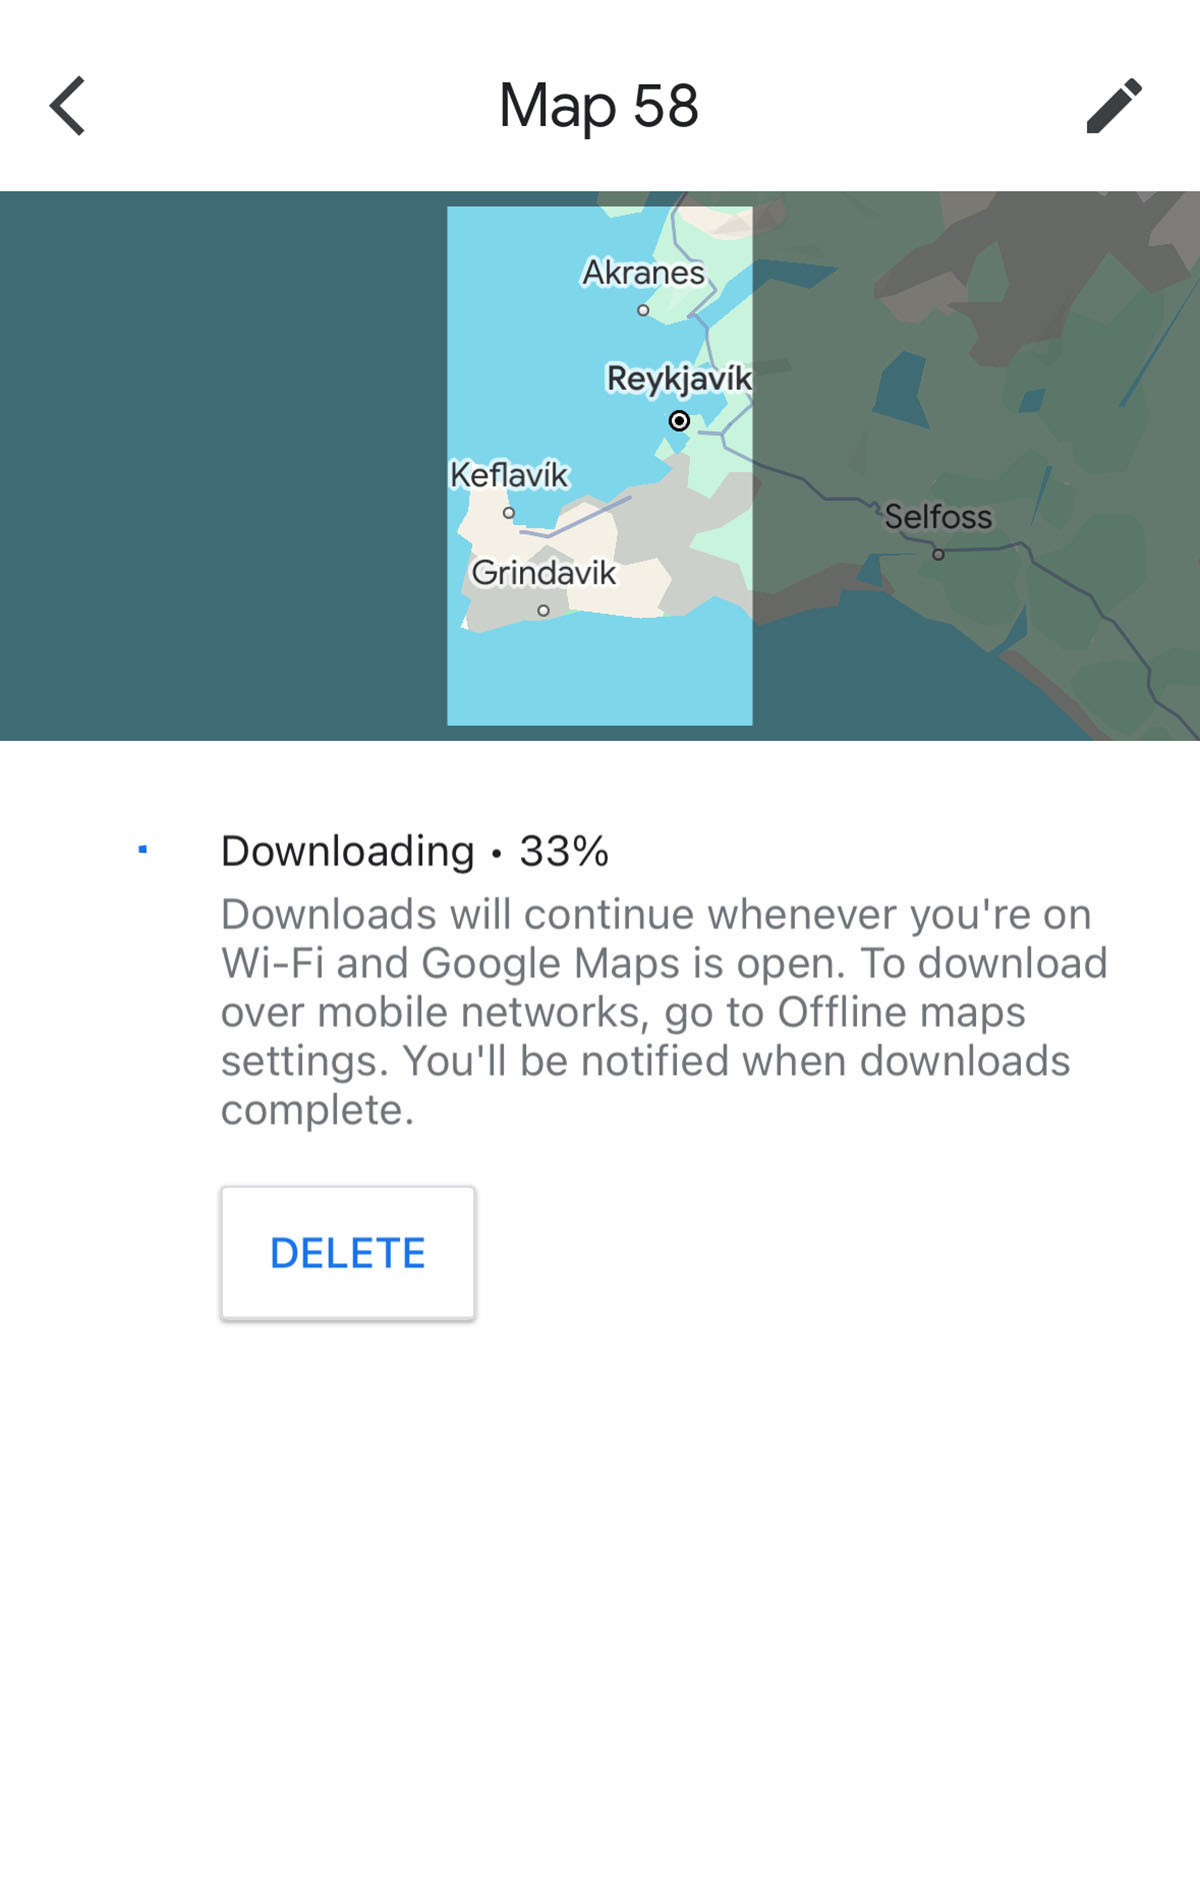
At this point, Google Maps will be using your connection to download the layers and detail of the map.
This is your opportunity to rename the map. We highly recommend that you do so because as you save more offline maps, you’ll have a huge list and if you don’t name them, you’ll just have a sequence of “Map 1”, “Map 2”, “Map 3”, etc.
Step 6) Offline map saved
When the download progress reaches 100%, the map is done saving. It’ll automatically take you back to the regular “Explore” view of Google Maps.
You might not catch it, but there’s a quick message that shows up on the bottom that says that you can use Google Maps in the area you just saved as normal.
At this point, use the map as you normally would.
When you disconnect from data, you’ll find that you can still see the details of the map instead of a big grey area.
Managing Your Offline Maps
In addition to the hidden “Ok Maps” command, finding where these offline maps are stored is not the most intuitive.
How to see your list of offline maps
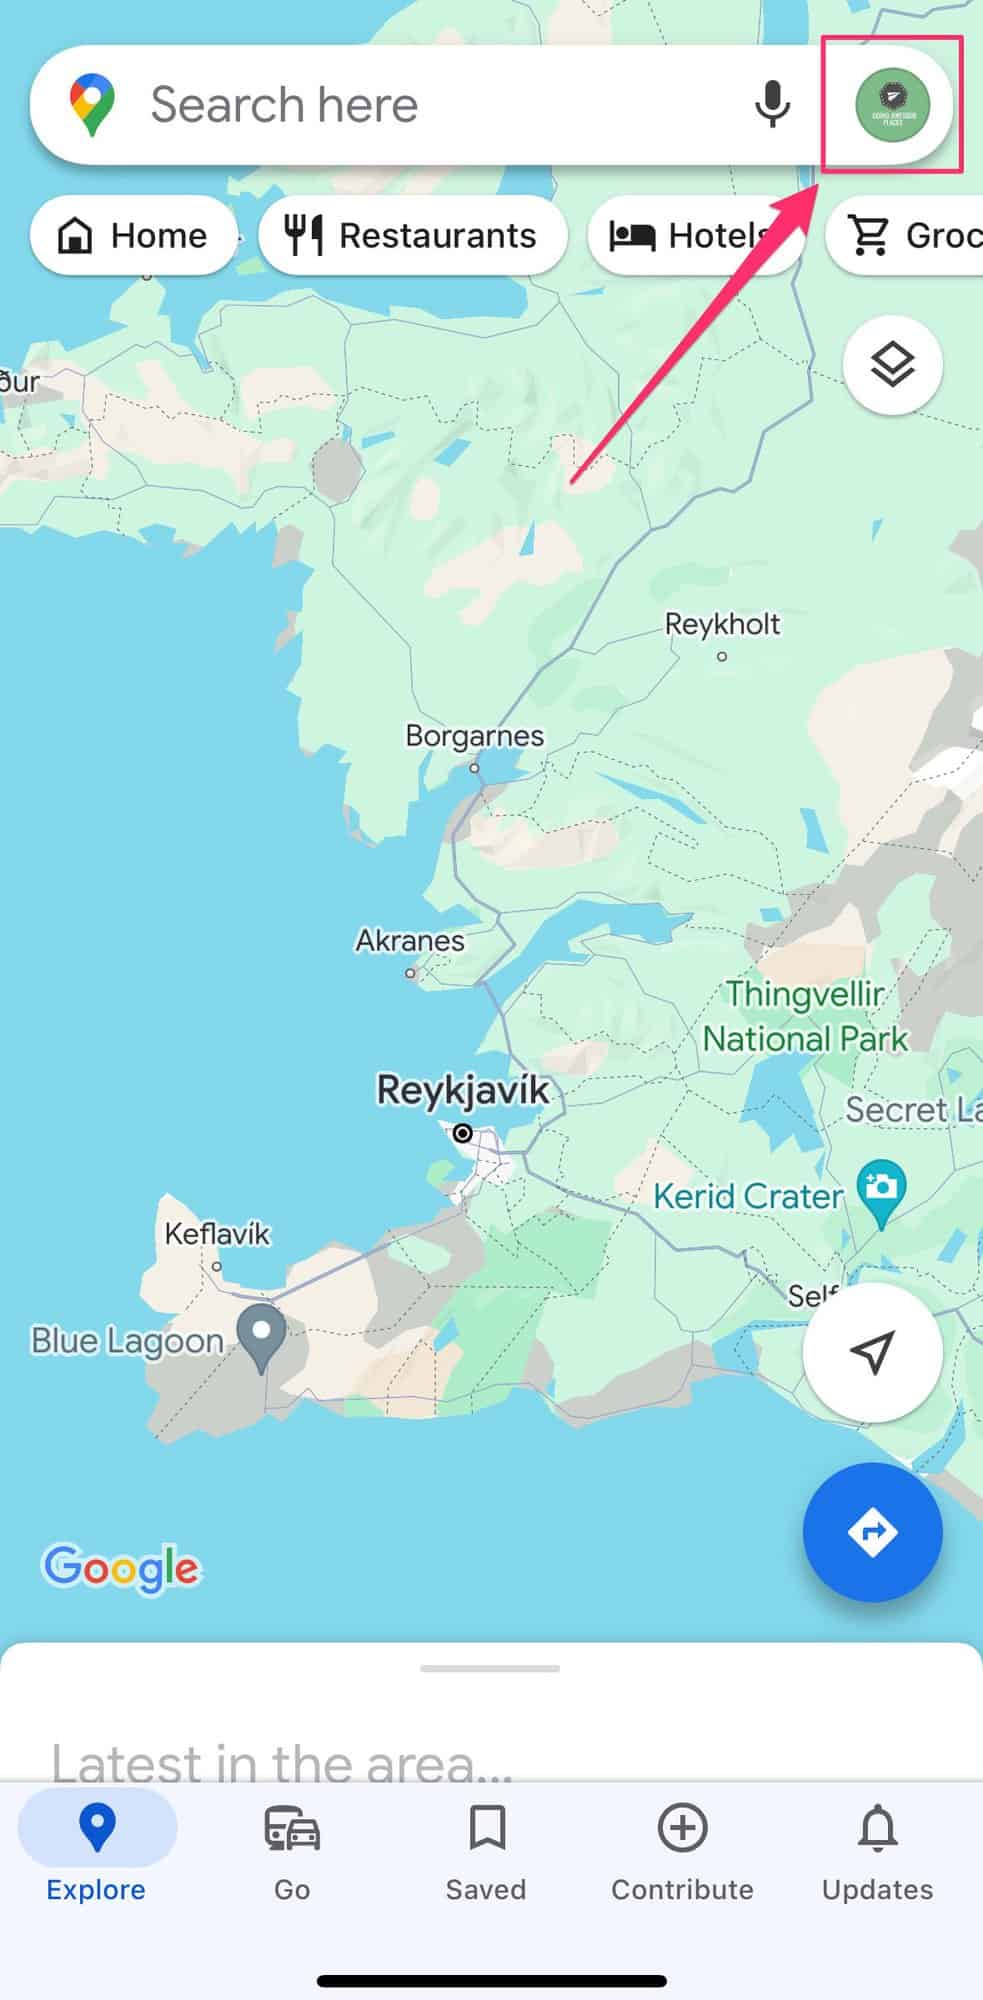
Instinctively, you’ll want to go to the Saved part of the menu below but that’s not where you want to go. Instead, you want to tap on your user icon on the top right to reveal the app’s profile menu.
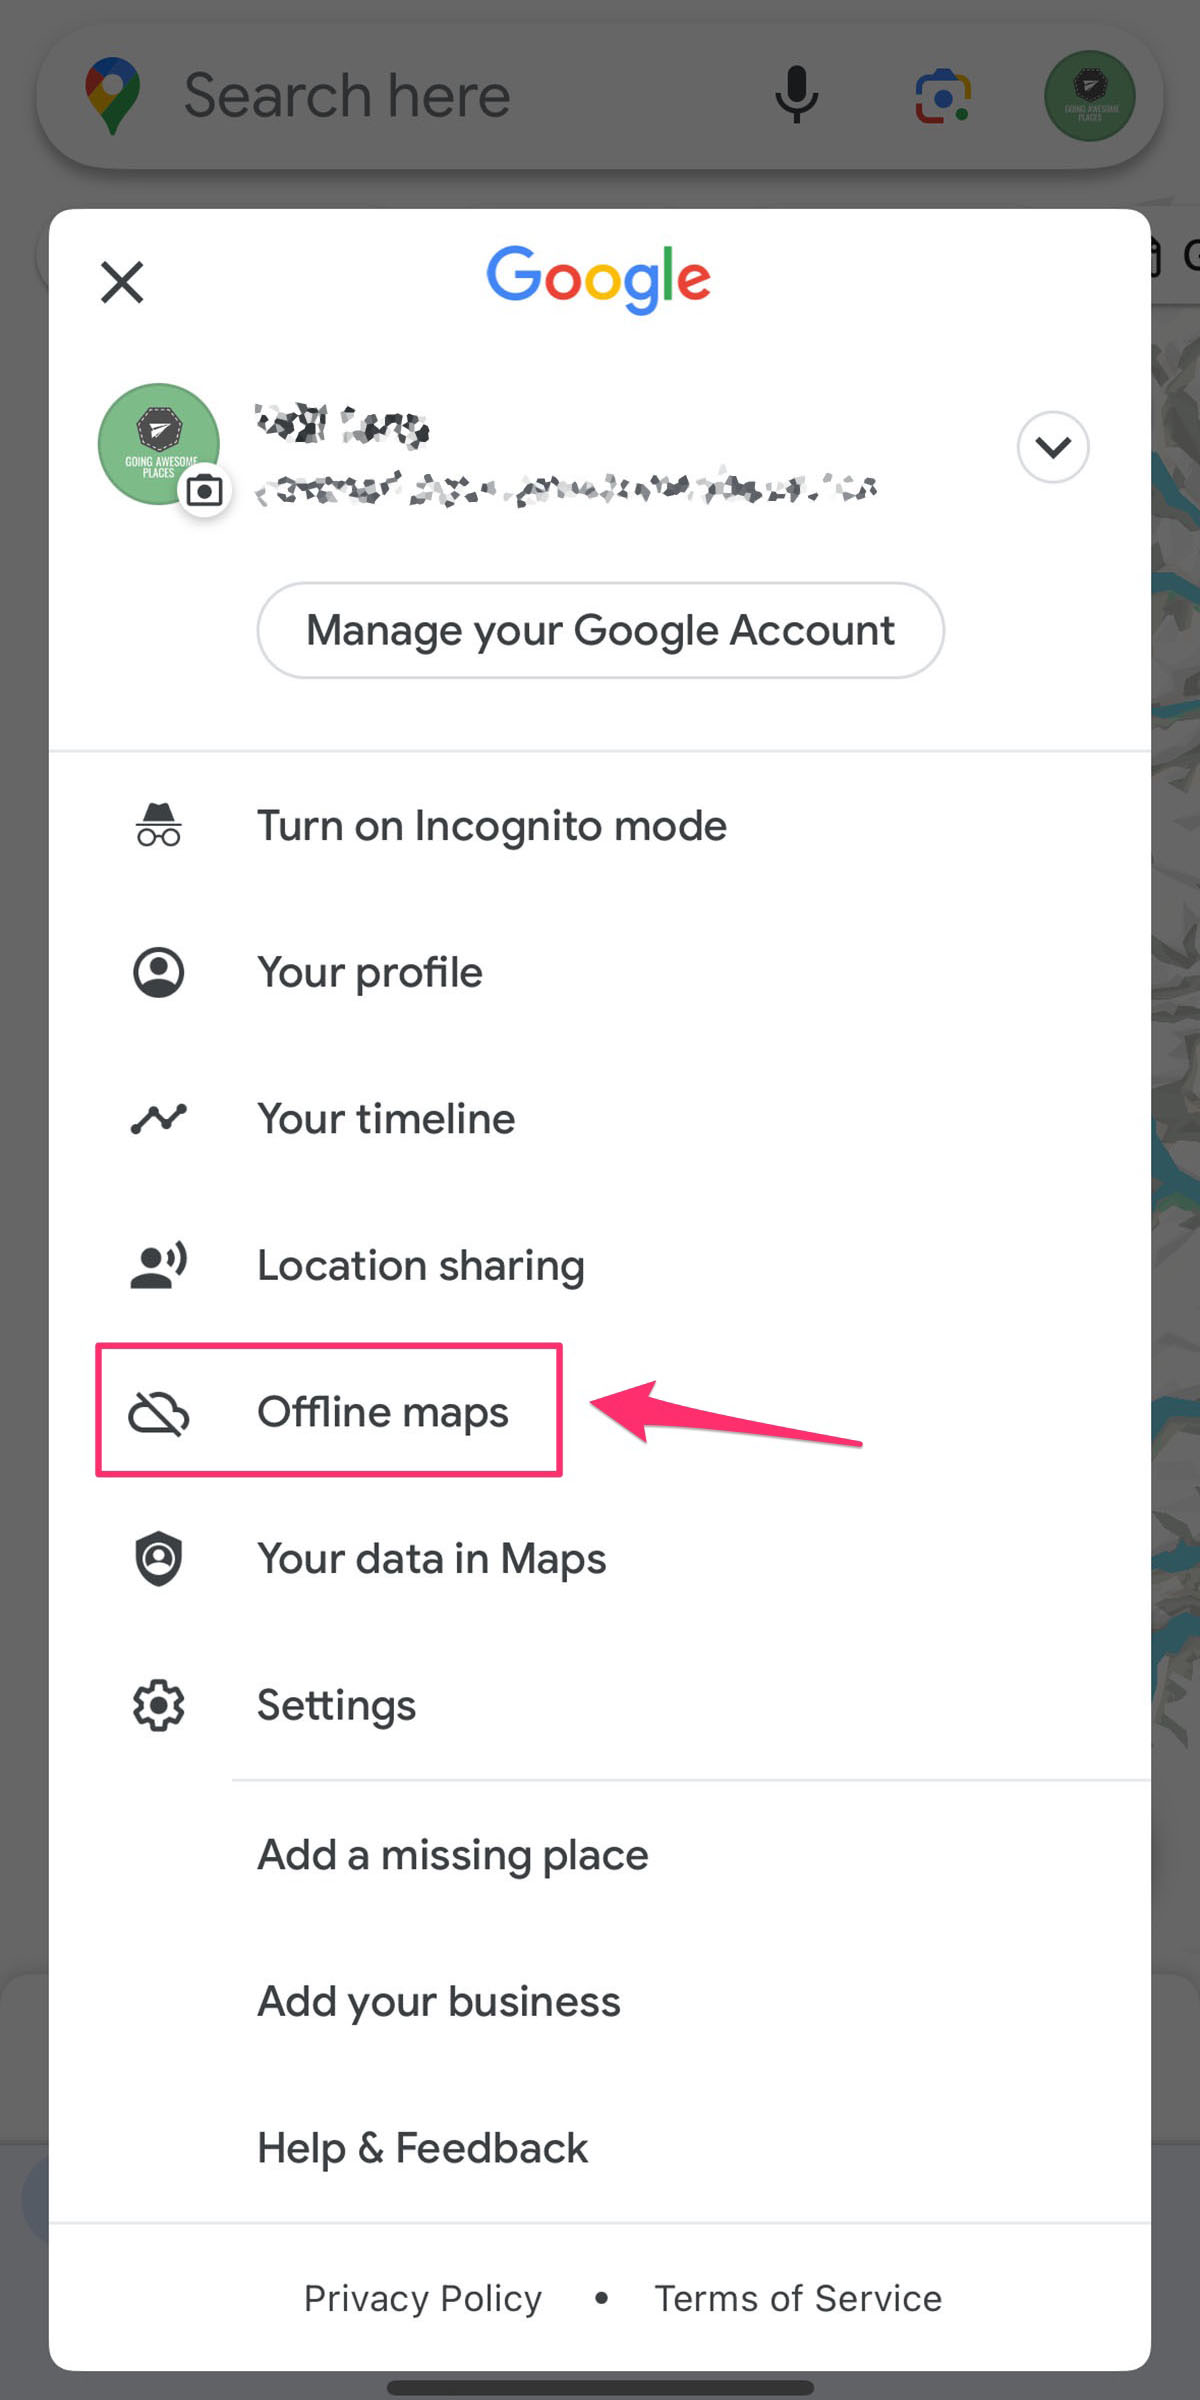
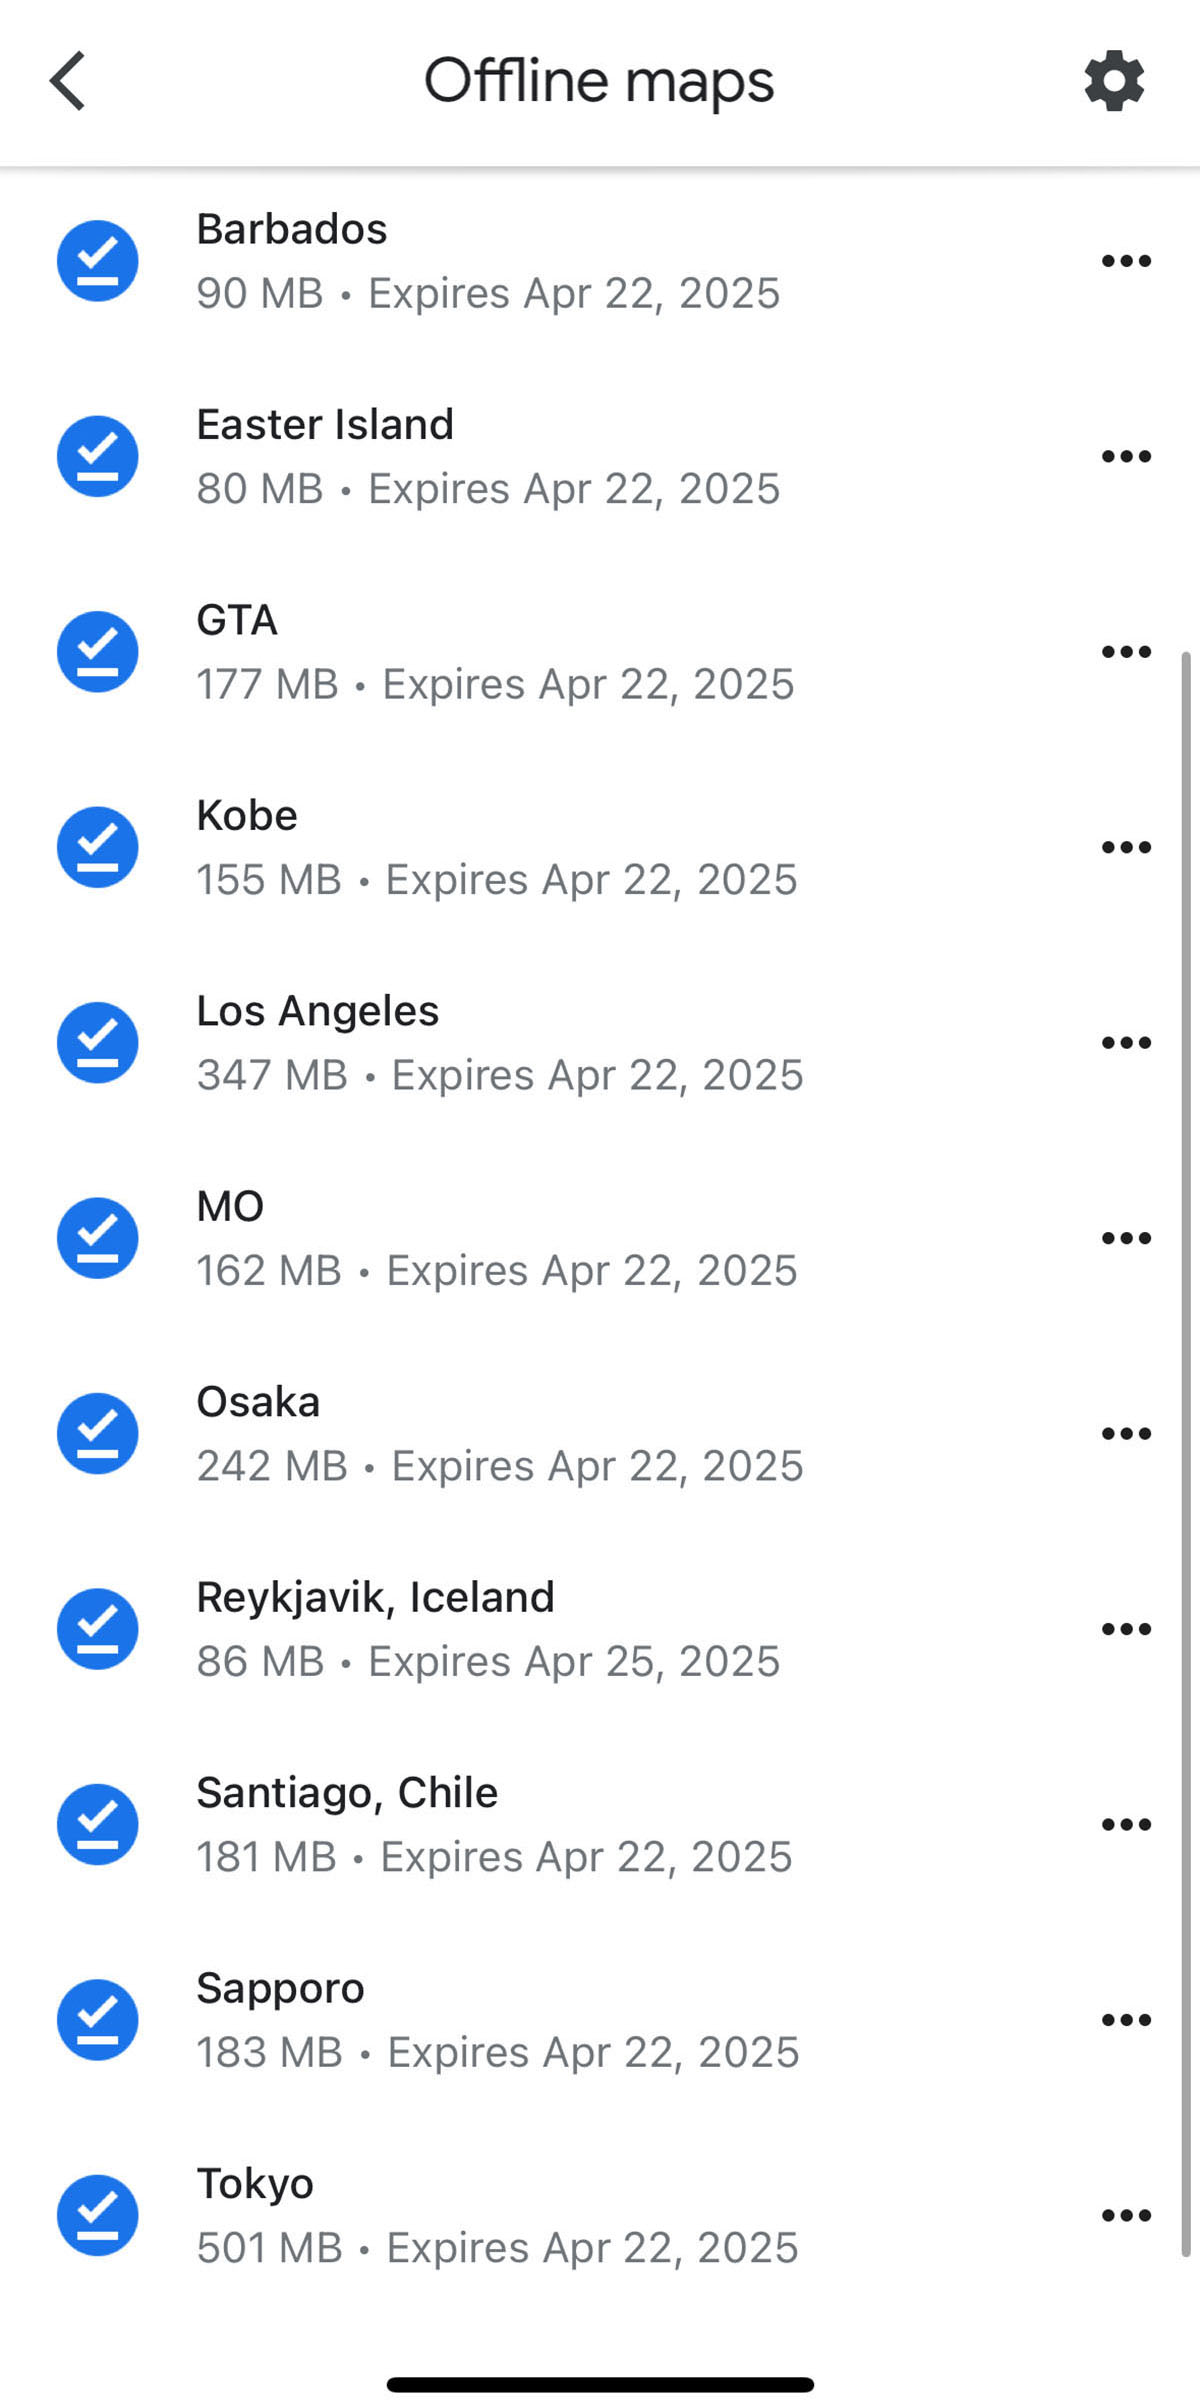
Tap on “Offline maps”.
This reveals the list of all Google Maps offline maps you’ve saved. This area is strictly for managing your maps and you can do the following:
- Update the map
- Rename the map if you forgot to do so earlier
- Delete the map (useful to help free up storage space on your smartphone)
Why maps need to be updated
When maps are saved, they are valid for 1 year (it used to be 15 days), after which point they need to be updated. This is because there are changes that can potentially happen with the map so they want to make sure you have accurate information.
The update process typically happens automatically when you have Google Maps opens but you can always trigger a manual update here.
Are you a hiker?
If you want proper trail maps, you’ll want to check out the app Gaia GPS for your phone. If you sign up with our link, you’ll get a full year free trial. With the premium membership, you’ll be unlocking offline mapping capability.
7 Limitations of Offline Maps
Google Maps offline is a nifty trick but comes with a few caveats that you should know about.
- Storage space – By default, all maps are set to expire after 1 year. One could take this as after a year, they’ll automatically delete itself. That’s not true however so you need to manually manage your offline maps. File storage optimization on your phone also won’t be able to manage this.
- Limited by rectangles – The areas you can save are limited by that rectangle area that you set when you follow the steps above. You can’t create complex shapes. To solve this, you might have to save several maps to cover your desired location or you can zoom out to save more than you need.
- Searching offline – When you’re disconnected from cellular data or wifi, you aren’t able to search for points of interest that you haven’t saved, see traffic information, or your custom maps.
- Limited pin information – The name of the saved location will display alongside the address but you won’t get any additional details such as hours, reviews, photos. If it’s a custom pin that you’ve dropped on a location, you’ll only see the GPS coordinates so you’ll need to know it from memory.
- Driving only – Turn-by-turn navigation works in offline areas but it can only do it for driving directions and not walking, transit, or cycling directions. For driving, you will get full route details.
- Excluded areas – There are a parts of the world that you aren’t able to create offline maps for, namely China and North Korea but there are also other countries and regions that can’t be downloaded because of contractual limitations, address formats, language, and other reasons.
- Limit to how many maps – There isn’t any official limits but many users have reported seeing this which could be related to how much storage you have on your phone.
Google Maps Offline Use-Cases
Over the years, we’ve used this handy travel hack for all types of trips.
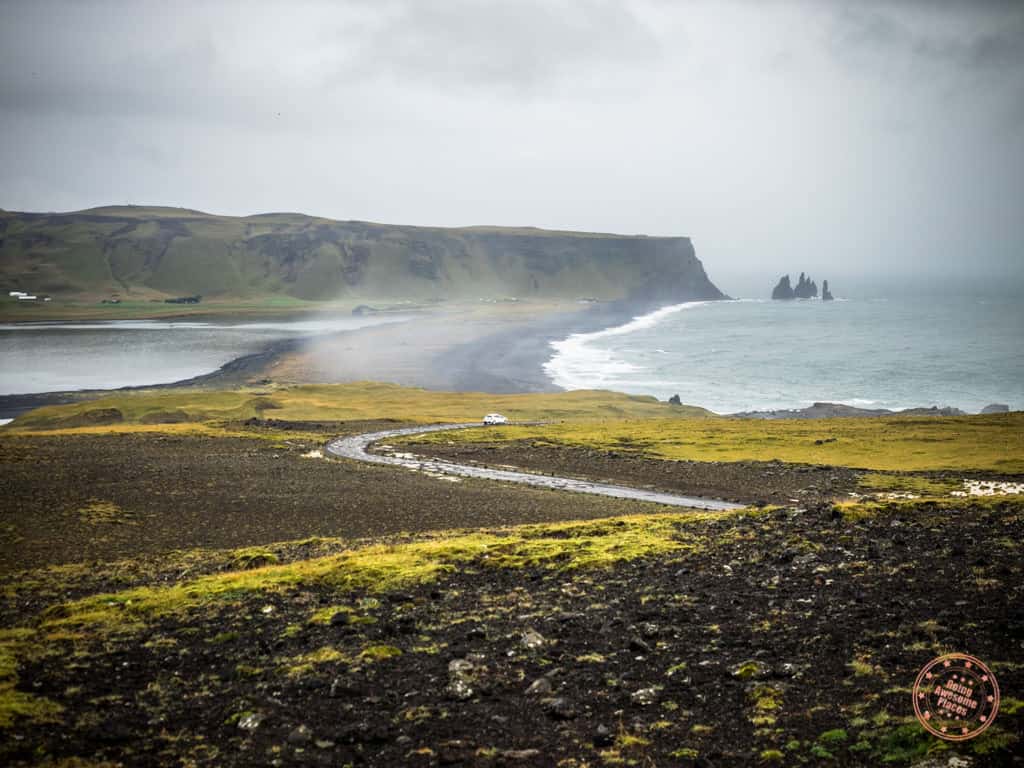
- Areas with poor cellular coverage – This is usually in more remote areas that have little to no coverage. Our 8 day Iceland itinerary is a great example of this where we had pins saved ahead of time on the map and we were able to get GPS navigation to locations. While our Iceland car rental had its own GPS unit, spelling out names of places was too cumbersome so we opted to use Google Maps instead.
- Road trips – Along the same lines as above, offline Google Maps works the best for driving directions. With pins set ahead of time, you can follow your road trip with ease, even if data connections are unstable or non-existent.
- You decide to save money on data – This is less of a case these days because eSIMS like Airalo, Ubigi, and KnowRoaming make it so easy but if for whatever reason you don’t have a data plan, having offline Google Maps is super handy to have.
- Hiking – Hikes and treks can take you to areas with no signal. For these type of trips, offline maps are useful to get an idea of whether you’re on track or you’ve gone completely off-trail. That said, for hiking specifically, we still recommend your primary app should be an app like AllTrails or Gaia and their premium versions (both take you to discount pages) which allow for offline mapping.
- As a back up – It’s become second nature for us to do this before every trip. You never know when cellular data might fail or during the day, you forget that your data package has expired and since you’re not connected, there’s no way to top up.
Why not just stay connected instead?
This Google Maps trick is pretty sweet but with how easy and affordable it is to get cellular data, you should check out Airalo, one of the most popular amongst travelers. Use referral code WILLIA9500 to get $3 USD credit on your first purchase.
4 Tips For How to Maximize Google Maps Offline For Travel
If you’re travelling and looking to use the Google Maps offline feature, you’ll want to keep these tips in mind.
- Create a Google account – If you don’t have one already, you’ll want to sign up for a Google account. This allows you to sync your information across devices including between your smartphone and laptop/desktop. For trip planners, this is helpful because you typically plan from your computer and use your phone when you’re on-the-go.
- Save points of interest – In Google Maps you have the ability to add places to “Starred places”, create custom labels, or add them to a list. This turns those points of interests into flags/stars/hearts. This is absolutely necessary if you want to be able to navigate to specific places because search doesn’t work offline.
- Save offline maps before your trip – Before a trip, we always have a “offline-ready” step. This is when I do all of my “Ok maps” commands to have the Google Maps app ready to go. Since I use spreadsheets in our trip planning process, we set those to offline-mode as well.
- Periodically clean up your offline maps – These maps don’t take up a ton of space but it adds up. After you’re done your trip, get into the habit of deleting the offline maps (clearly something I need to start doing!). This frees up space on your phone for other things like more photos!
Frequently Asked Questions
From our testing, it shouldn’t matter whether you’re saving a super zoomed area of the map for offline use or zoomed out. The level of detail stays the same.
Since Waze is owned by Google, the good news is that the map data that’s saved for offline-use is actually shared. Functionality will be quite limited on Waze.
Yes you can. This is handy for when you want to drop a pin on a location that you want to remember for later. Once you’re connected again, it’ll automatically sync with your account.
No, you can download offline Google Maps even if you’re not logged into a Google account.
No, unfortunately there’s no ability to change the names of the pins that are saved on Google Maps, even the pins for custom locations.
The steps to save Google Maps offline are identical between iPhones and Android devices.
Yes, you can follow the exact same steps for an iPad.
Read More Travel Hacks
- Best Offline Maps App for Travel that Isn’t Google – How to Import My Maps into Maps.me
- 12 of the Best Apps for Japan Travel
- Avoid UPS Brokerage Fees in Canada
- Currency Conversion Cheat Sheet
- Google Flights Explore Review
- Our Best Travel Hacking Content
Finding The Best Travel Deals
- Hottest deals – Bookmark the frequently updated travel deals page.
- Car rentals – Save the most money through car rental coupon codes.
- Hotels – Use corporate codes or get Genius 2 tier with Booking.
- Flights – Have you ever heard of the “Everywhere” feature?
- Insurance – Make sure you’re covered for all of your adventure activities with the best travel insurance.
Travel Resources For Your Next Trip
If you’re in the process of planning your trip and putting together your itinerary, these are genuinely the best resources that the Going Awesome Places team stands by 100%.
Credit cards: Don’t get burned by hidden fees on top of terrible exchange rates. When we travel now, we use the Wise Card. Simply load it with the currency you need before you go and use it as a regular VISA or their digital wallet card. Use their free app to track how much you have and top up when you need to.
Flights: Of all the booking search engines, Skyscanner is the most helpful and easy to use thanks to their Everywhere feature. Kayak is also another that’s we will often check as well.
Car Rental: If you’re looking to save money, these car rental coupon codes will be a true game-changer. Otherwise, DiscoverCars and RentalCars are great places to start.

Airport Parking: You’ll need a spot to leave your car at the airport so why not book a spot at a discount. Use code AWESOME7 to get at least $5 off at Airport Parking Reservations or Park Sleep Fly packages.
Data: We’ve been a huge fan of wifi hotspot devices like PokeFi because their rates are so good and you can use it globally but recently, we’ve really loved using eSIMs. The best one is Airalo. Save money by getting region-specific eSIMs and use referral code WILLIA9500 to get $3 USD credit on your first purchase. Ubigi is another one that we’ve had success with where they uniquely offer 5G coverage. Use code AWESOME10 to save 10% on your first order.
Hotels: Our go-to is Booking.com because they have the best inventory of properties including hotels and B&Bs plus they have their Genius tier discounts. The exception is Asia where Agoda always has the best prices. TripAdvisor is also useful for reviews and bookings.
Vacation Rentals: Your first instinct will be to check Airbnb but we always recommend checking VRBO as well if you’re looking for a vacation rental.
Tours: When planning our trips, we always check both Viator and GetYourGuide to at least see what’s out there in the destination that we’re going to. They often have different offerings and prices so check both.
Travel Insurance: Learn how to buy the best travel insurance for you. This isn’t something you want to travel without.
- Insured Nomads – Popular insurance provider for frequent travelers and comes with great coverage and special perks.
- RATESDOTCA – Search engine Canadians looking for the cheapest insurance including multi-trip annual policies.
- SafetyWing – A perfect fit for long-term nomads.
- Medjet – Global air medical transportation.
- InsureMyTrip – Best for seniors, families, and those with pre-existing conditions.
If you need more help planning your trip, make sure to check out our Travel Toolbox where we highlight all of the gear, resources, and tools we use when traveling.
